
Representing your products appropriately to your customers is very crucial. To represent your product with some high-quality images should be sufficient. But adding a short video about your product will be a welcome bonus. Because customers can observe the product’s size, scale, and appearance in natural daylight in real life. This means that video provides a better shopping experience and makes your brand trustworthy. eBay lets vendors add a video on the listings and store. So you can add a video to both your product listing and store page. But in the below article, eBay claimed that “Listing with variations do not support video” which means sellers are not able to add a video to the variation listing.

But we can add a video in the variations listing by following the same single listing process. In this article, we will guide you on how you can add a video to the eBay variation listing.
So, let’s walk through the process of adding a video to the variation listing.
Step 1: First, log in to your eBay seller account.

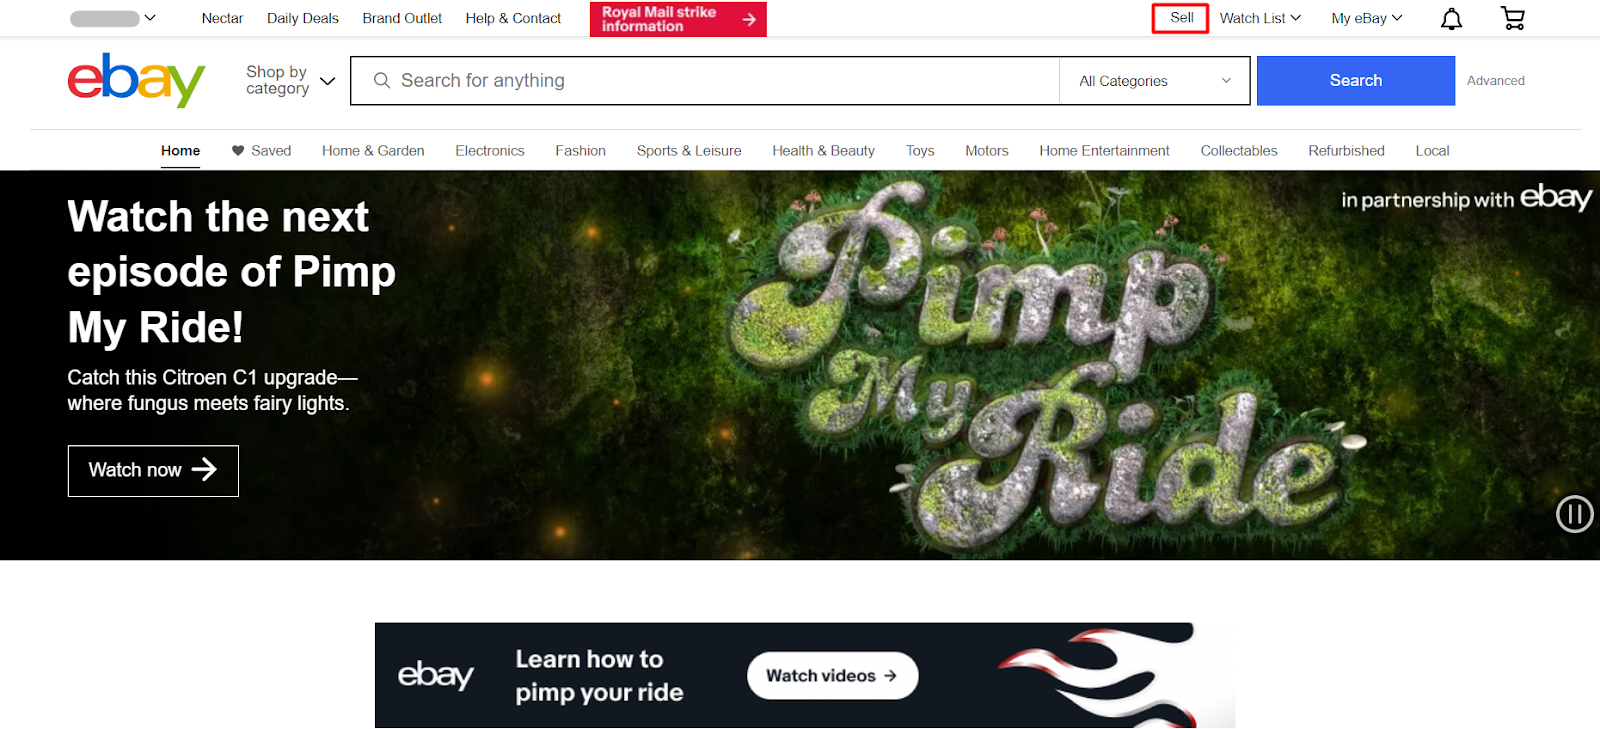
Step 2: After that, you will find the Sell option in the top right corner. Please click here for further steps.
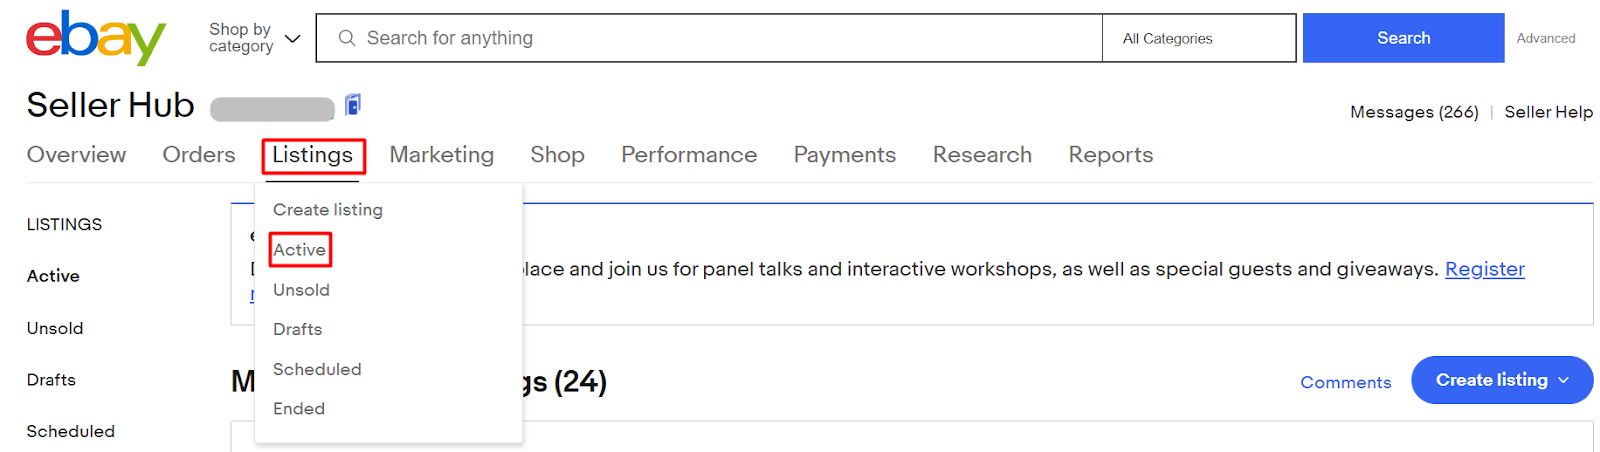
Step 3: After clicking on sell, it will show you to the eBay Dashboard page. On this page, you will find the Listing menu. Please click on the Listing menu and select the Active option from the drop-down.
Step: 4: Now, you can see the active products. Here you need to select the variation products to which you want to add the video. Please click on the variations item product Title.

Step 5: Here, you can see the screenshot of the variation products page.

Step 6: From the product’s backend, you are able to see the Revise your items option in the top left corner. Now, click on Revise your items to add a video.

Step 7: On the Revise your listing page, please go to the video section and then click on the Add video option to upload your video or you can drag and drop your video here.

Step 8: Now, your item video is uploading. It will take some time to upload.

Step 9: Once the video has been uploaded, you can see that it is under review. If you click on the Under review button it’ll show you the review message like the 2nd screenshot.


Step 10: When your video will be uploaded successfully it will show as the second image on your product page.

Once your video is uploaded, it will be reviewed and posted to your listing within 48 hours. However, it can take up to seven business days to review and post a product video during occasional peak periods. Buyers will view your video after the successful review.
Note: We can not add the video to eBay listings by using the old listing interface. We need to use the new listing tool which is also known as Helix to add a video to our listing.
To conclude, Adding a video to your eBay listing is one of the easiest ways to increase your buyer participation. You can only add one video to each listing, however, you can use the same video on several listings by uploading it only once. We hope that you understand the whole process clearly and are able to add your product’s video to the variation listings by following our given instructions. If you have any queries regarding the adding video on eBay variation products, please let us know through the comment box. Our experts are always there for you to answer your queries. If you think this article is helpful, please subscribe to our blog and share it to help others.