Embarking on a new journey with an online marketplace like Faire might raise a few questions, especially when it involves tasks like updating your products and managing your inventory. But fear not! We’re here to make things as simple as a walk in the park, even if you’re a newcomer. Today, we’re your guides on the path to mastering the art of bulk inventory upload on Faire’s platform.
Imagine this as your inventory management playbook—a user-friendly guide that’ll have you confidently managing your products and inventory like a pro. We’ll unravel the process, step by step, so that by the end of this read, you’ll feel like a Faire inventory wizard.
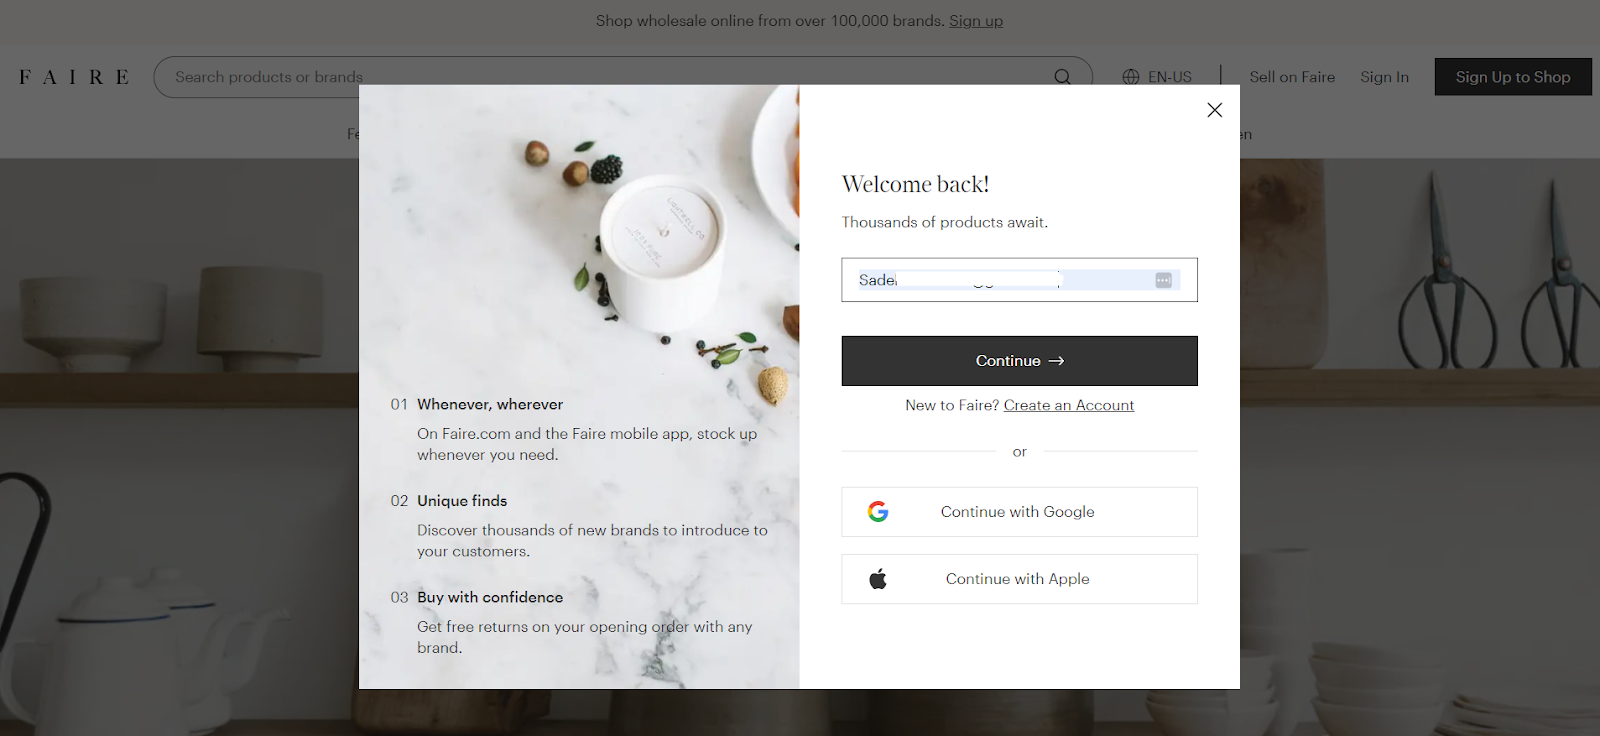
Step 1: First you need to log in to your Faire account.
Step 2: Once you’re logged in, hover your mouse over the left side of the screen. From the options that appear, click on the “Products” option.
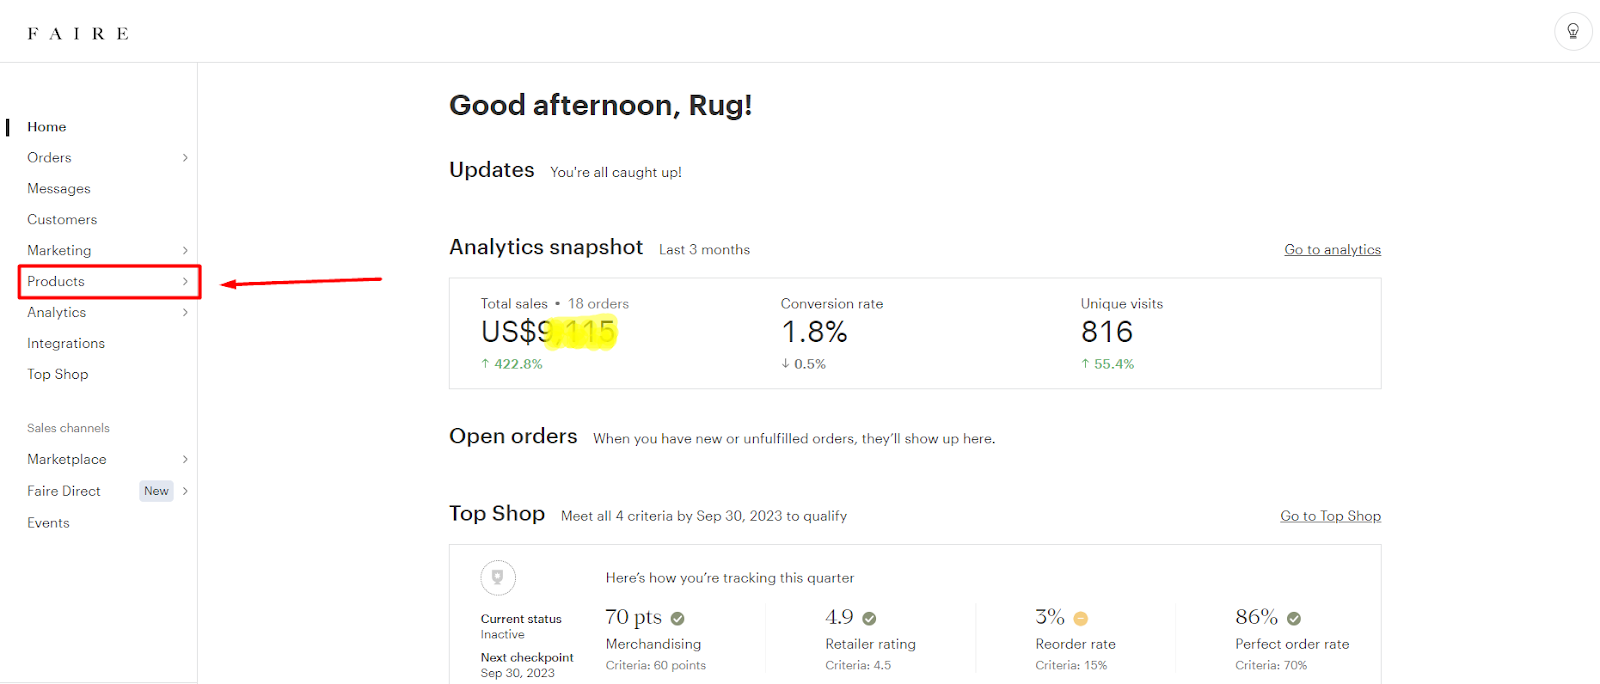
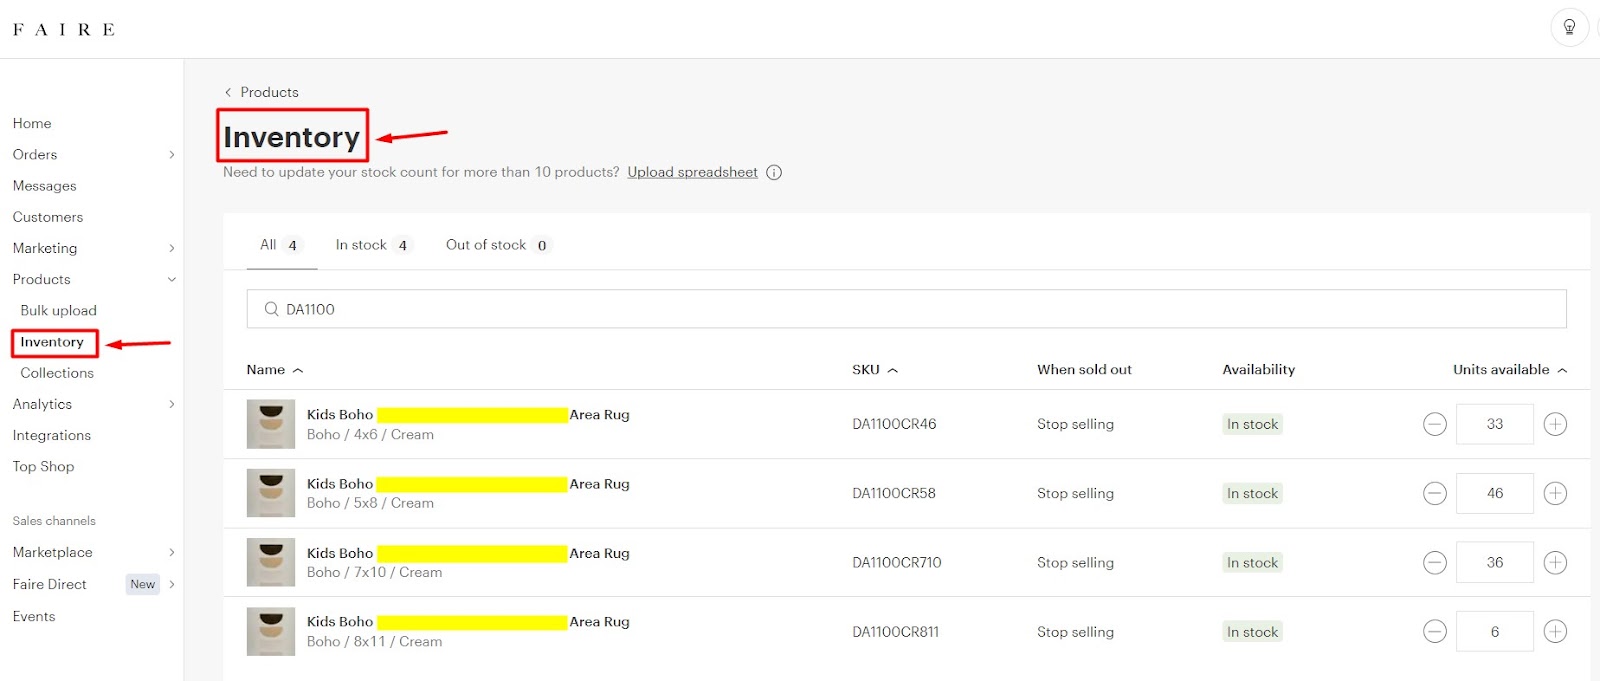
Step 3: After clicking on the “Products” option, a new drop-down menu will appear. Look for the “Inventory” option and click on it.

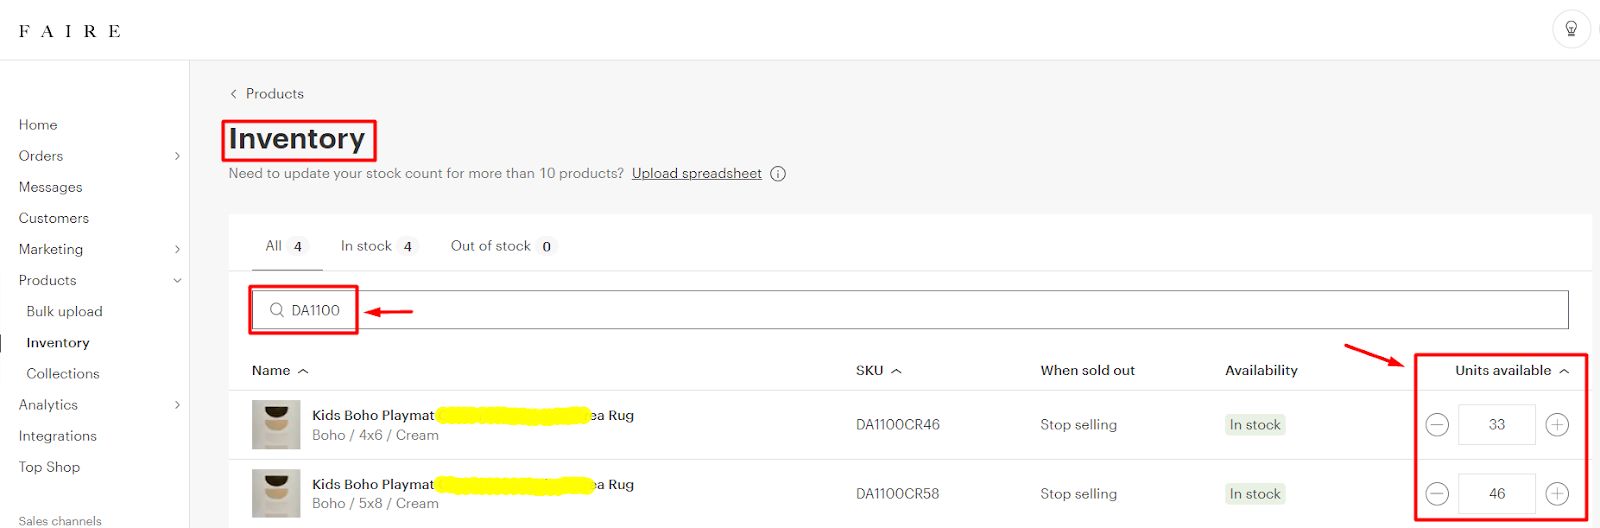
Step 4: In the “Inventory” page you will find a search bar from where you can search your products with their SKUs.

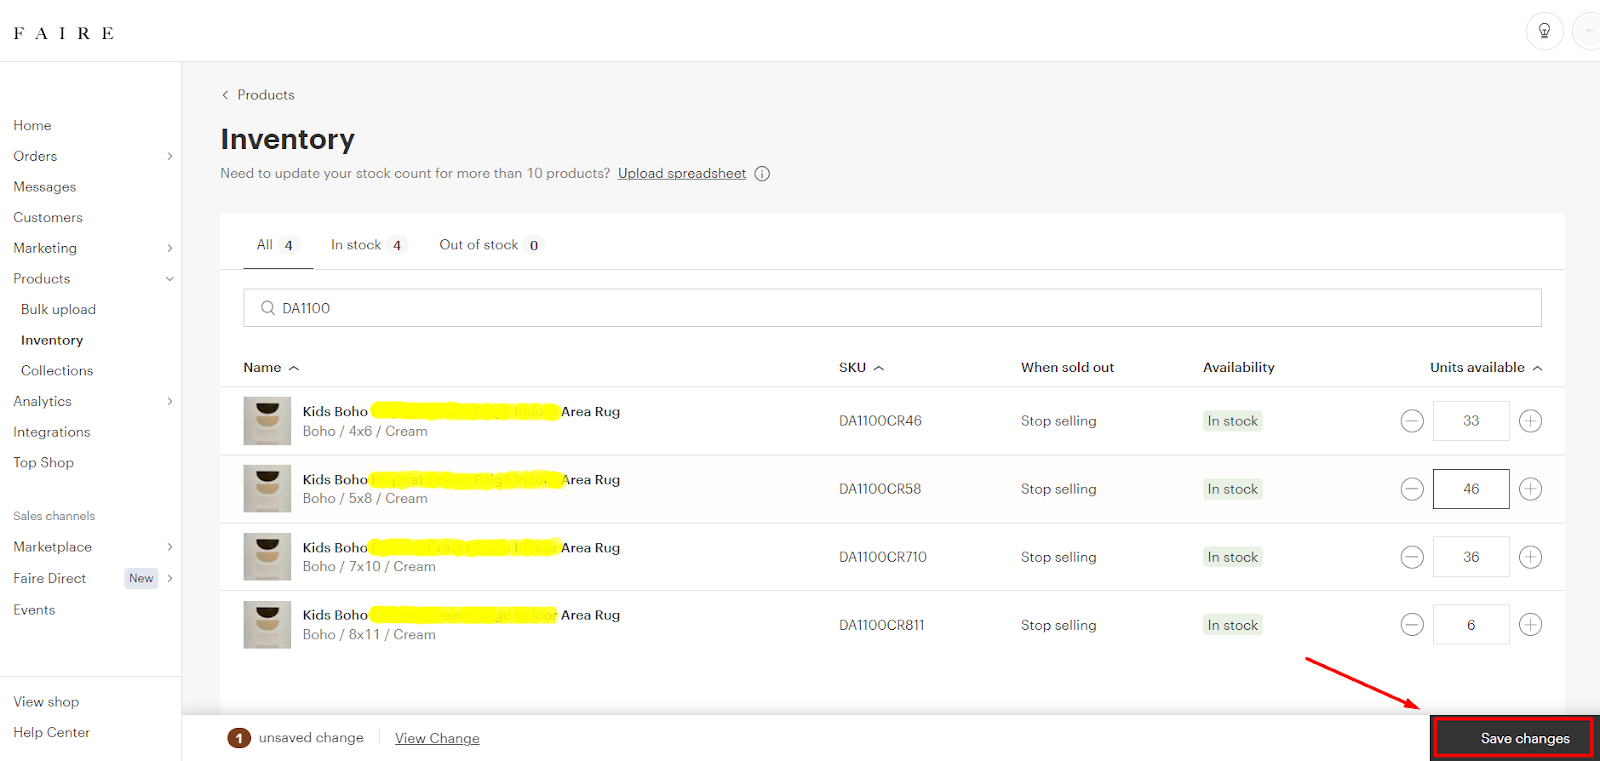
Step 5: After getting your products through the search option you can update the inventory from the right side of your product list.
Step 6: After updating the inventory manually you need to press the “Save Changes” option from the right below corner.
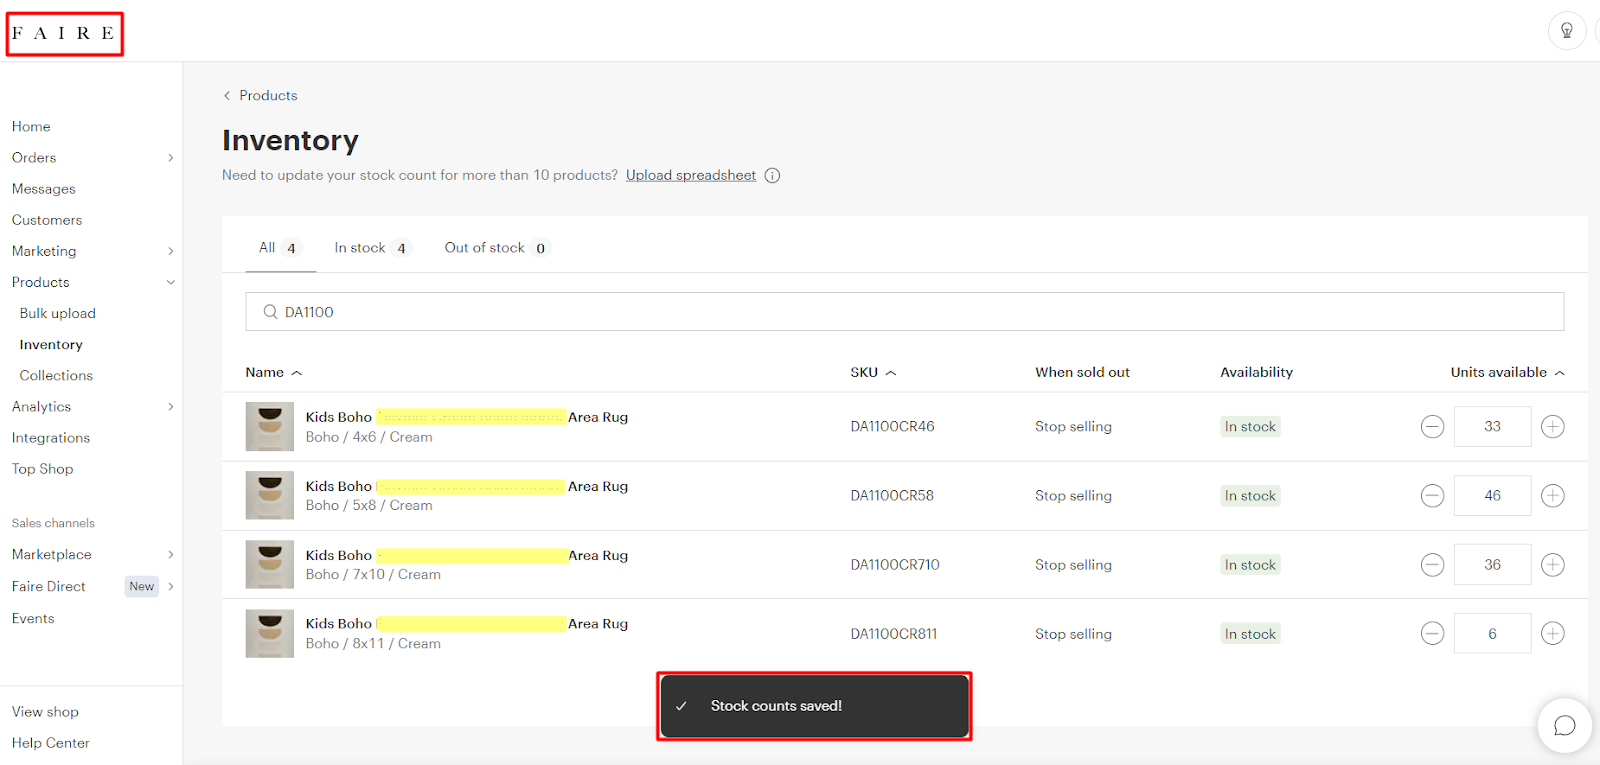
Here you go! Your inventory gets updated.
Now we are going to show you how to update the inventory in bulk by using the inventory template.
Step 01: First you need to go to the “Inventory” page
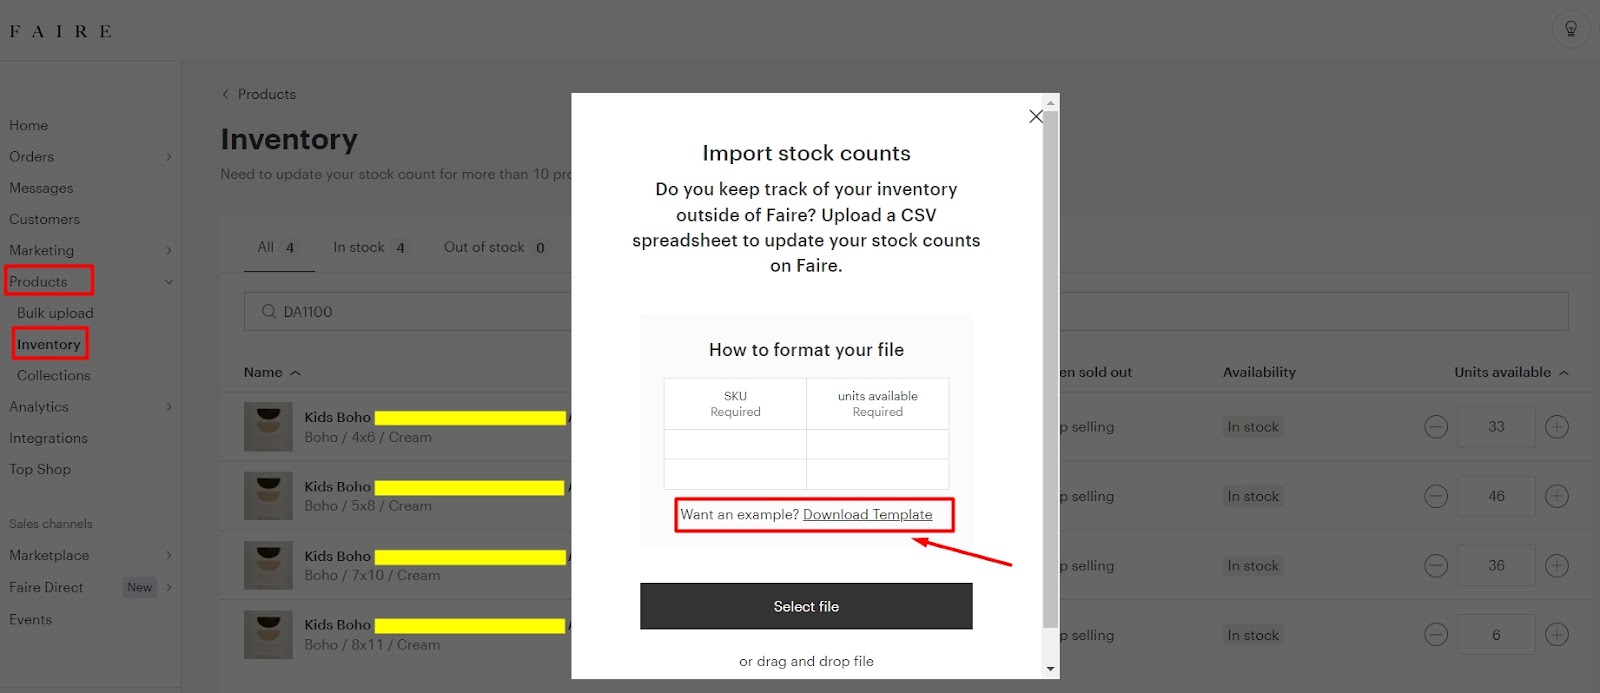
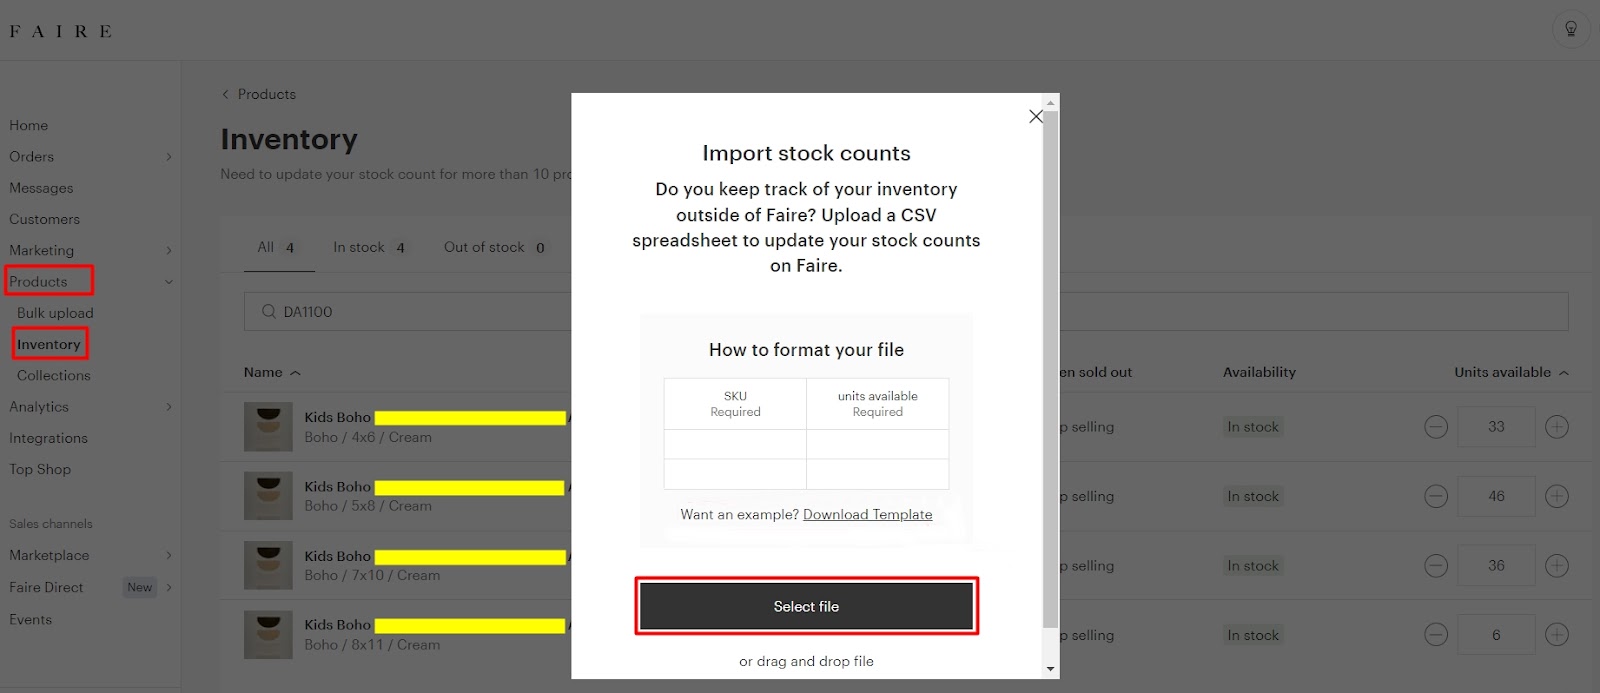
Step 02: From that page you will see a “Upload spreadsheet” option. You need to click there.

Step 03: After clicking on the “Upload Spreadsheet” option, a new tab will pop up. You need to select the “download template” option from that tab. And your template will be downloaded.
Step 04: Here is the “Inventory template” . You need to fill up the SKUs and inventory based on your products.
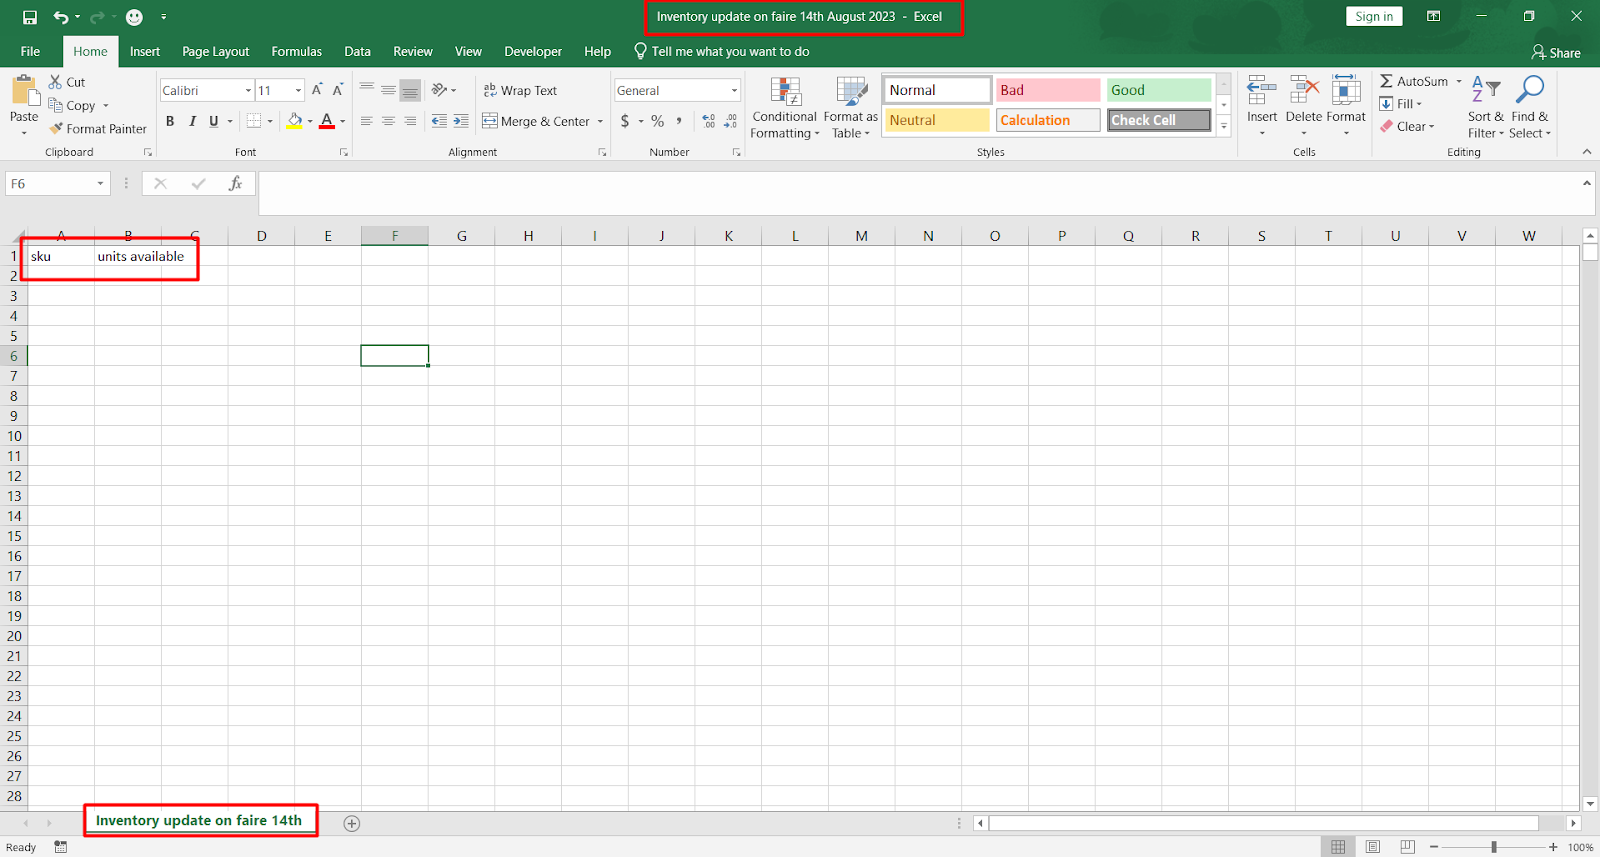
Step 05: After updating all the information, we need to save the file and get back to the tab from where we have downloaded the inventory template.

Step 06: From this tab you need to click on the “Select file” option and select your inventory template.
Step 07: After selecting the inventory feed file, it will upload automatically on the back end. All you need to do is click on the “Start Import button” to complete the procedure.

Congratulations! These steps will save you time and make inventory management a breeze. Our guide aimed to simplify the process, ensuring you’re well-equipped to handle it. Need more help or have questions? We’re here for you. With your newfound skills, go conquer Faire like a pro! Here’s to smoother operations and more successful selling, please leave a comment below or email us at info@ecomclips.com.