Wish is the fastest growing mobile-first online marketplace that allows shoppers to browse and buy items from third-party sellers. This marketplace is tremendously popular because of its value over the brand, packaging, or speedy delivery. On Wish, there are three ways to add your products: Manual, CSV files, and API. In this article, we will guide you on how to download or upload CSV files on Wish. Before showing you the entire process, you need to know first about the CSV file.
What is a CSV File?
A CSV (comma-separated values) file is a simple text file in which information is separated by commas. CSV files are most commonly encountered in spreadsheets and databases. You can use a CSV file to move data between programs that aren’t ordinarily able to exchange data. You can create a CSV file through applications like Microsoft Excel and Google Drive.
How do you download and upload a CSV file on Wish?
You can download and upload multiple products at once by uploading or Downloading a CSV file using the Add/Edit Products tool in Merchant Dashboard. Let us show you the process.
For Download a CSV file,
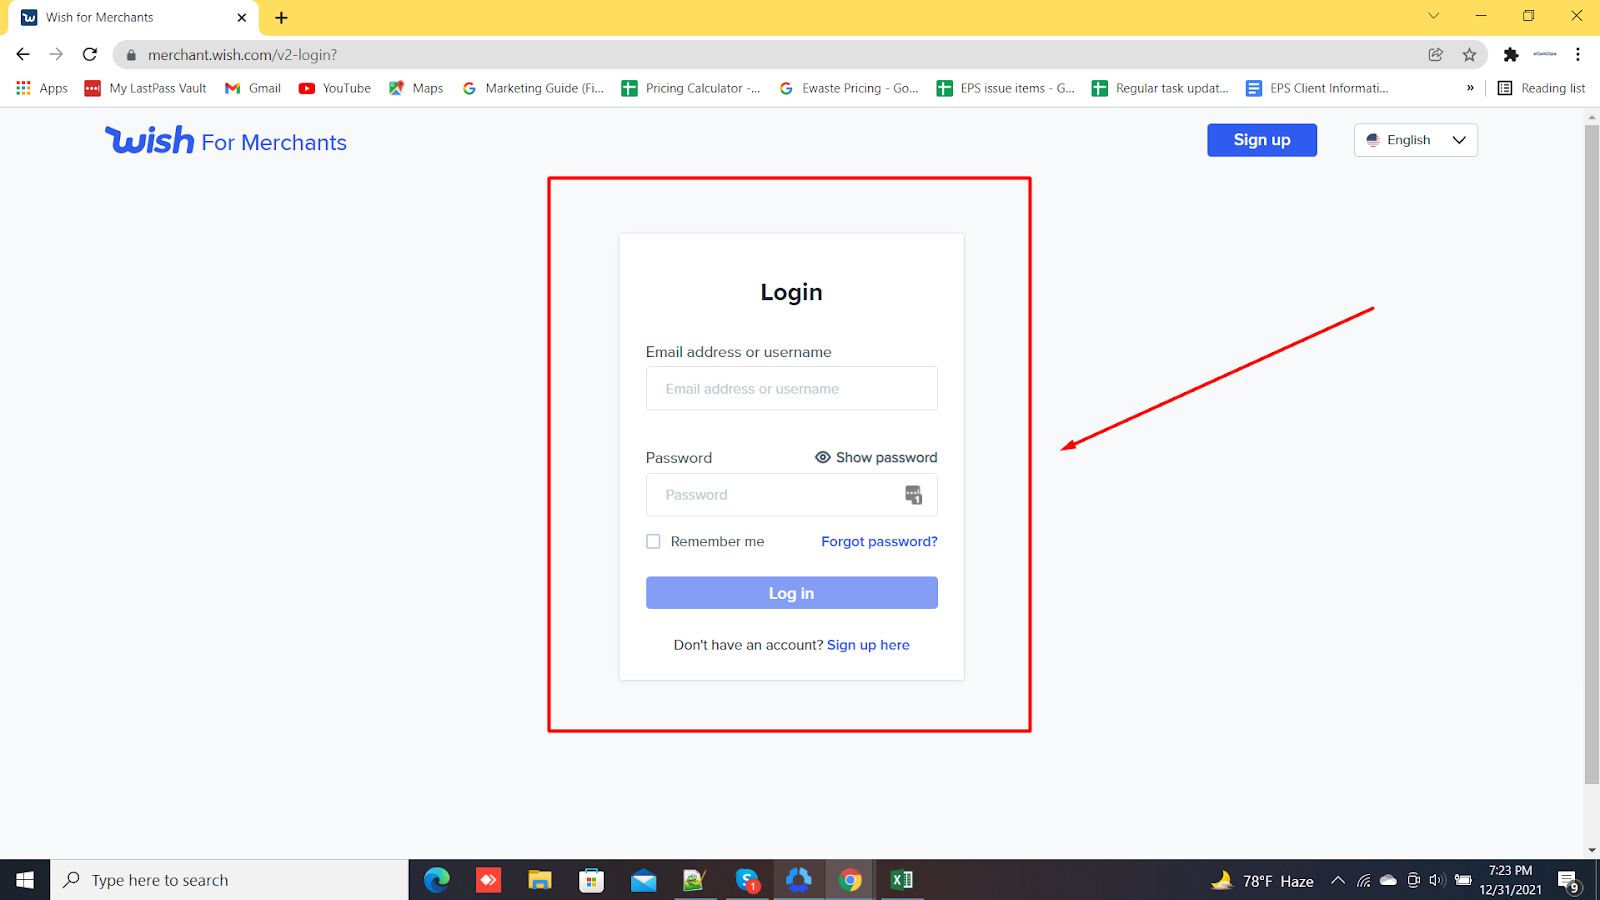
Step 1: At First login into your Wish Merchants account
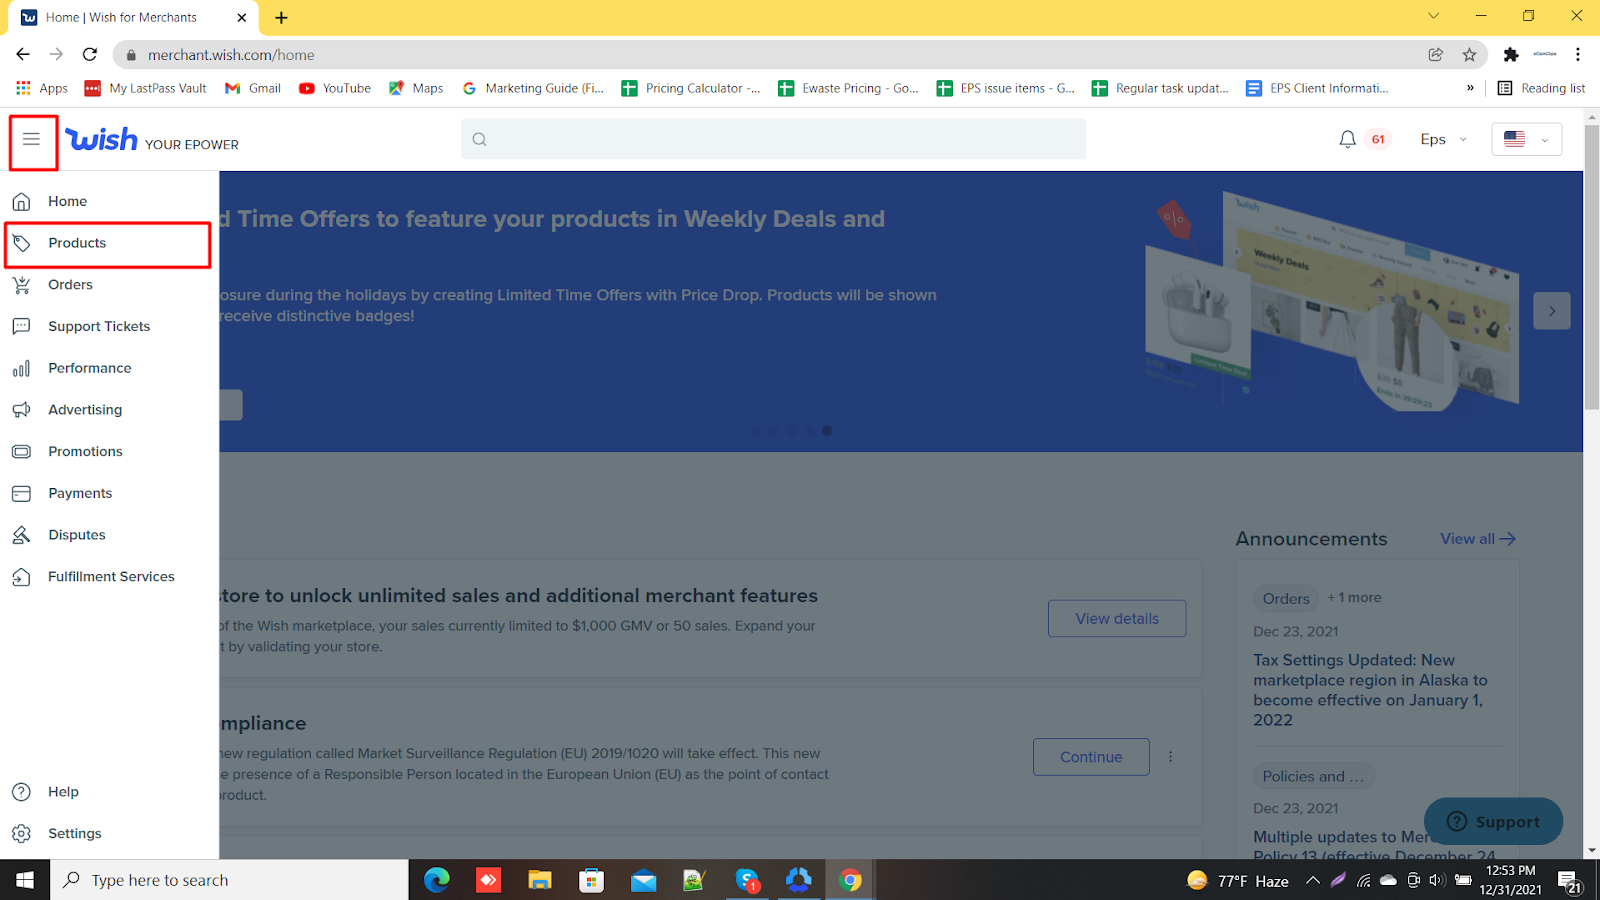
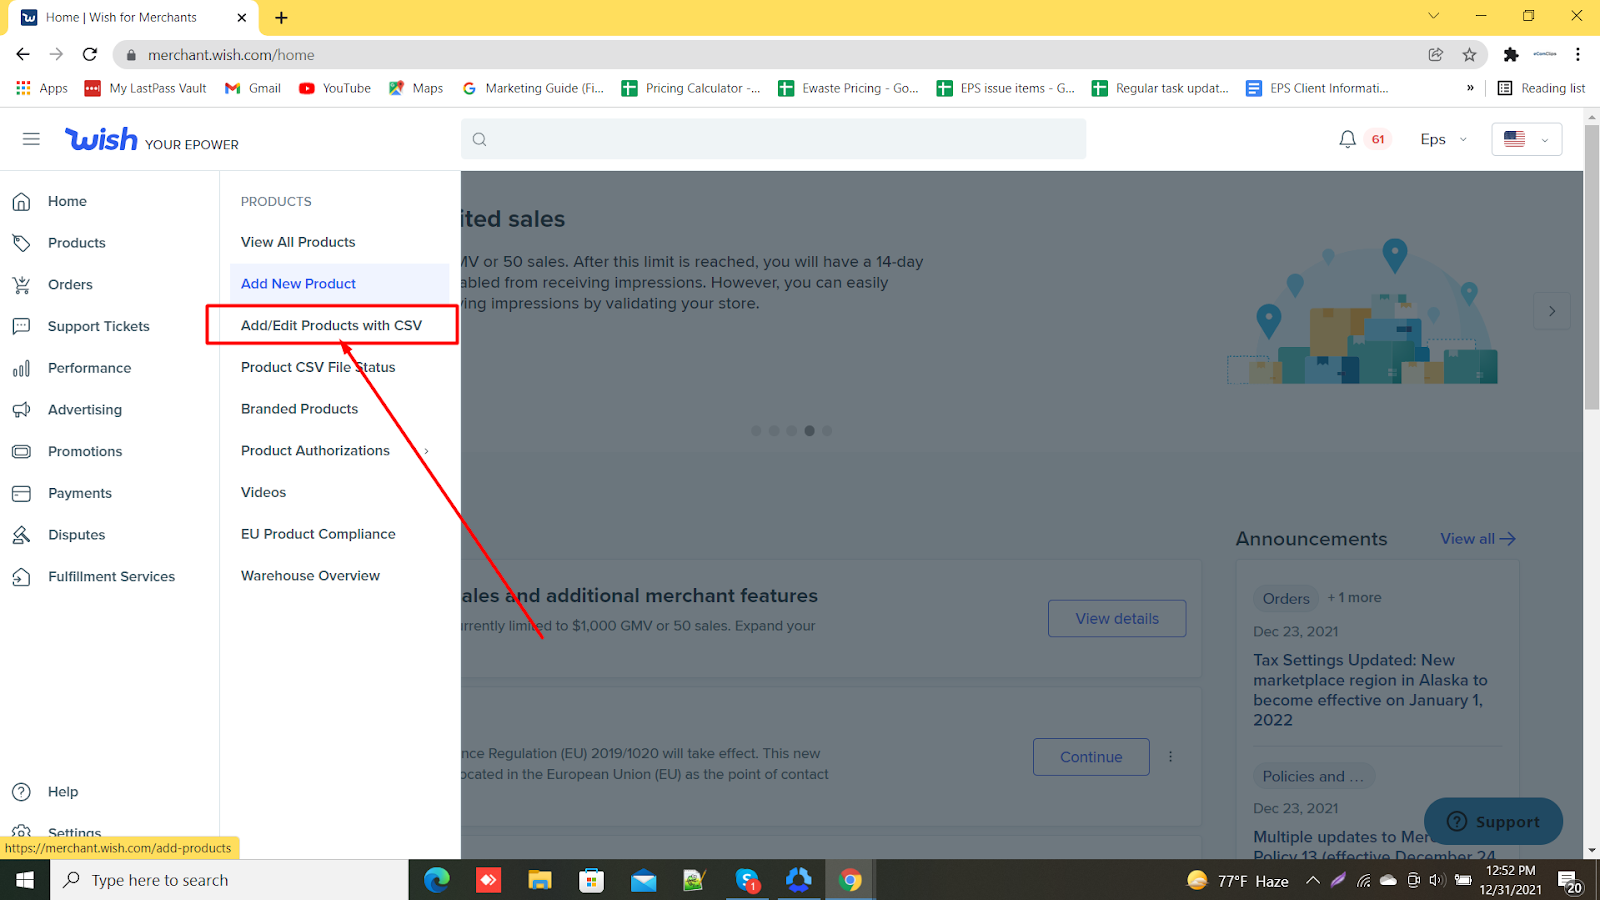
Step 2: Now, click on the “Menu option” and select “Products”

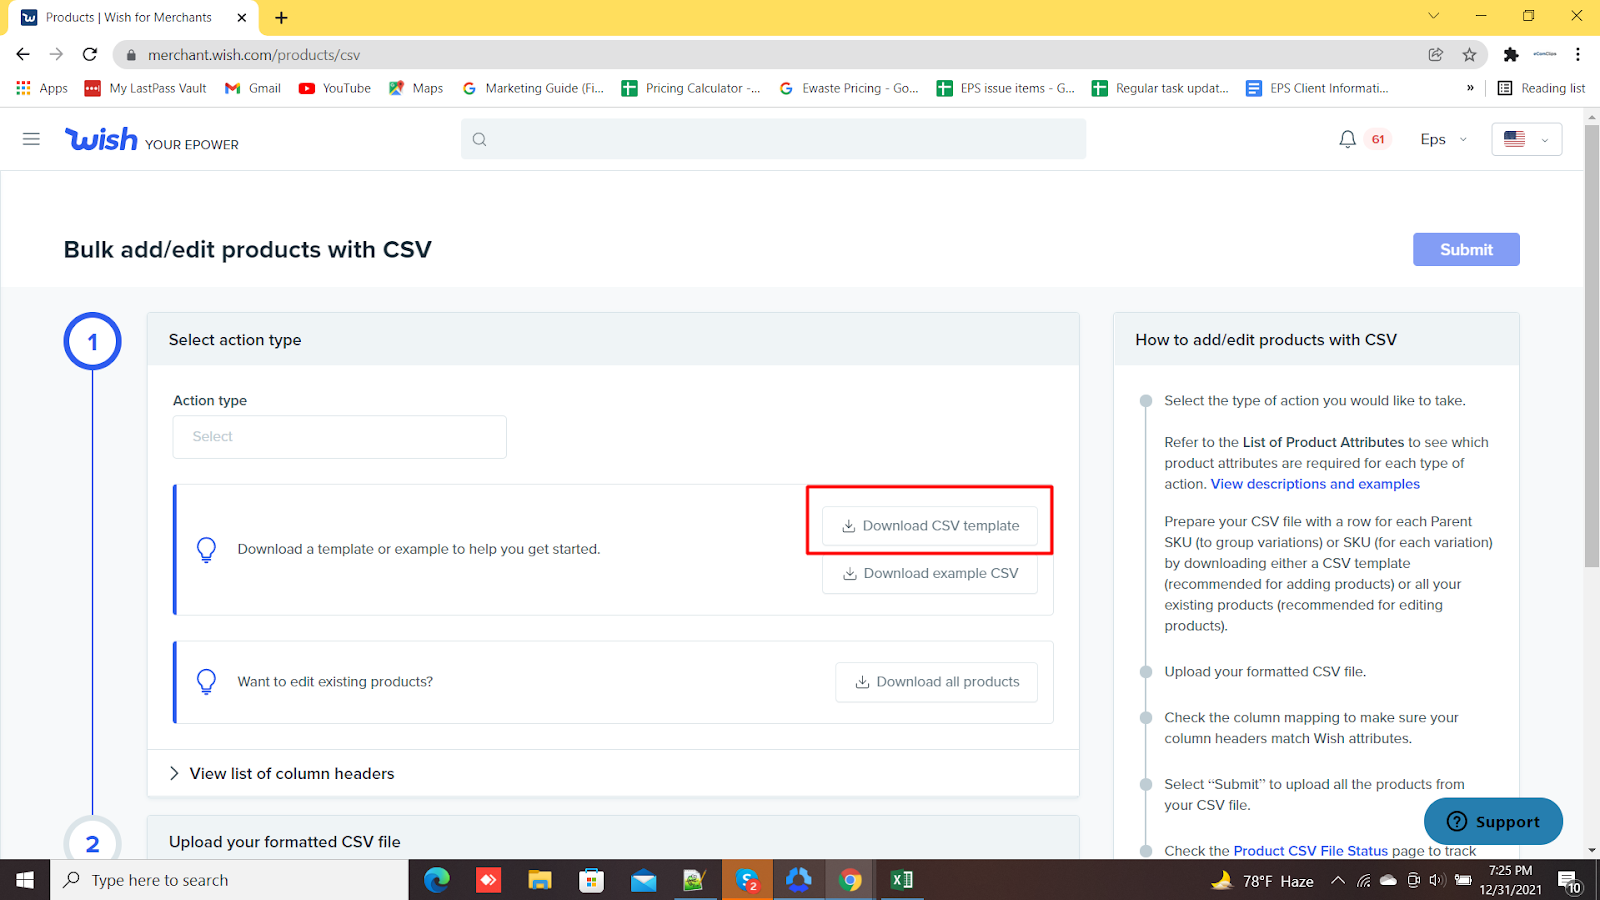
Step 3: Go to the “Add/Edit Products with CSV” option and click here

Step 4: Now just click on the “Download CSV Template”
Your CSV template is ready and you can work on the CSV file. Here you can see the CSV template which we’ve downloaded from the Wish merchant.

Now, you need to input the columns of parent SKU, SKU, descriptions, tags, currency, price, color, size, inventory, main image, and extra image, quantity, and reference.
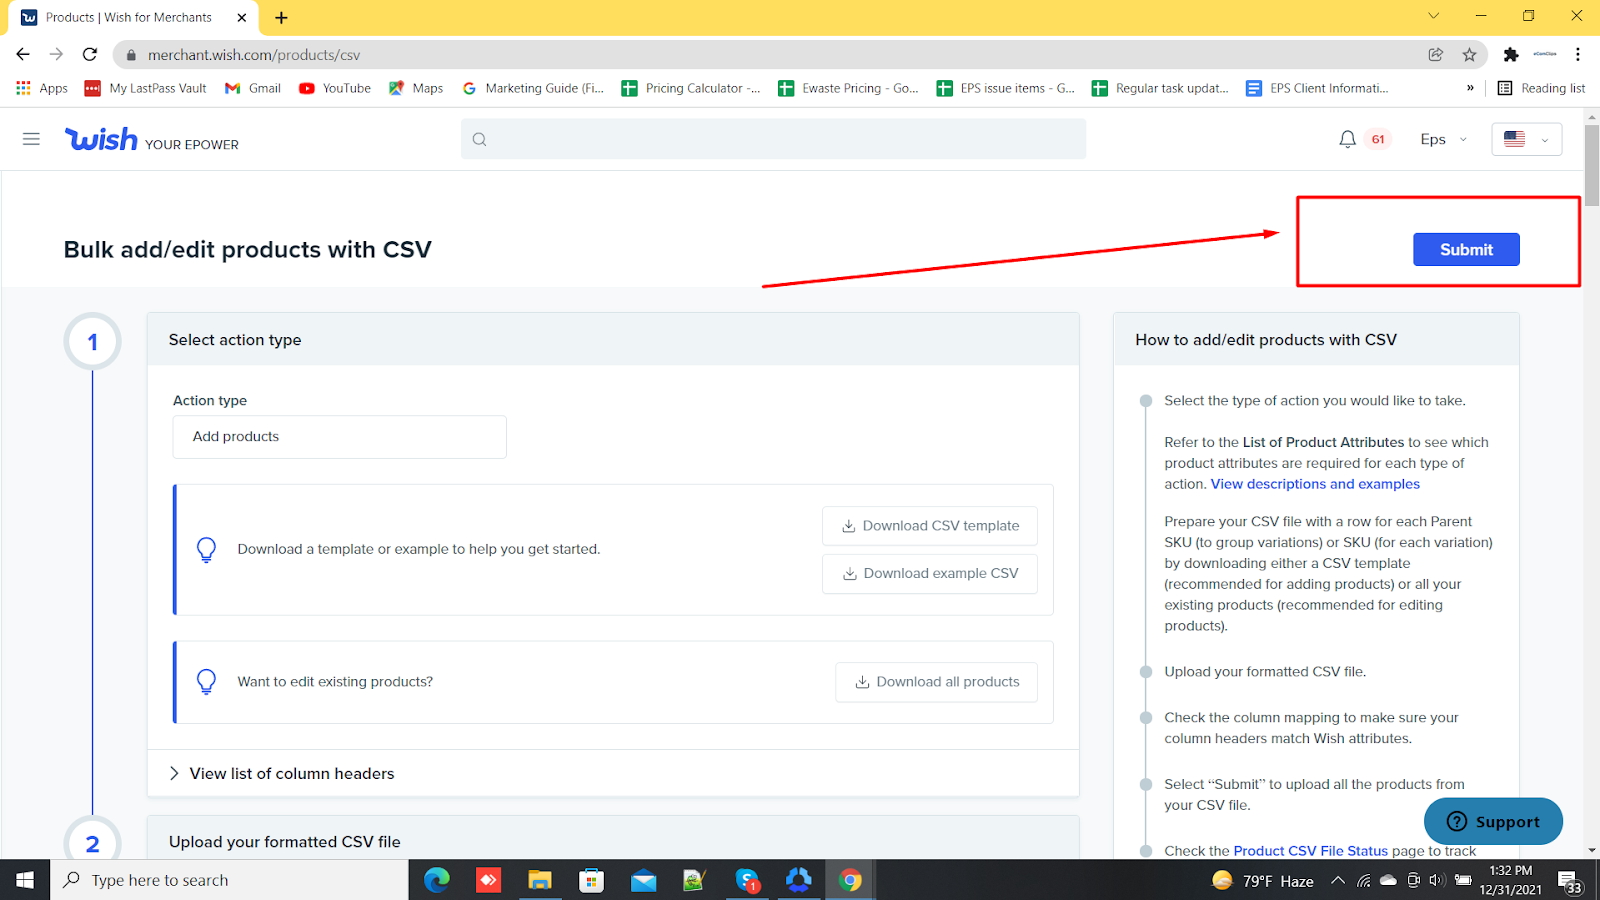
For Uploading a CSV file,
Step 1: Go to the “Menu” again and then scroll down to the “Products” and click
Step 2: Then select “Add / Edit Products with CSV”
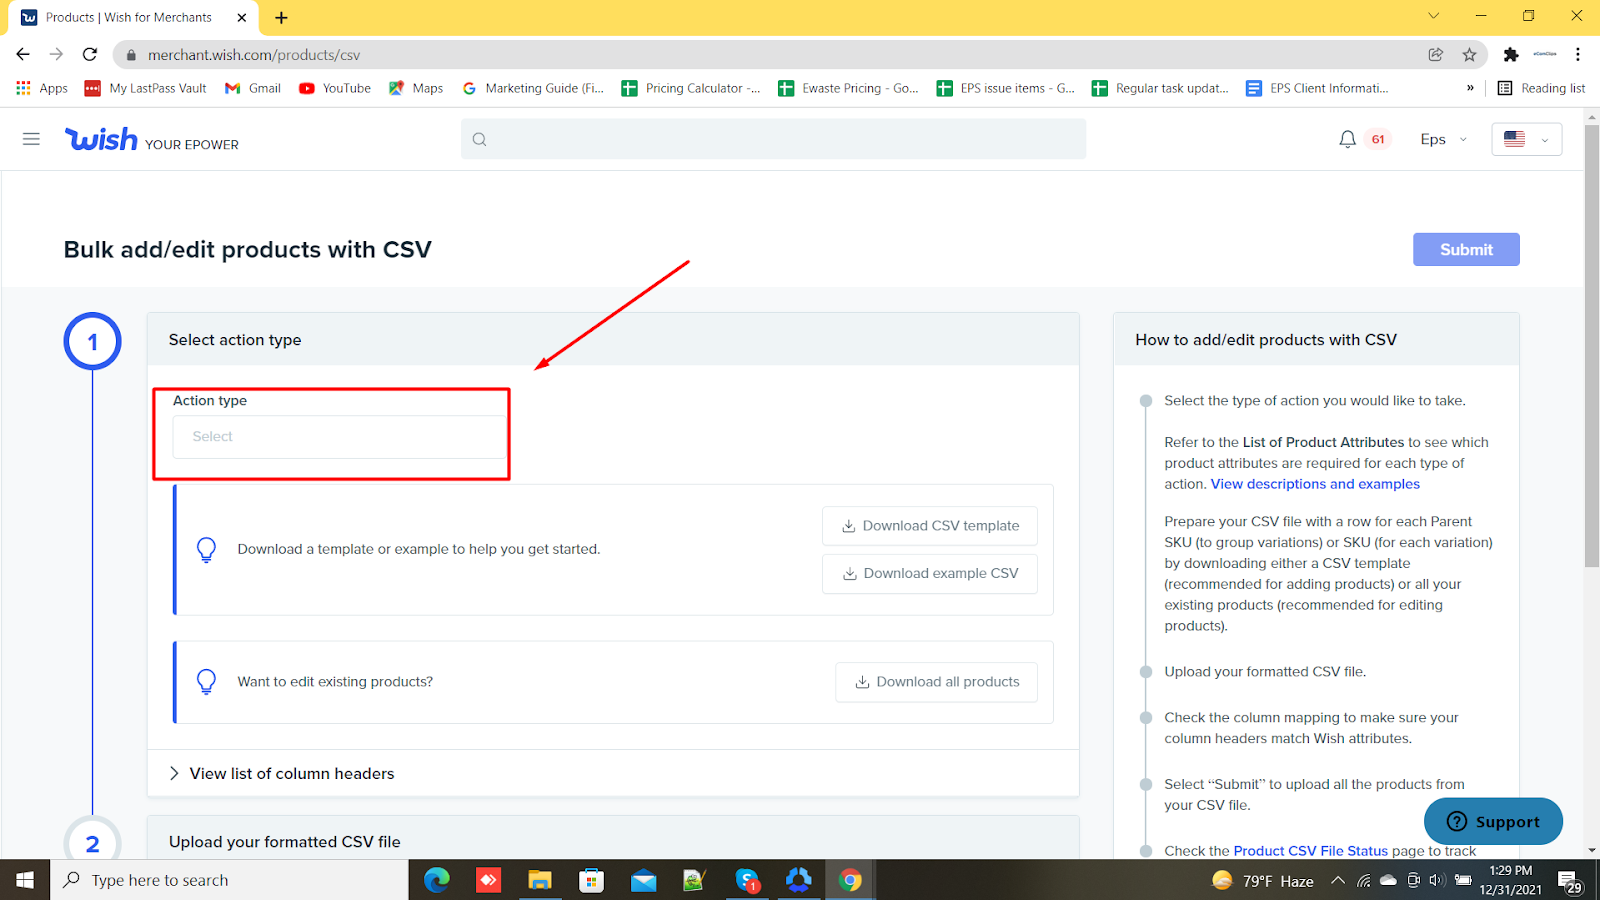
Step 3: You will find “Action Type” under the “Select Action Type” section.
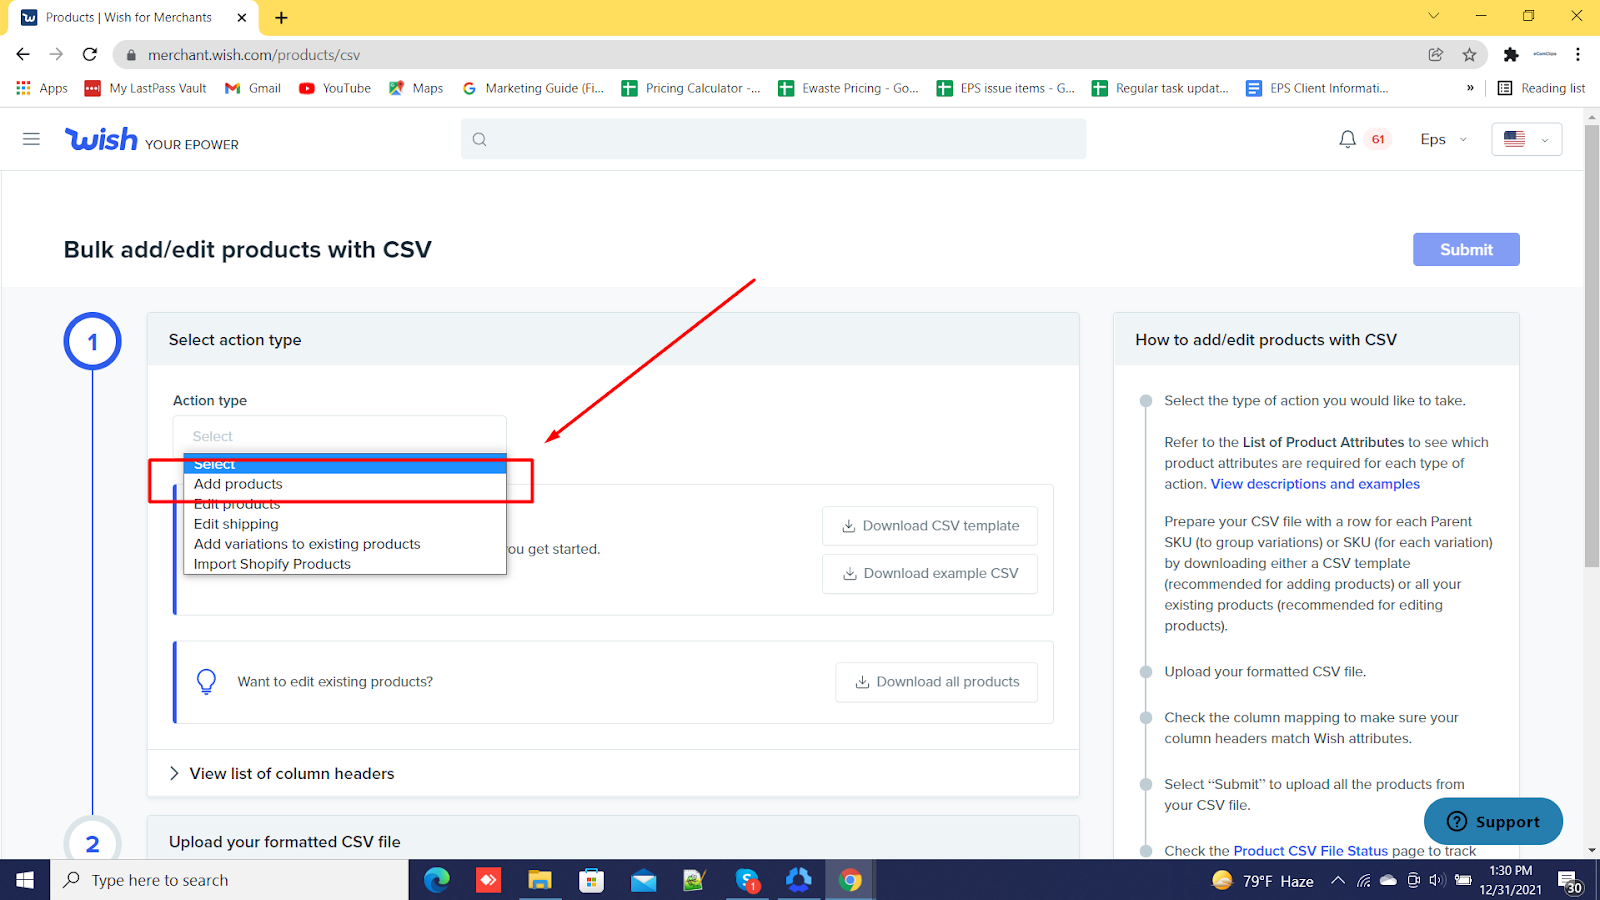
Step 4: Press the Select options and click on the “Add Products”.
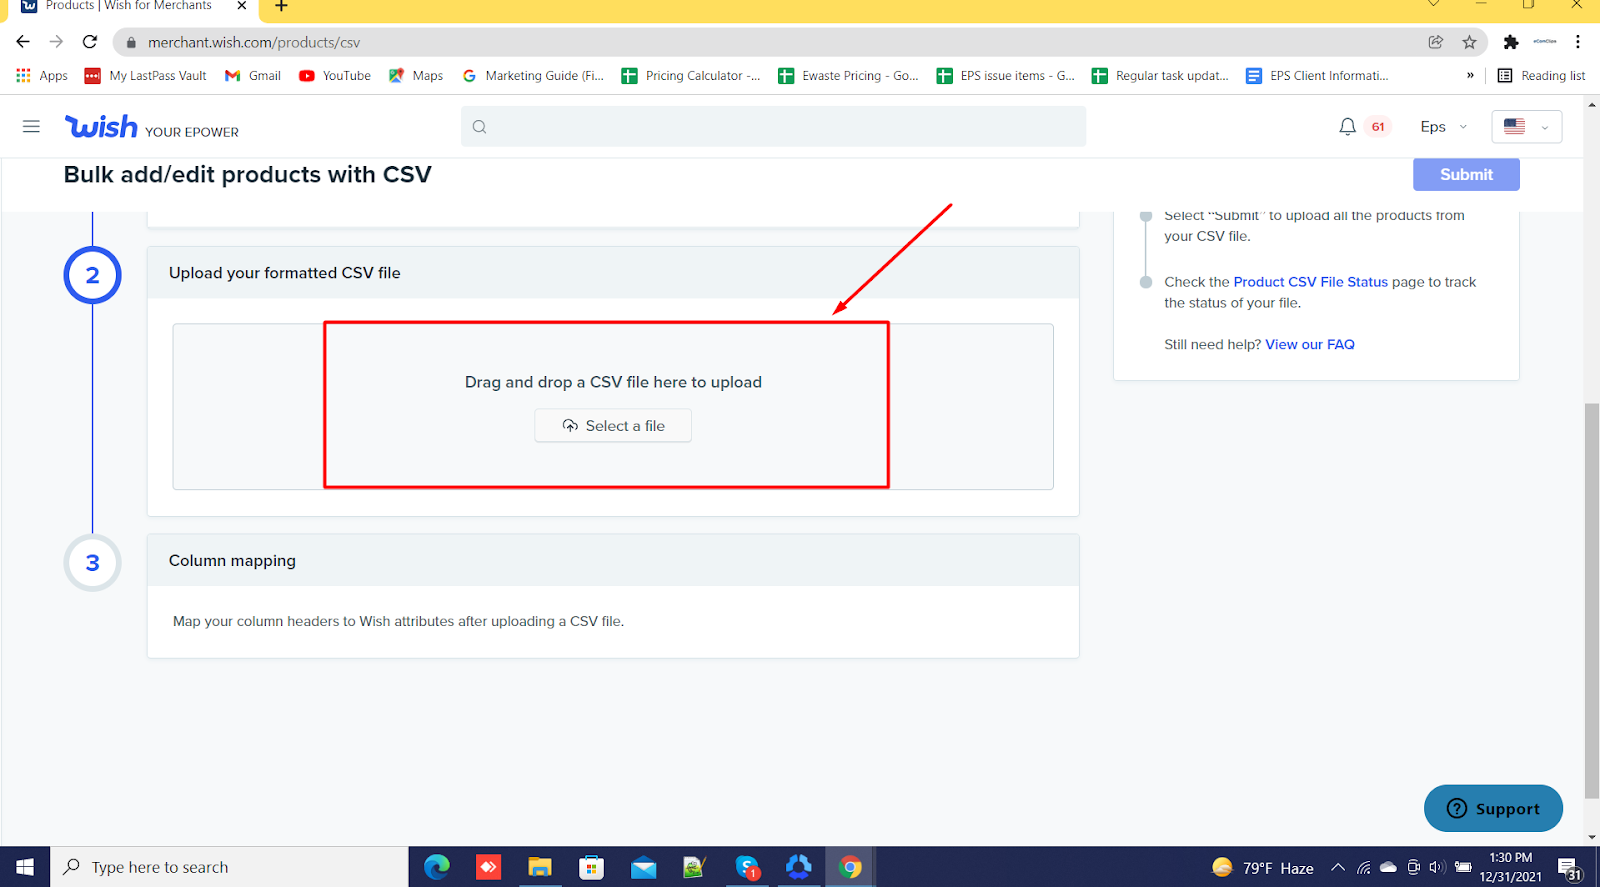
Step 5: Now you can see the options “Drag and drop a CSV file here to upload” or “Select a file” Then select your CSV file.
Note: Please, make sure that your file is in CSV format! Otherwise, you won’t be able to upload your data/ files to your merchant account.
Step 6: In the section of “Column mapping” change your necessary Attributes regarding your necessity.

Step 7: And finally click on the “Submit” button to Upload your CSV file!
It may take some time to upload and if you have any errors on your file, you can also use the information in the “File upload history” area to check the member records with errors. You can make the corrections in the file and re-upload it.
To sum up, Downloading and uploading a CSV file from Wish is not rocket science. You can easily do it by yourself if you follow the steps thoroughly that we explained earlier with the screenshots. We hope that you understand the whole process clearly. If you like our discussion, please comment, share, and subscribe to our blog. Also, do not hesitate to ask if you have any queries on any field of eCommerce. We would be glad to hear from you and answer your questions.