
Amazon custom is a storefront on Amazon that offers customizable products from professional sellers. It allows shoppers to customize products with text, images, logos, or any other options provided by the seller. So sellers can combine this customization option for the shoppers to upload a photo and text. Image customizations allow the shoppers to add text too. For image customization, the images should have a specific format that sellers can control from the Seller Central by using the Clipping Mask option. In this guide, we will recap how to do Image Customization on Amazon using the Clipping Mask feature. But before showing you the whole process, you need to know about Clipping Mask.
Clipping Mask:
Clipping Mask is like combining two images in a layer so that one image appears to peek through the outline of the other. It is used to cut or edit an image to produce the right shape. Clipping Mask is keeping the images that are inside of the path and other portions extracted from the images.
Image Customisation on Amazon:
If you want to work with any rectangular frame image then it needs very simple steps, but to customize an image on any other shape like circle shape we can not do this easily, and therefore you need to take the help of a clipping mask. We will cover both options here.
Let’s dive down into the process of image customization on Amazon by using the Clipping Mask.
Step 1: Go to your amazon seller central account and hover over the Inventory tab and click on the Manage Inventory option.

Step 2: Now find your product for which you want to add a custom option then click on the down arrow on the very right side to the Edit button and click on the Add/Edit Customization Information. It will take you to the Edit customization page.


Note: For doing any type of customization-
i) The listing should be in stock. You can not add customization to an out of stock product listing.
ii) And the listing needs to have only one offer running at a time. Listing having multiple offers will not be eligible for customization.
Customizing Image on Rectangular Frame:
First, you need to upload an image on the customization page. But before that, you need to make sure that the image resolution is 400 x 400 pixels and that’s why you need to edit the image in photoshop to resize.
Resizing Image:
- If your image is already in square shape then the job is pretty simple. Just press Ctrl+Alt+I from the keyboard and select the image resolution 400 x 400px and press Ok.

- But let’s say, you need to resize a rectangular shape image. So, press Ctrl+N to open a new document. In the new document page, select width and height of 400 pixels. After that click on the Create button.

- Now press Ctrl+O to open that rectangular shape image you want to resize. Select the image from your computer and click on the Open button to get the image in photoshop.

- Now press the Ctrl button to drag the image to that window to the new document that you created 400x400px. Now you can see the new image is imported. Please press Ctrl+T to transform or resize or reposition the image until you are satisfied.

- Now, press Ctrl+Shift+S to save the image. You can save the image in either jpg or png format. Select any of them and click on the Save button.

Step 3: Now, go to the back end of the Amazon customization page. After that click on the Drag or upload a square image option and upload the image from your computer that you resized earlier. Now, click on the Add customization button.
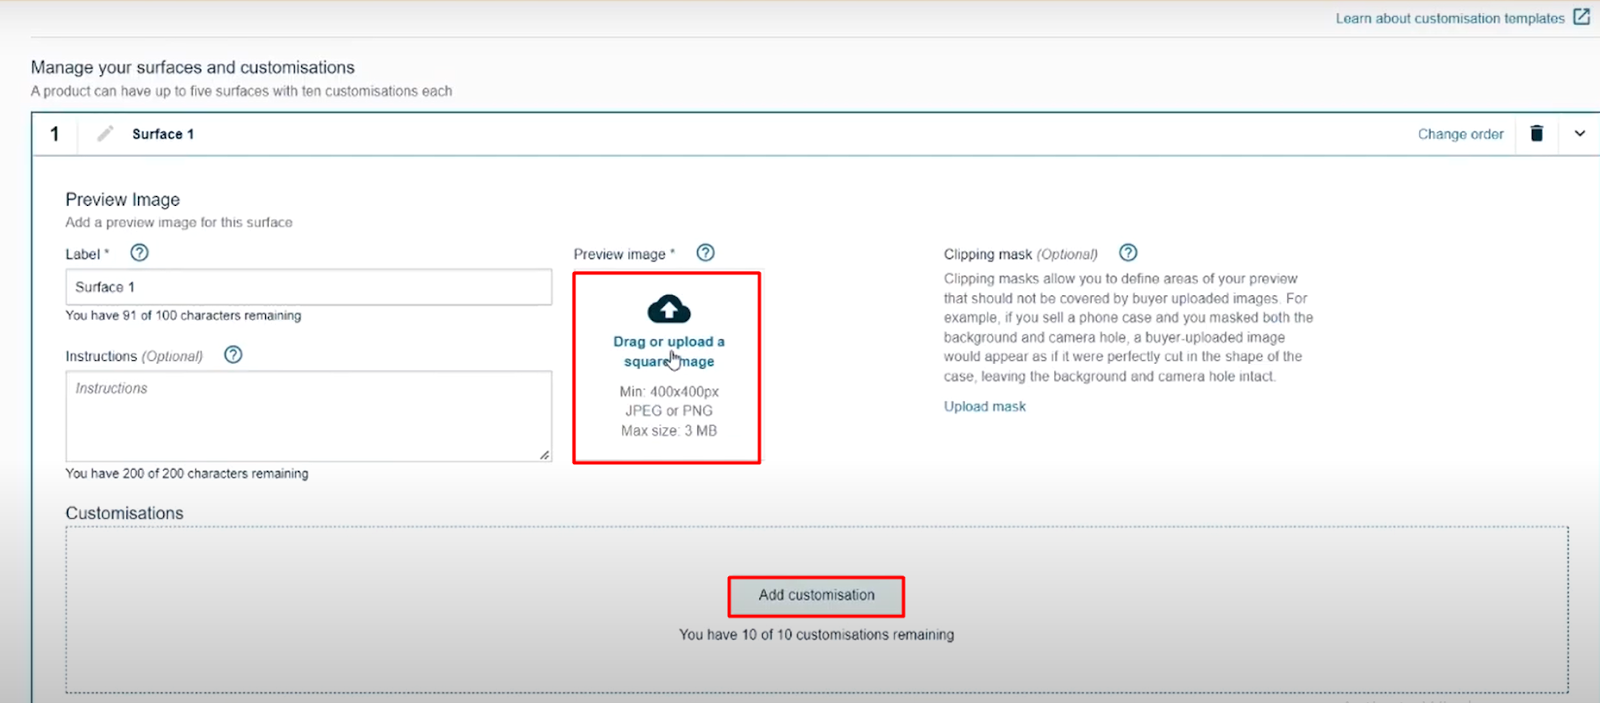
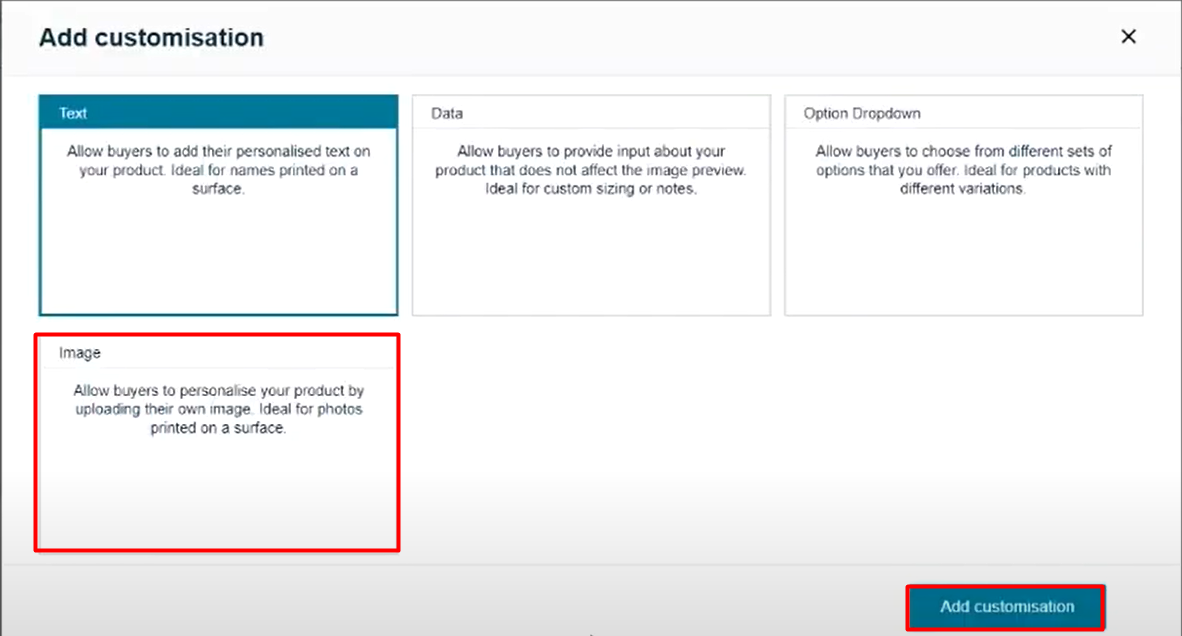
Step 4: After that, a new window will open on this page. As you are doing image customization, so you need to select the Image option and then click on the Add customization button.
Step 5: Now you need to write down the name for the label from the Label section. Also, you can write instructions for the customers.
Note: We don’t need to input the surface name here. We only need to input surface names when we will work with two different surfaces to distinguish the surfaces.

Step 6: After that, you need to select the area where the customizable image will show. You can select the area by simply dragging the mouse. Or, you can also do that manually by giving the value in the Position and Size option.

Step 7: Now click on the Preview button to see the result.

Step 8: You can preview an interface from the customer’s point of view. When they click on the customization option they will be asked to browse an image. To check, click on the Browse option and select an image from your computer.
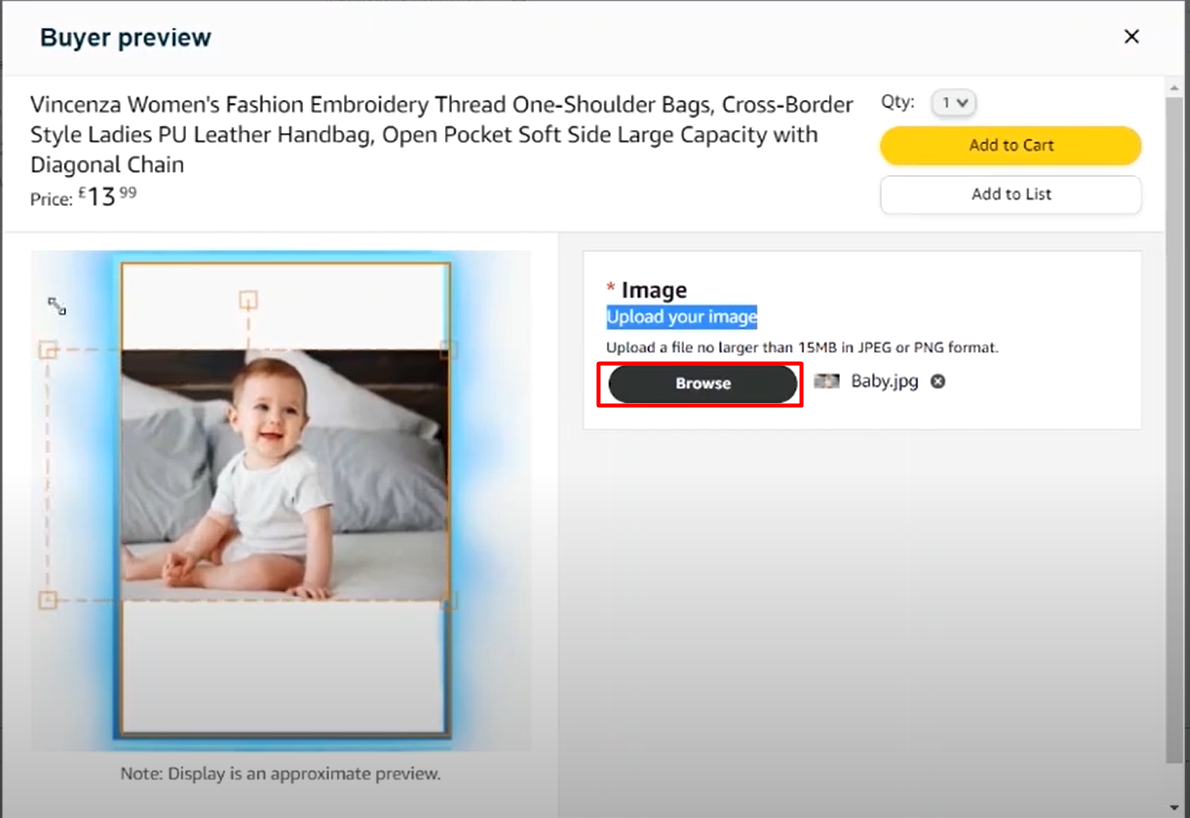
You can drag and increase the size, rotation, or reposition the image. If everything is working smoothly then you are done. So this is the customization for any rectangular surface.
You can see the level and instruction that you have given earlier in step 5.

Customizing Image on Any Other Shape Except Rectangular (Using Clipping Mask)
Customizing an image with a round shape is not an easy task. For doing so, you need to upload 2 images. 1 is for the main image surface and another image is for clipping. For doing this, follow step 1 and step 2 again.
Resizing and editing Image:
This time, you need to edit those 2 images with photoshop to resize them with 400×400 px. We already discussed earlier to resize the image. Here we are showing how to edit images for clipping Mask.
- Open the round shape image and resize it to 400x400px. Now select the round area with the selection tool on which part the customer’s image will be visible. Then delete it by pressing the Delete button on your keyboard.
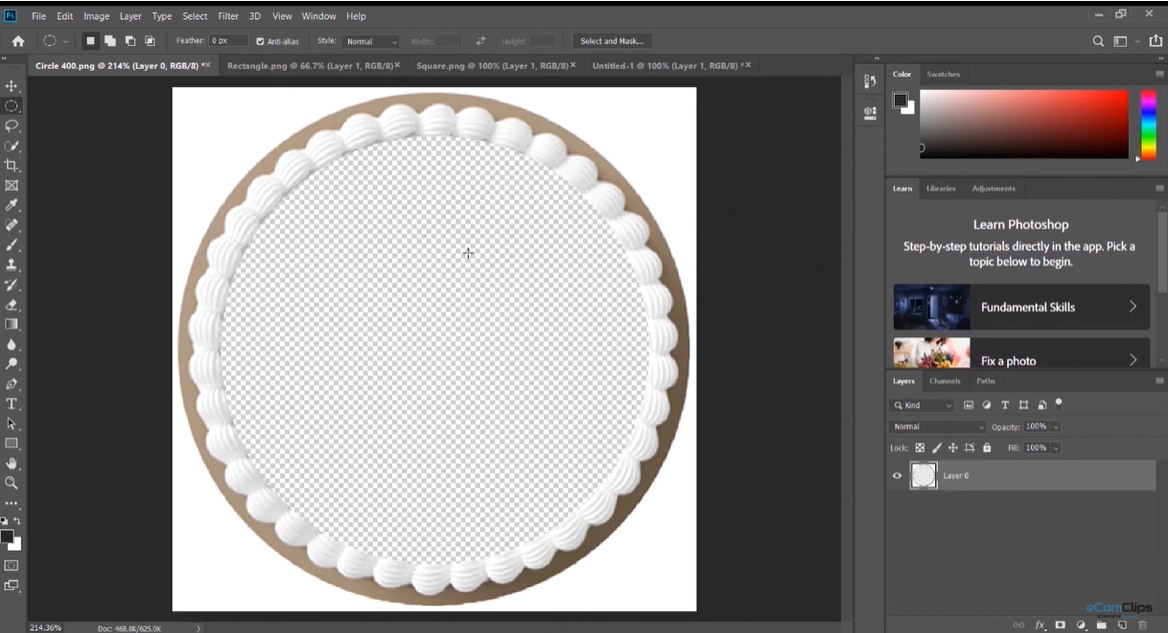
- Now save the image with png format. Remember, you have to save it as PNG as we want to work on a transparent background. Otherwise, the clipping will not work.
Step 3: ad .
Step 4: Now additionally, you need to upload another image, that transparent PNG image for the clipping area. Click on the Upload mask button and upload the image you saved for clipping.

Now, click on the Add customization button.
After that, please follow the process of previous Step 5 to Step 8 as before.
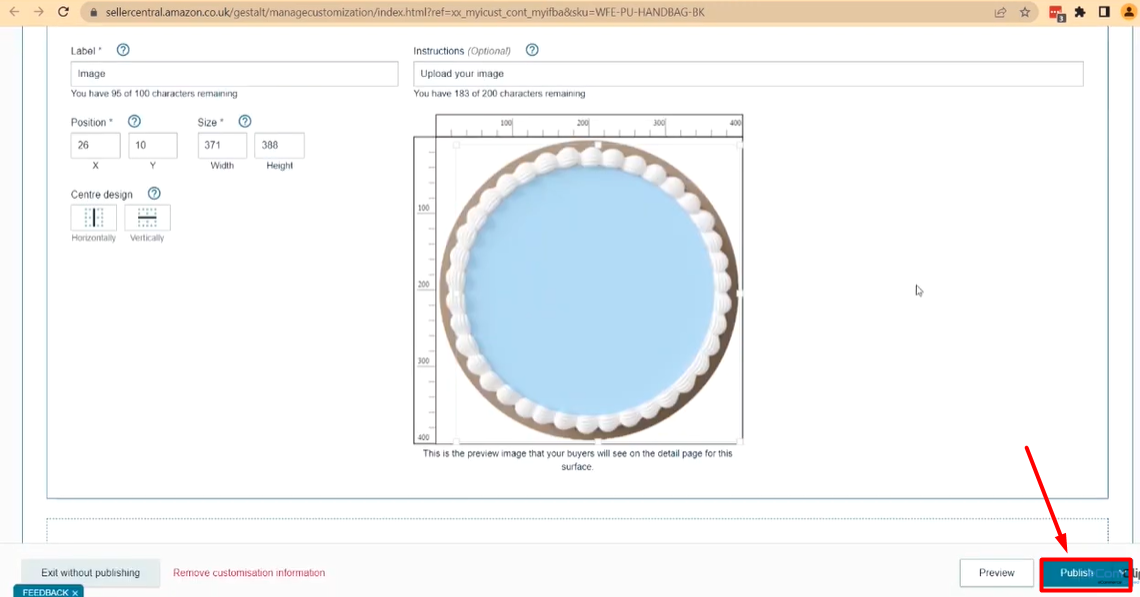
Step 9: Now you can preview the customization if you wish to as we showed before. If you think everything is okay just click on the Published button.
To sum up, Amazon Custom offers your business a free program for generating sales from customizable products. Customization image by using the clipping mask is might sound complicated but if you follow our instructions properly, you can easily do it by yourself. If you like our discussion, please comment, share, and subscribe to our blog. Also, do not hesitate to ask if you have any queries regarding the image customization on Amazon by using Clipping Mask. Our experts are always there for you to answer your queries. You can also watch the video on our YouTube channel Ecomclips.