
Store Automator is a rapidly evolving multi-channel management tool. It connects marketplaces, shopping carts, suppliers, warehouses, shipping solutions, ERPs, and more. They’re all in the same spot. Store Automator is one of the most user-friendly and popular third-party software among e-merchants. To utilize Store Automator for your business, you must first create a user account, just like any other management program. Then you must construct an inventory or list all of your products in your account. In this article, we will show you how to Create New Products on StoreAutomator.
You can create new products on StoreAutomator in two methods. You have the option of doing it in bulk or manually listing them. If you’re starting a new business and only have a few things to list, you can do so manually. You can also use the bulk listing approach if you have a large number of items.
Manual Process:
To create new listings with the manual approach on StoreAutomator follow the below steps:
Step 1: Go to your StoreAutomator and log in to your account.

Step 2: On the left side of the page, click on the Inventory tab.
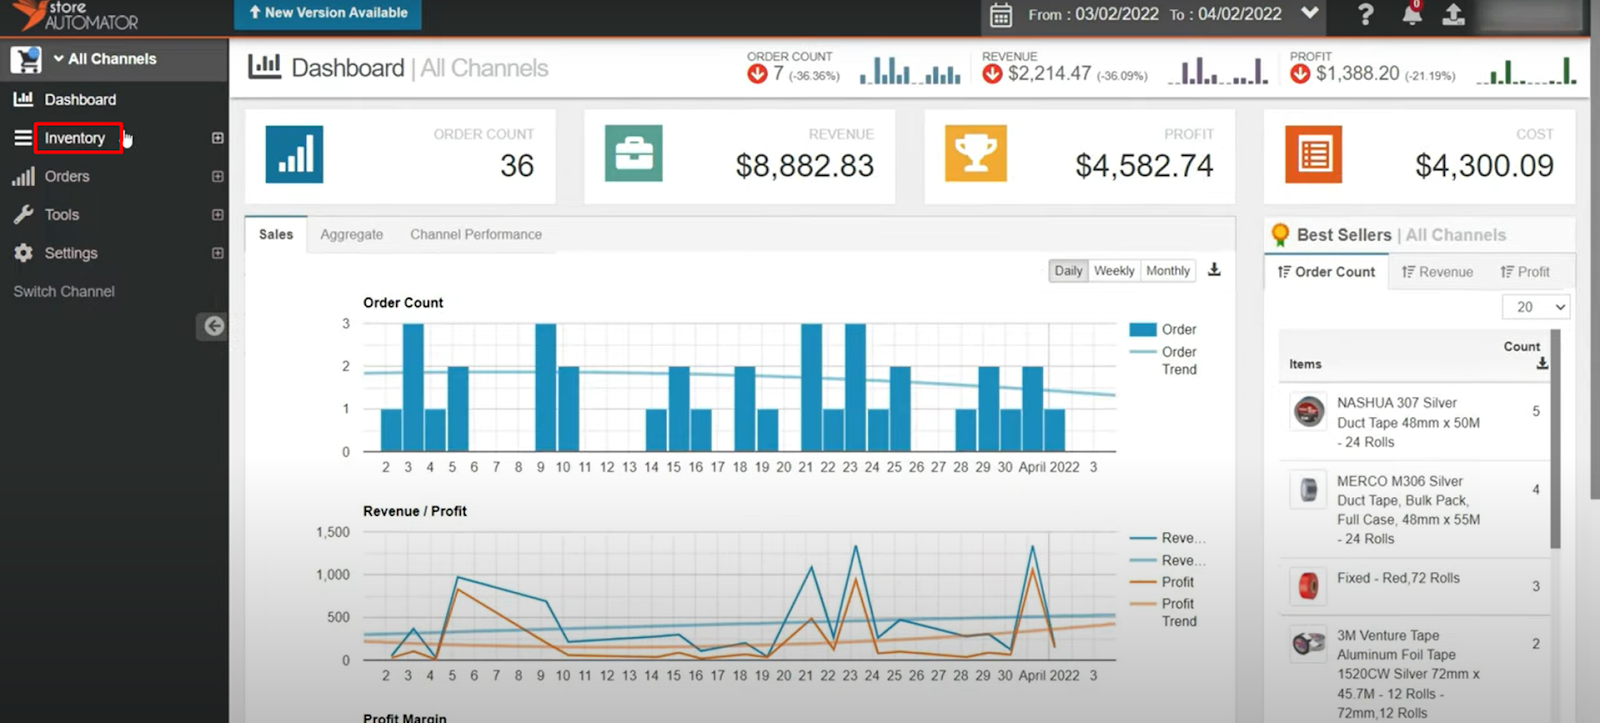
Now select “Products” from the Inventory drop-down menu.

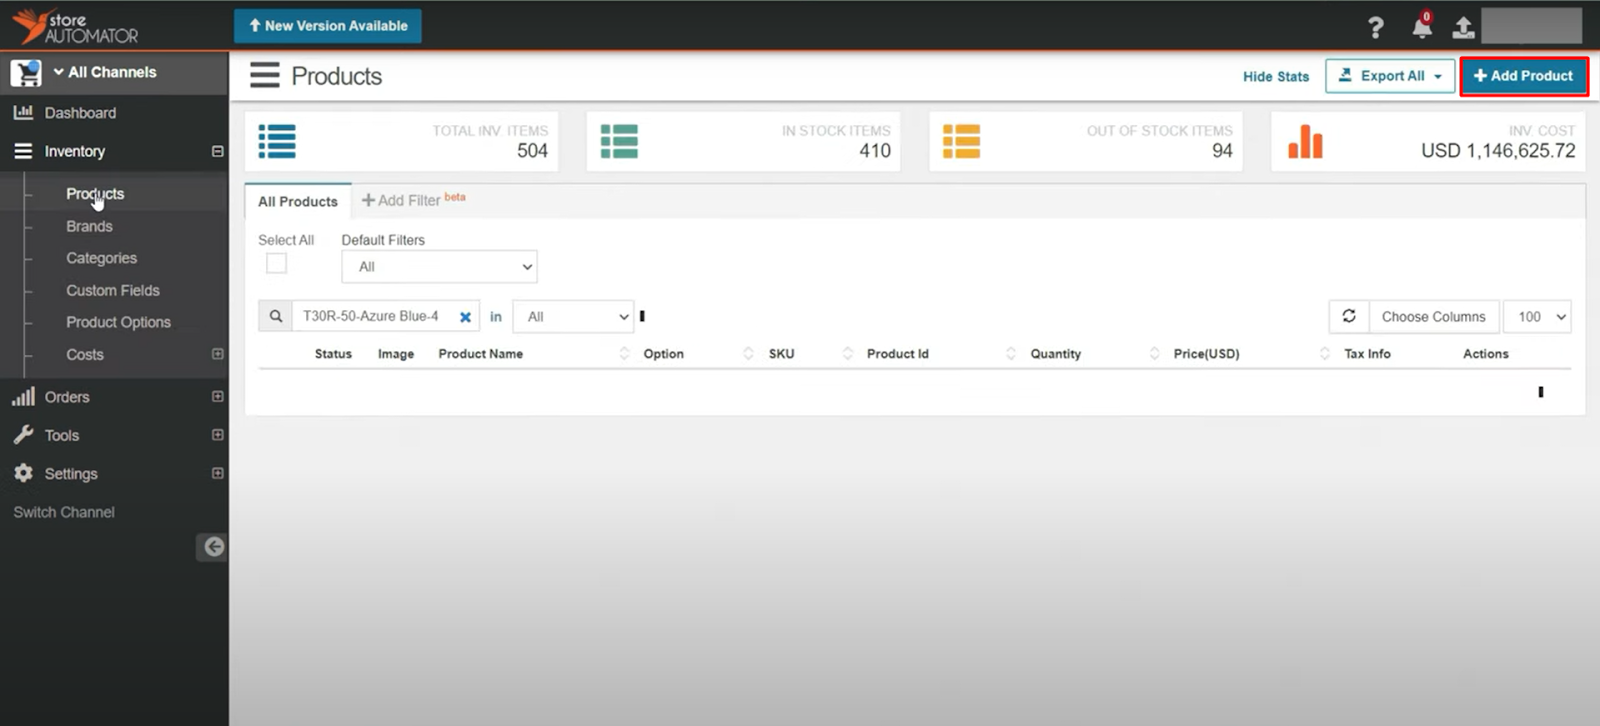
Step 3: Next, click on the “Add Product” button in the top right corner of the page.
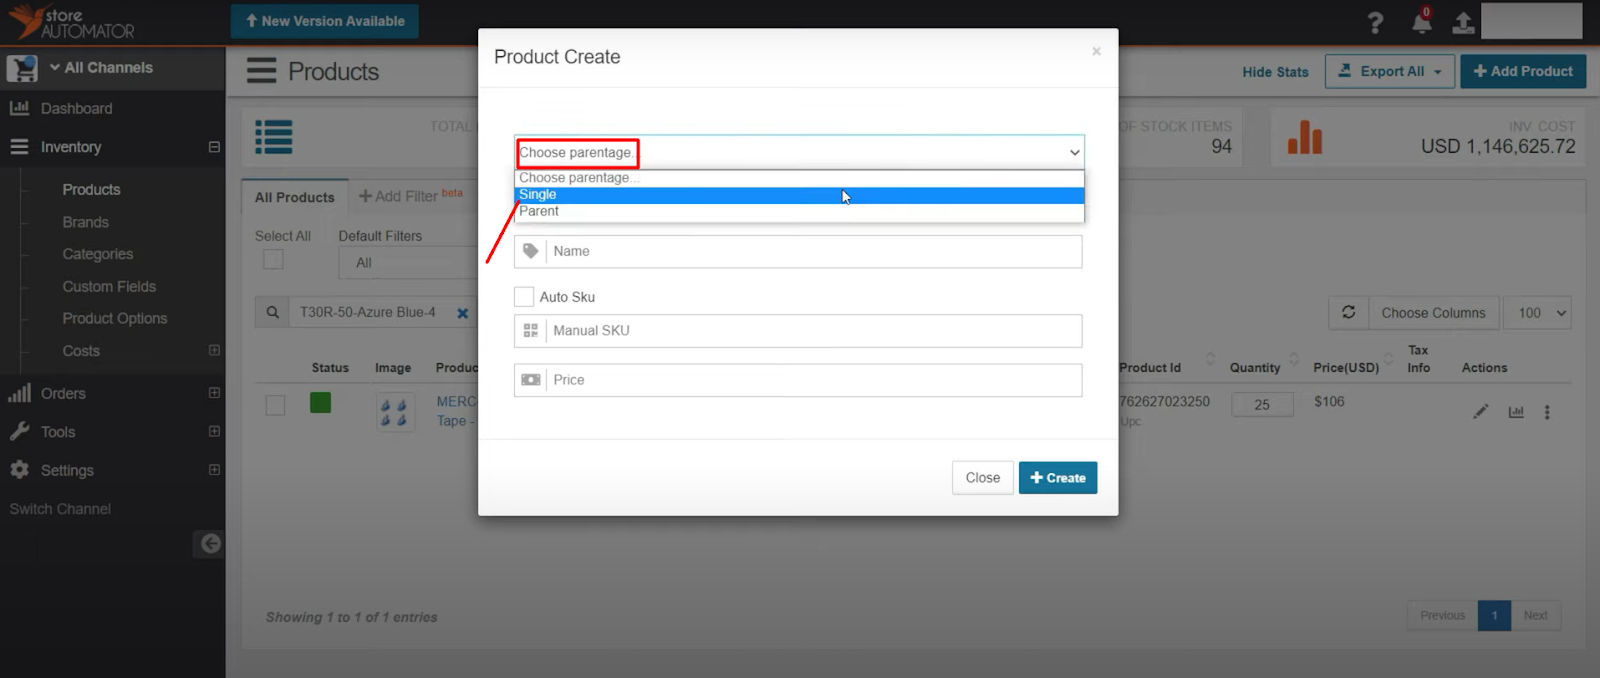
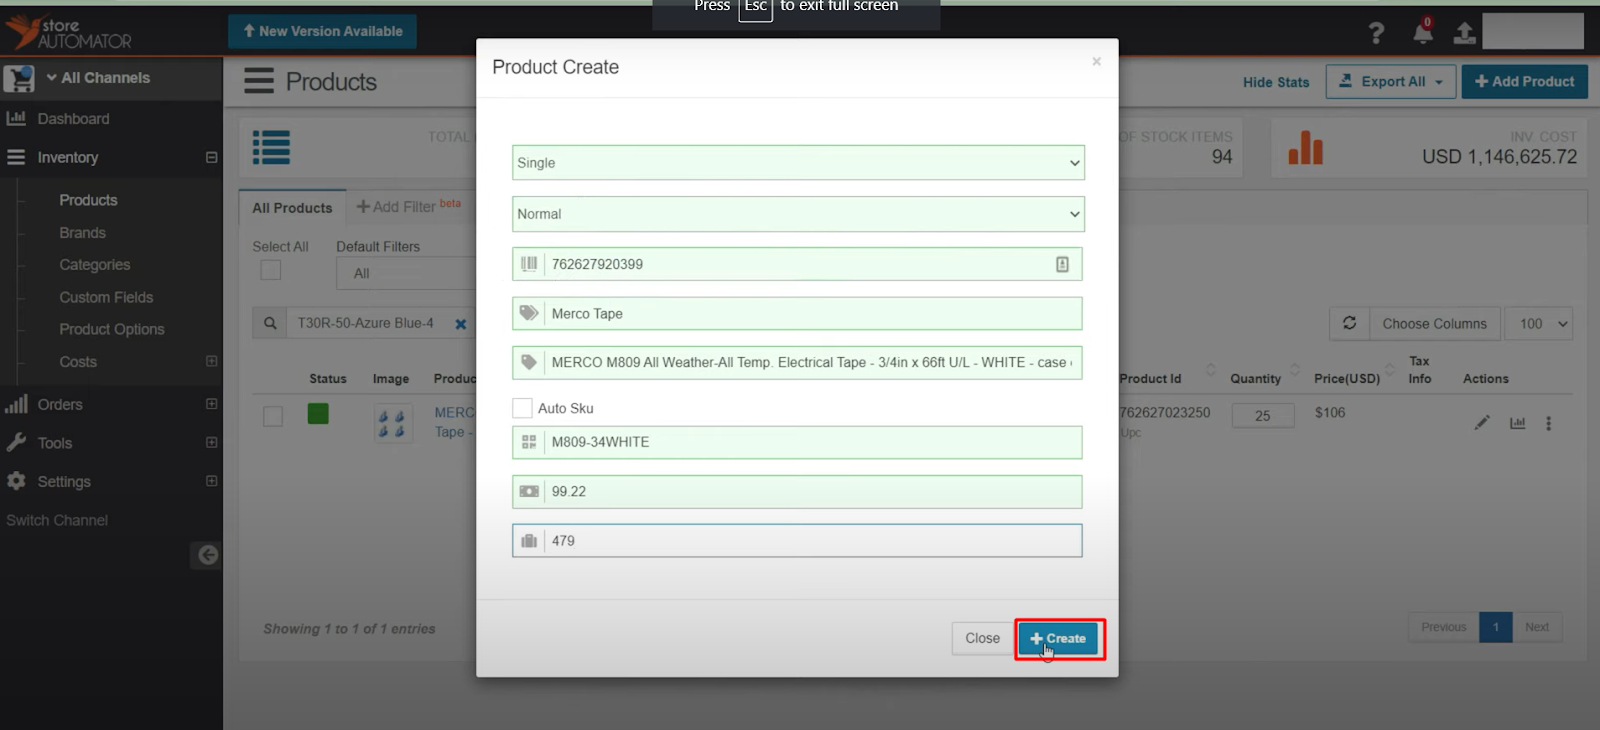
A pop-up window will open. After that, you must decide whether you want to establish a Single product or a Parent product. We’ll choose “single” from the Choose Parentage dropdown because we’re making a single product.
Now you must fill up all of the required fields on this product creation page, such as – Brand Name, Item Name, SKU, Price, and so on. You have the option of providing manual or automatic SKU creation.
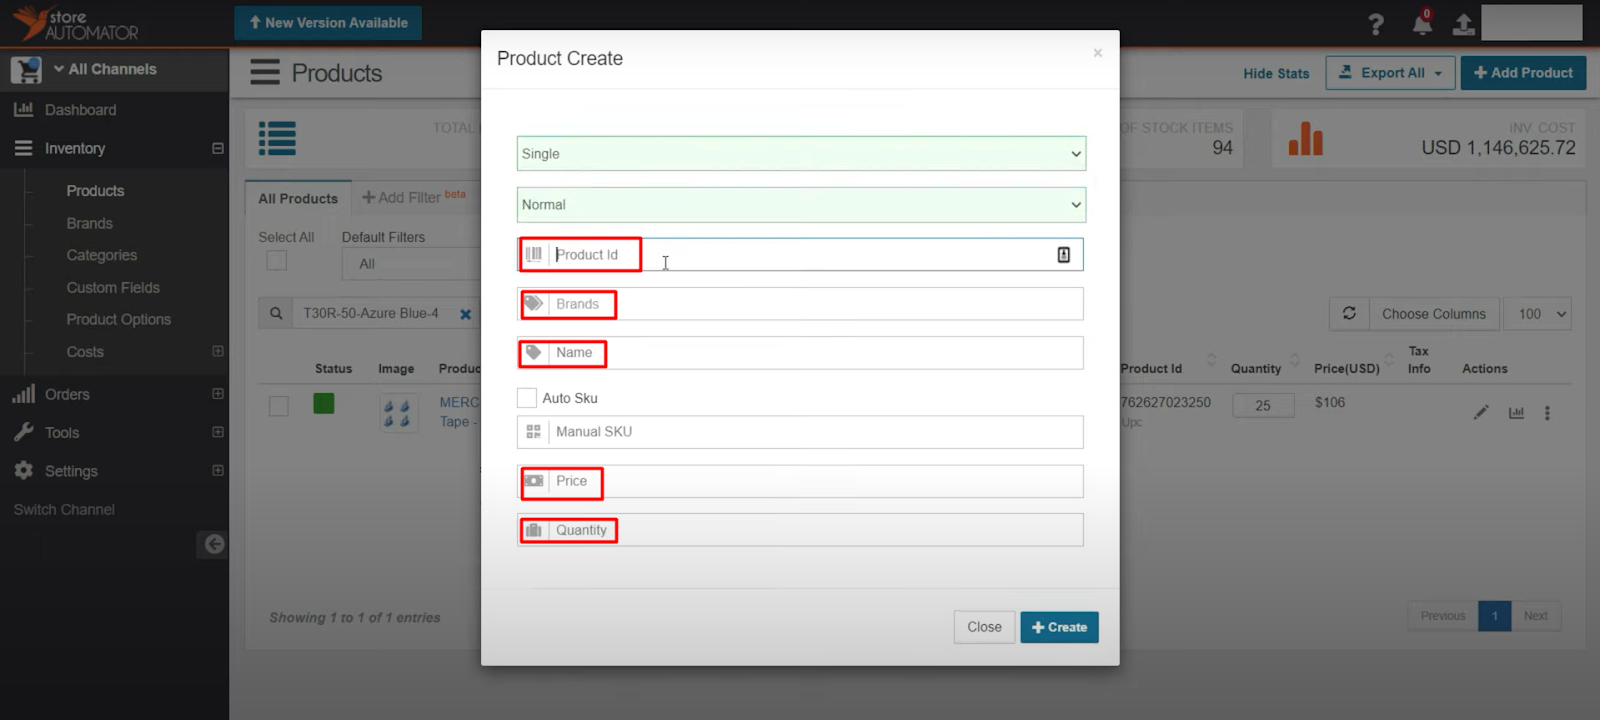
Click on the “+Create” option after fulfilling all the required fields.
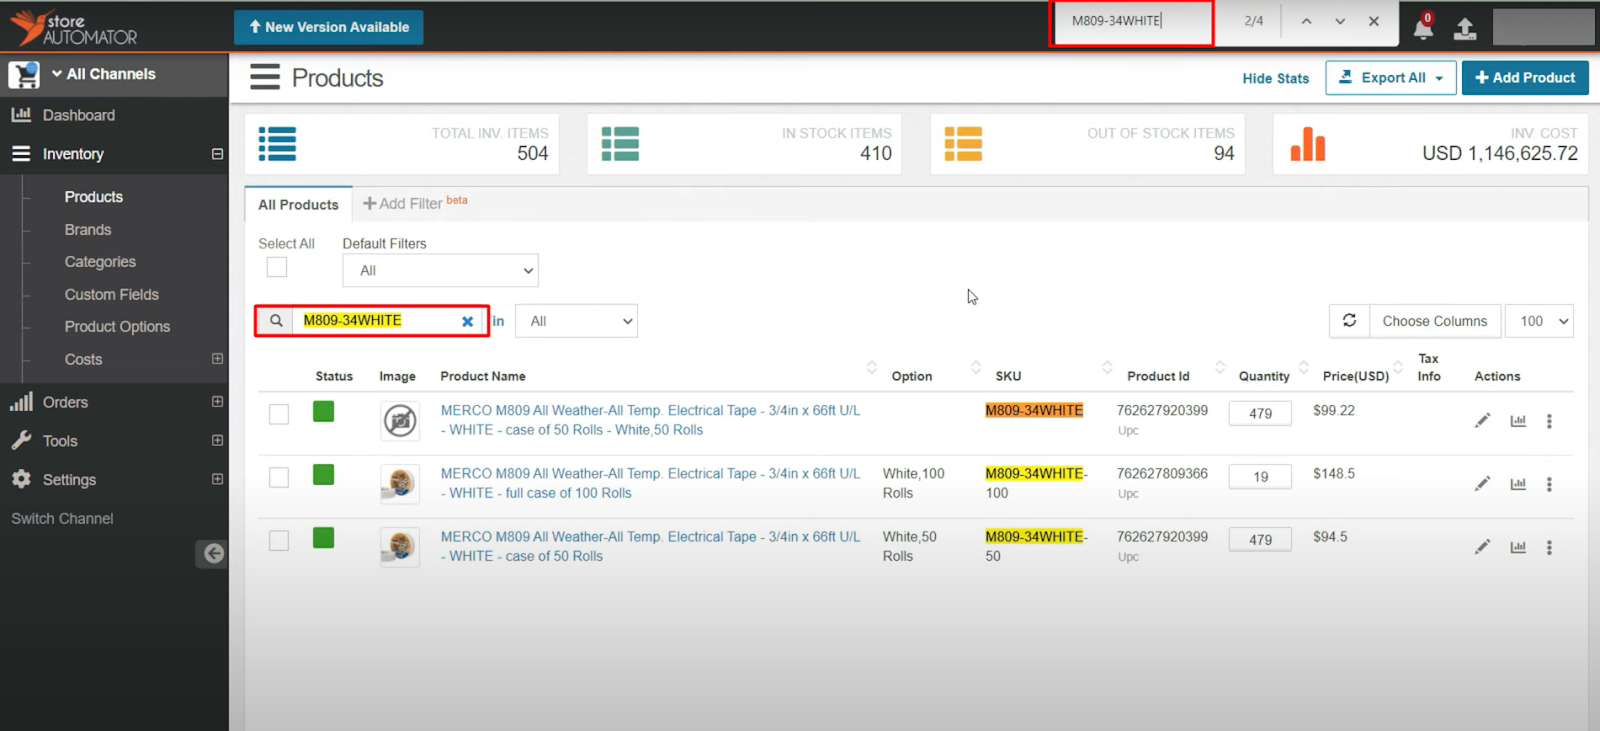
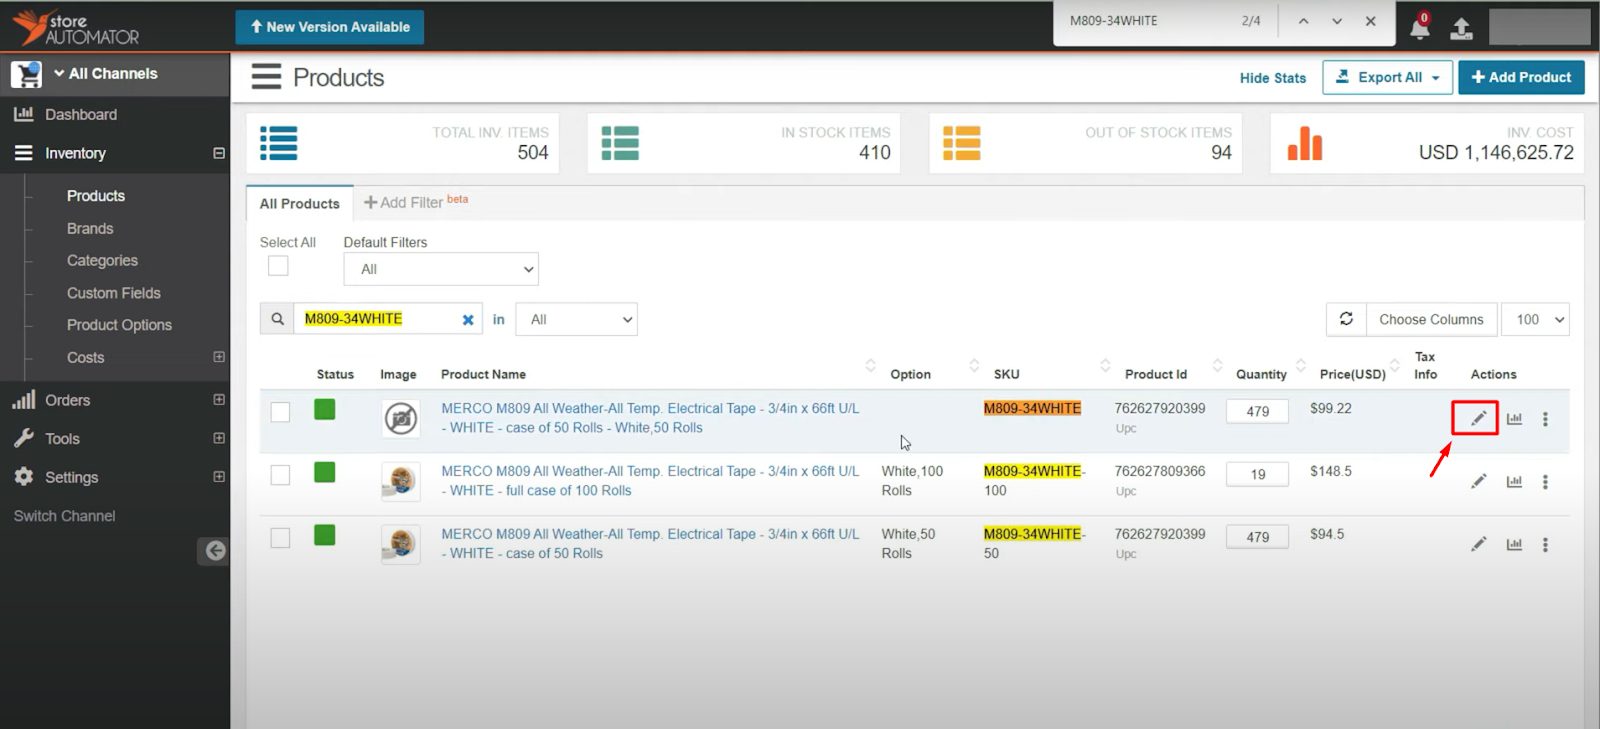
Step 4: Now open the product you have just made. You may find it on the Store Automator product page or by searching for it in the search field.
Under the Action section, click on the Edit icon.
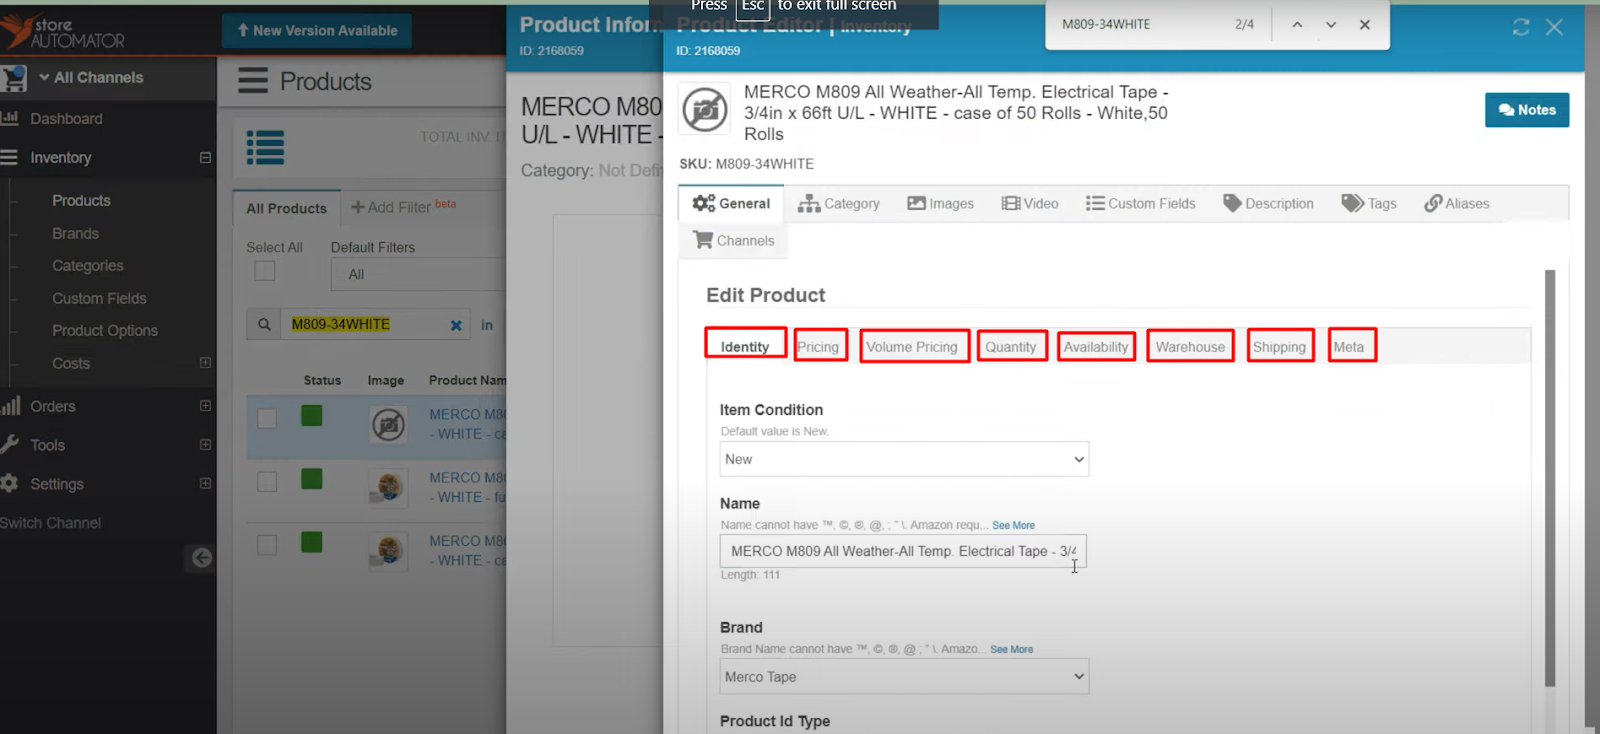
Step 5: After you’ve arrived at this page, select the Edit In Inventory option.
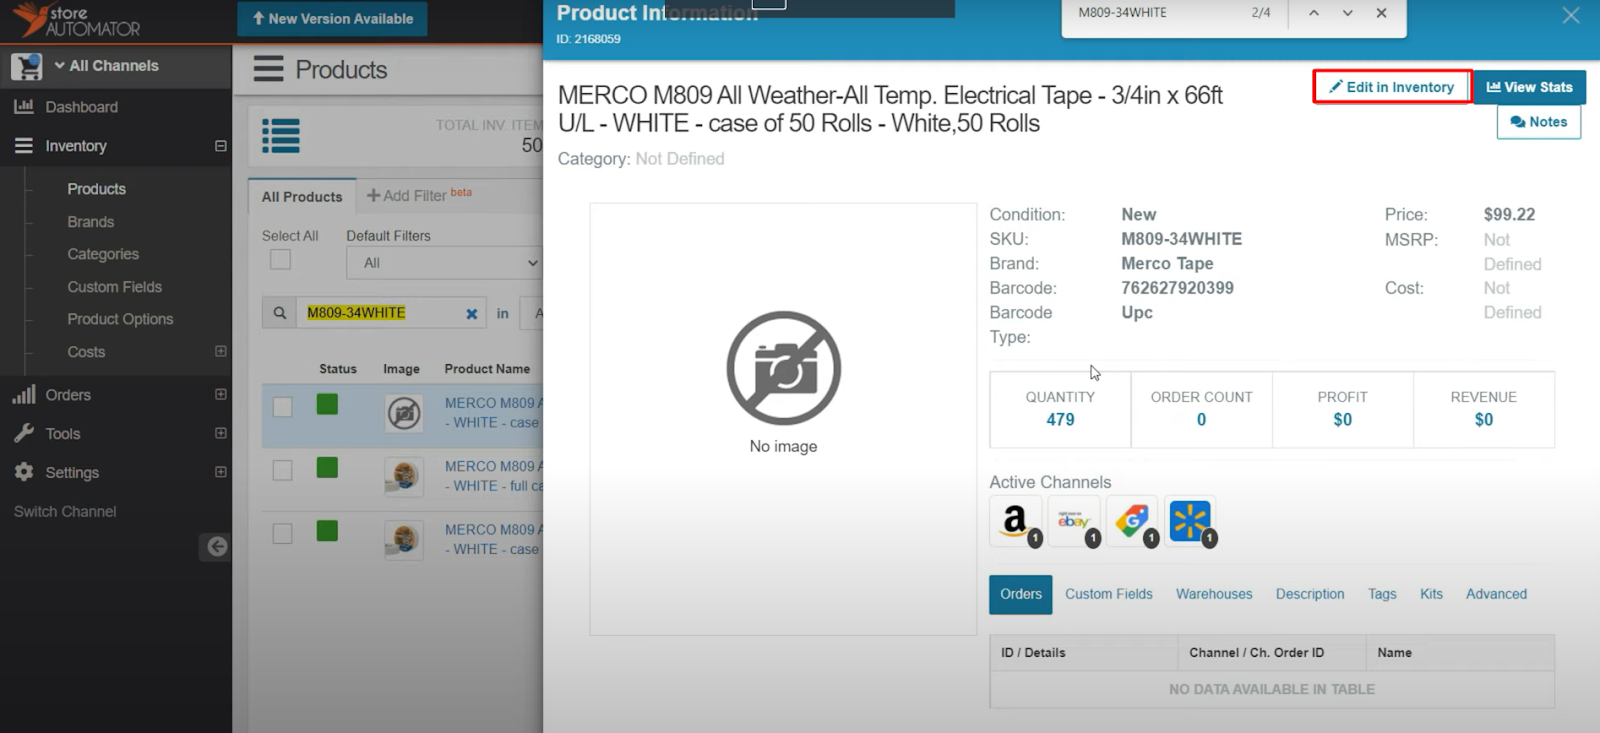
And here provide all of the information from the General section like Identity, Pricing, Volume Pricing, Quantity, Availability, Warehouse, Shipping, and Meta.
Then include the relevant Category, Images, Video, Description, Tags, Channels, and other information. You can also offer Custom Levels, other information, and whatever else is required.
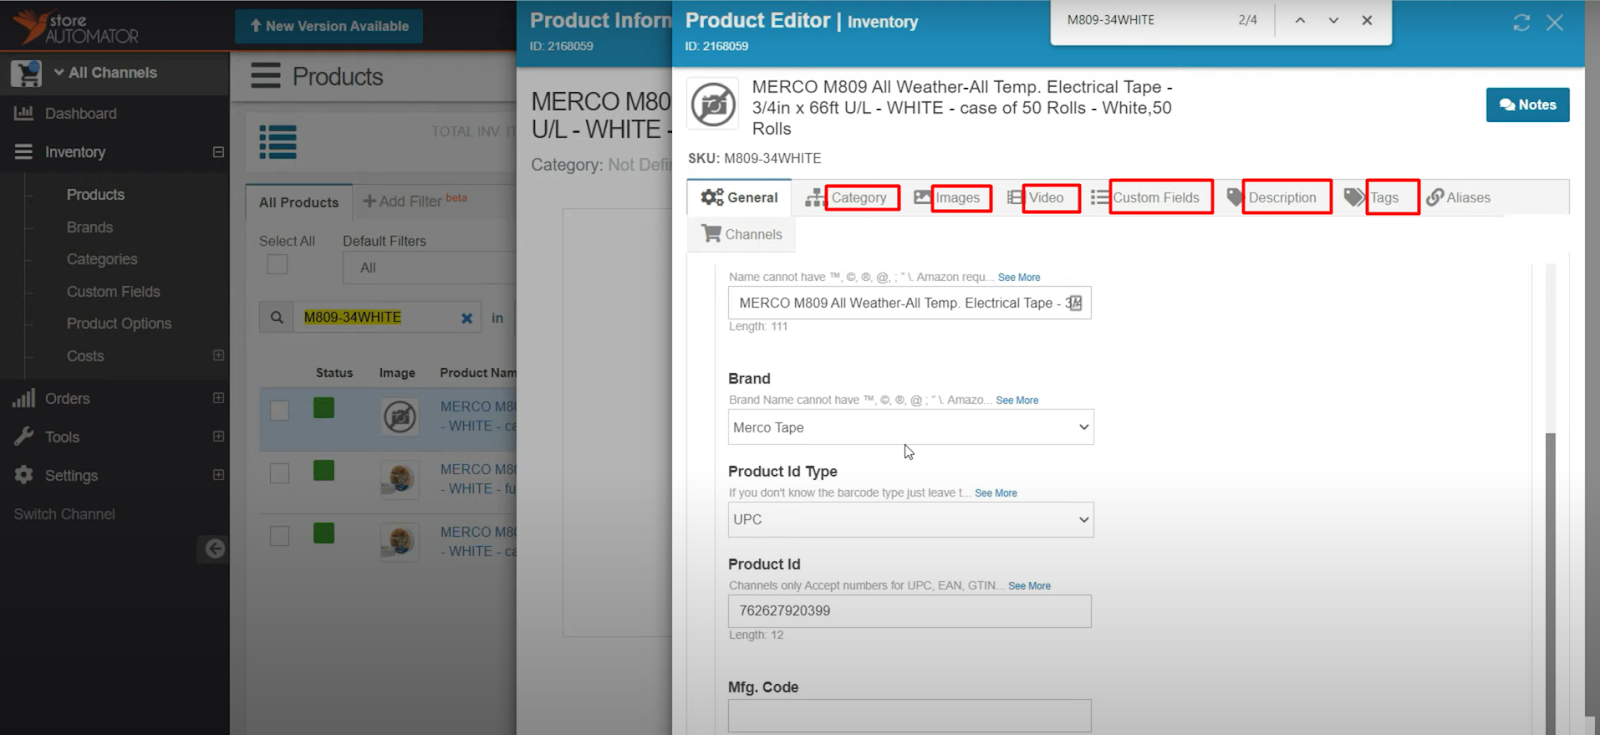
Then, click on the “Save & Close” button.

Finally, a single product is manually created through Storeautomator.
Bulk Process:
Now we’ll show you how to create a “Bulk” listing.
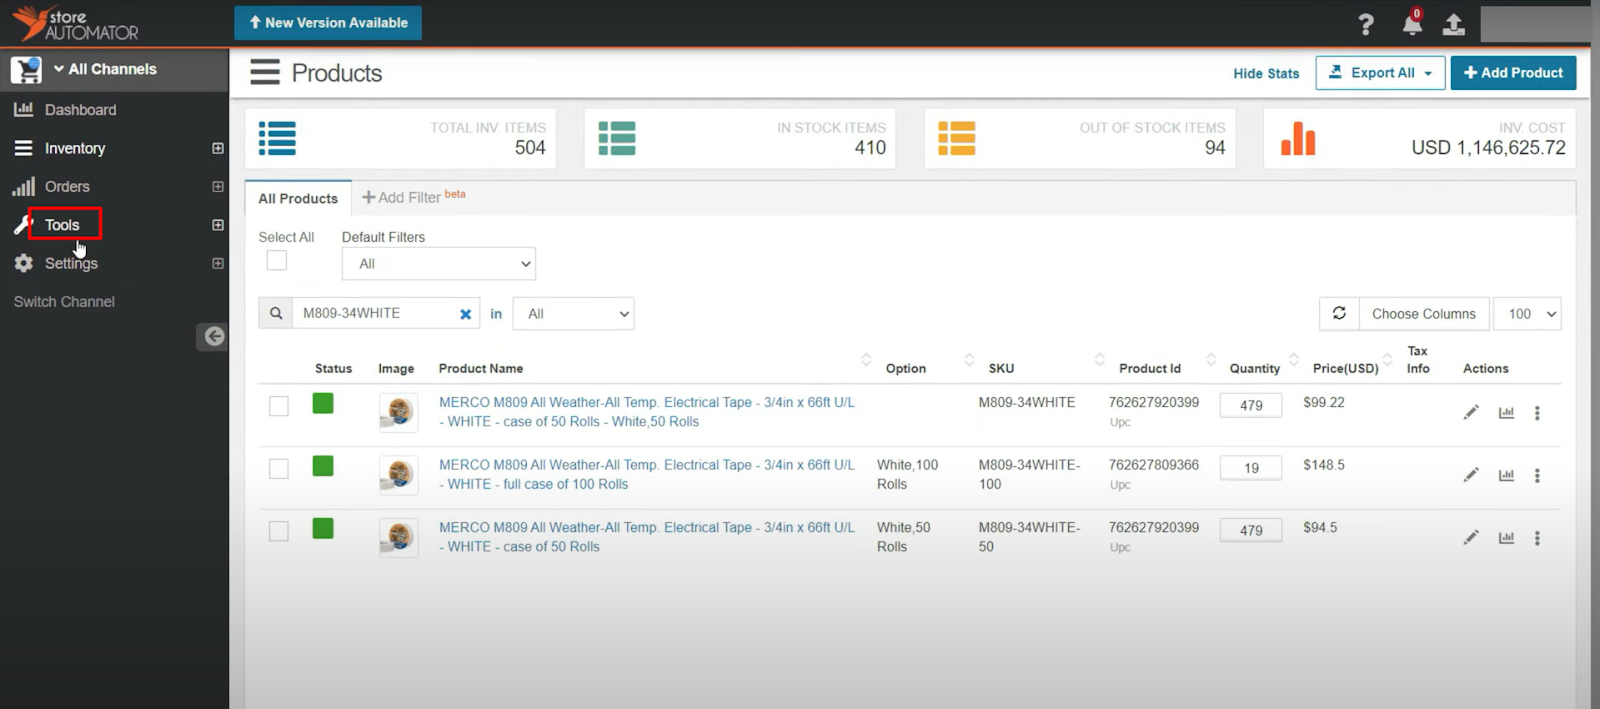
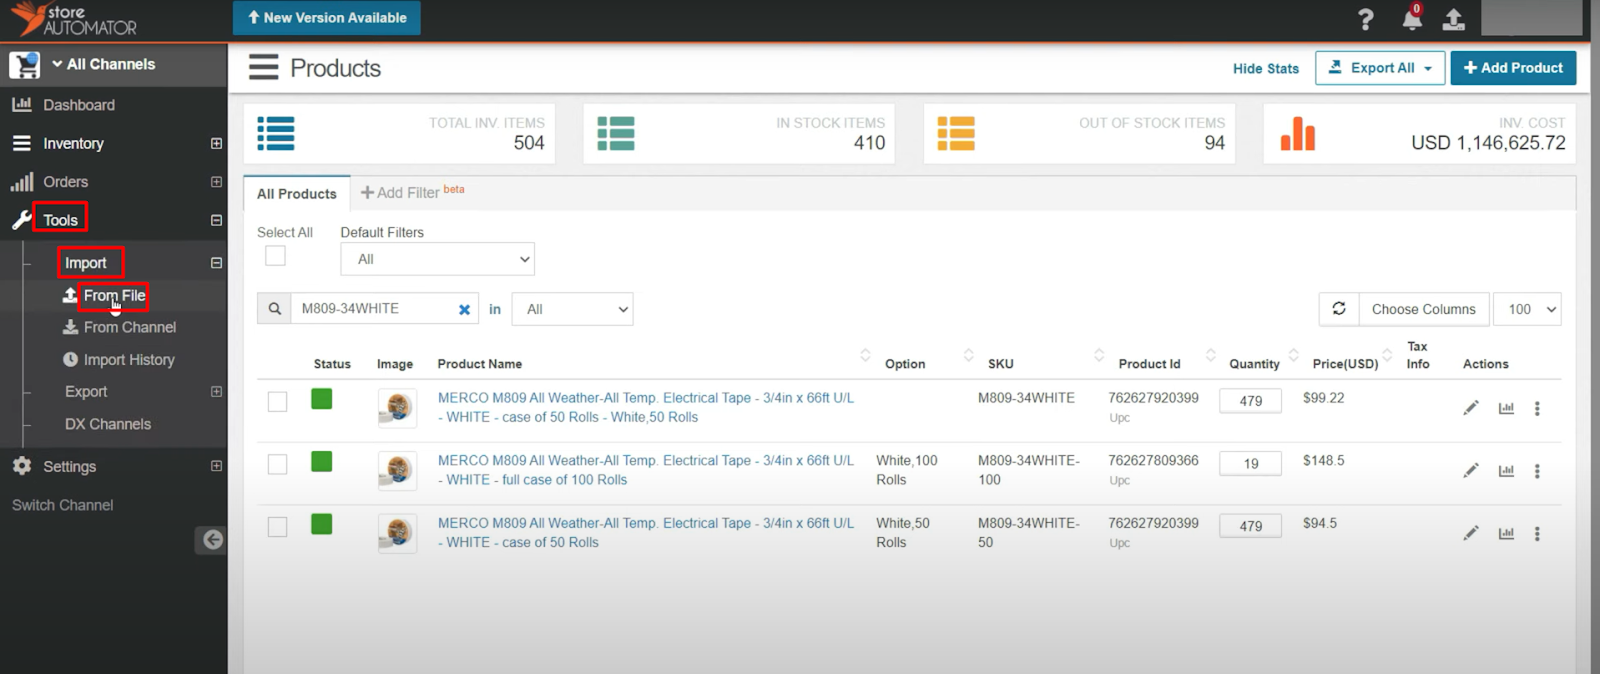
Step 1: At first, click on Tools from the left side of the page
Step 2: Click on Import from Tools drop-down and then click on From File.
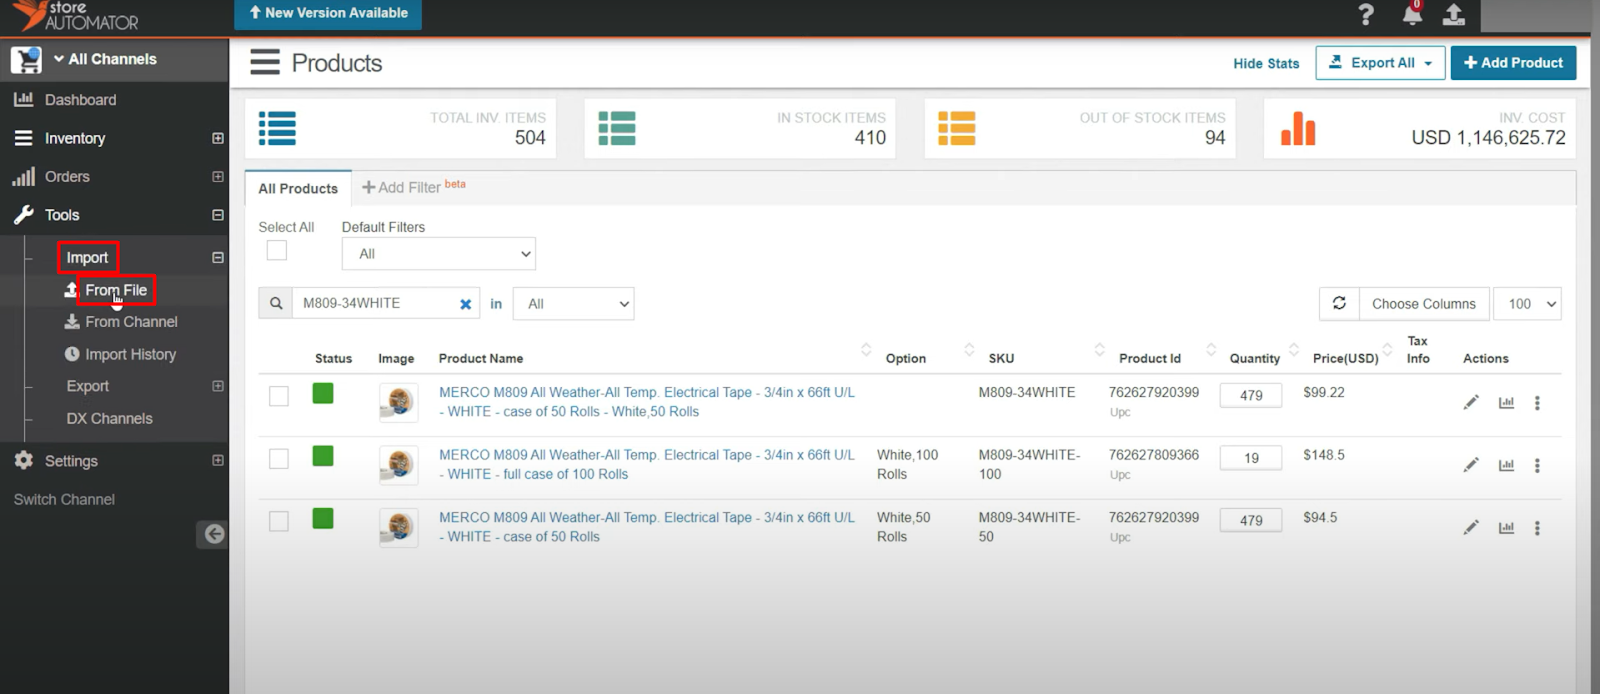
You can see a variety of template files for creating/updating product data information in this section.
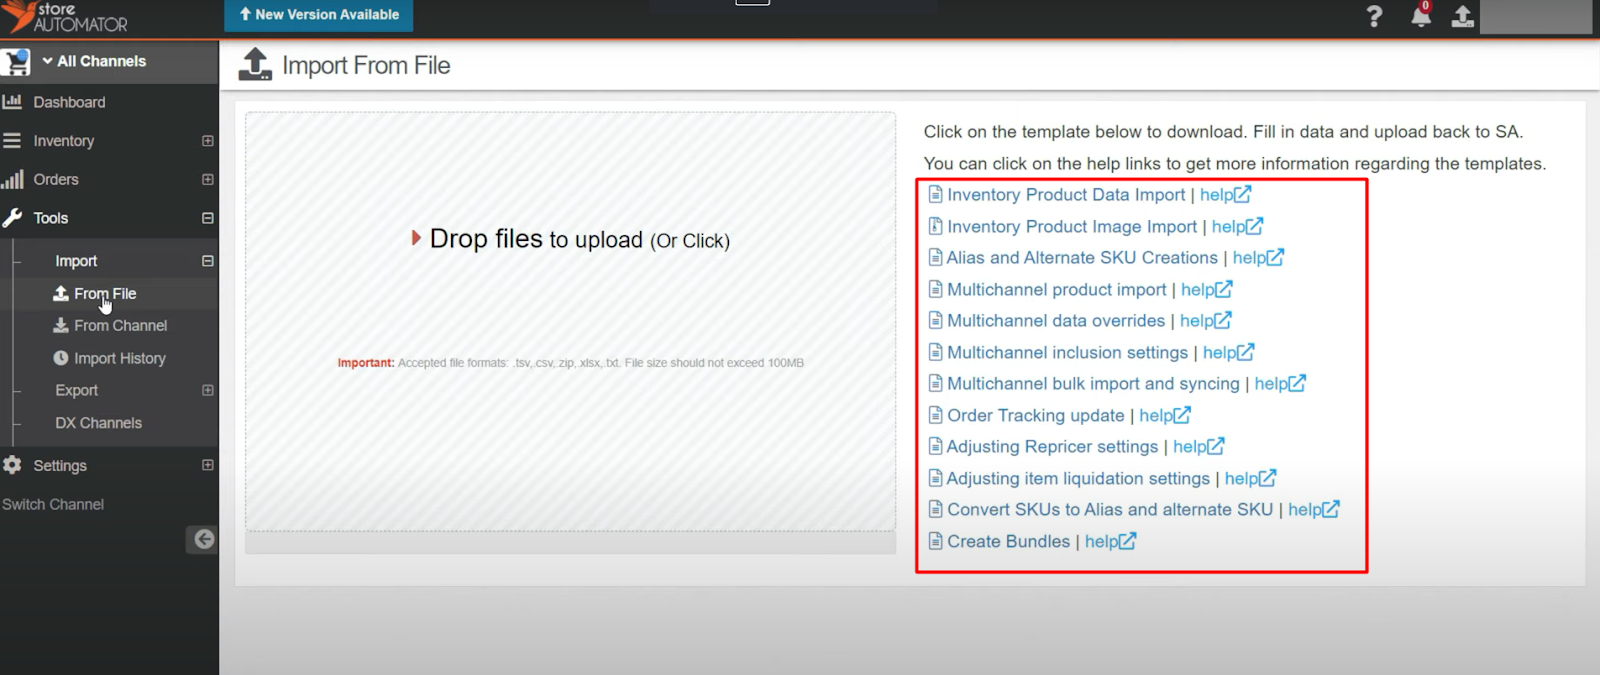
Step 3: Download the Inventory Product Data Import template file. To download it click on the template file name.

Step 4: Now, open the downloaded template file and put in all of the necessary details. Then save the file as a CSV file.

Step 5: Next, go back to the Store Automator site and select Tools, then Import from the drop-down menu again and select From File.
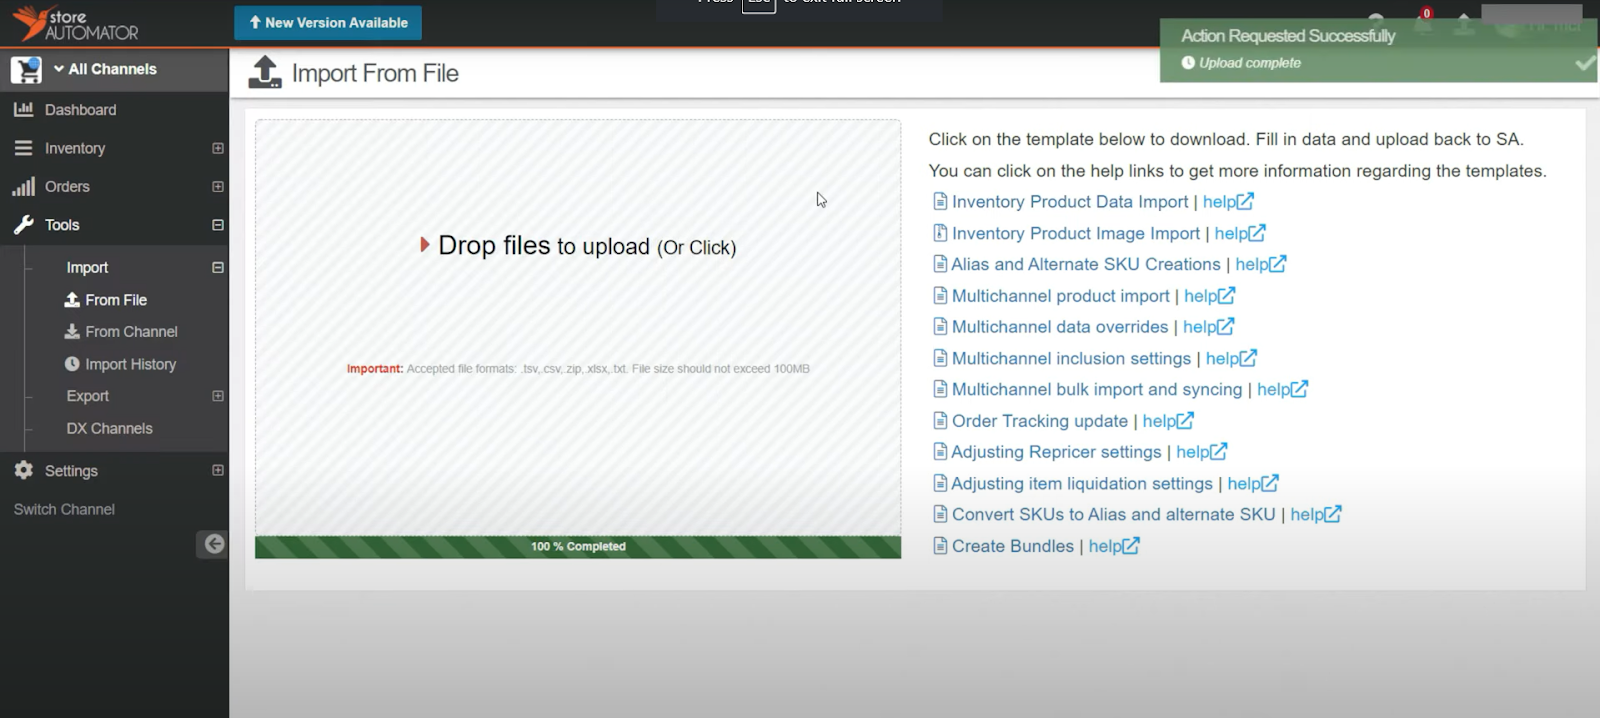
Step 6: Here, browse or drop your desired file here.
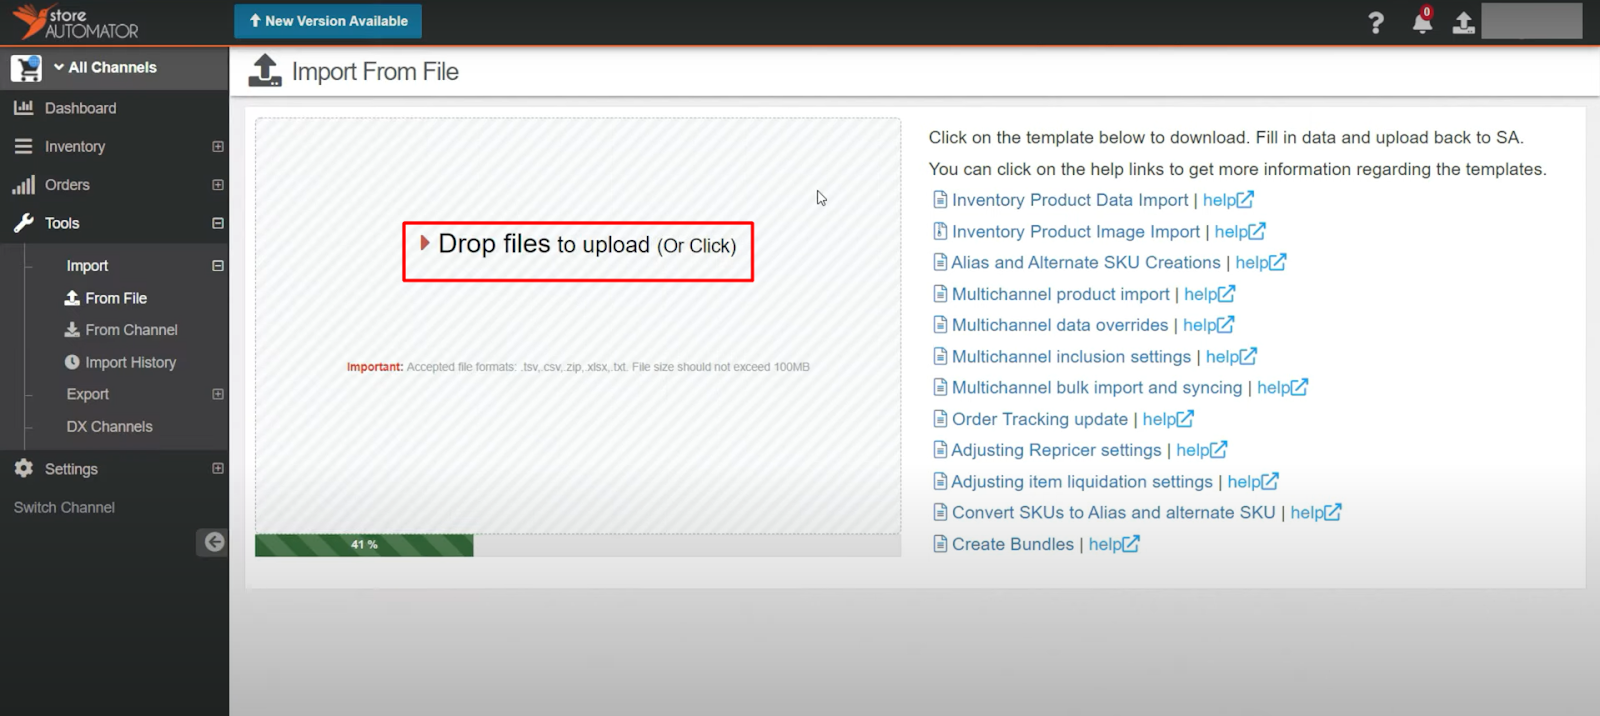
The creation of your products will take a few moments.
So that’s everything you need to know about using Store Automator to add your products.
To conclude, Store Automator is a great multi-channel management tool for multi-channel sellers. Everything you need to do for your business, you can find all in one place at Store Automator. Please leave a comment in the comment box if you have any queries or require any extra assistance, and we will respond with the appropriate solution.