
Learn how to add products to your catalog using the SellerCloud interface. SellerCloud offers a number of ways to add a product to your catalog. You can manually add products through the SellerCloud interface one by one as well as add products in bulk by uploading a file. You can also add products via sales channels. In this tutorial, we’ll look at Add product using sellercloud interface.
Before starting the tutorial, let me introduce you with sellercloud.
SellerCloud
SellerCloud is an innovative multi-channel platform. It provides us with a single point entry catalog for all product specs. It has multiple software features that wrapped in one bundle.
Sellercloud is dedicated to helping online retailers. Through processes like synchronization, simplification, and automation functionalities SellerCloud enables retailers to meet the challenges facing their business, especially those who run selling multiple channels.
In conclusion,
It is an innovative platform which provides an effective set of tools to manage the full window of multi-channel selling.
Some amazing features of SellerCloud:
- Inventory: SellerCloud allows you to monitor and manage your inventory of all channels.
- Catalog: It is basically a single point entry for all multichannel listings.
- Orders: For all the channels, orders can be handled in all aspects.
- Shipping: You can make secured shipping with top shipping carriers without using any third-party apps.
- Purchasing: You will refrain from going out of stock.
- Multichannel: Enables you to sell from leading channels all over the World and make big revenues.
Today we will show you “How to Add Product using SellerCloud Interface
Add product using SellerCloud
Step 1:
First of all, go to the SellerCloud dashboard. Here you can have a clear view of your new customers meaning today’s orders, Saved Inventory Searches, Saved Purchase Searches, My Queued Jobs, Today’s Orders, Saved Order Searches & Failed Shipped Notifications and some other functionalities for Sellercloud.

Step 2:
Then click to the Inventory tab.

Step 3:
In the inventory portion, you will see that there is a huge menu that allows us to do many things. Each & every menu command has their own purposes. But for this article, we need to add a new product through the sellercloud interface. So we will choose “Add New Product”

Step 4:
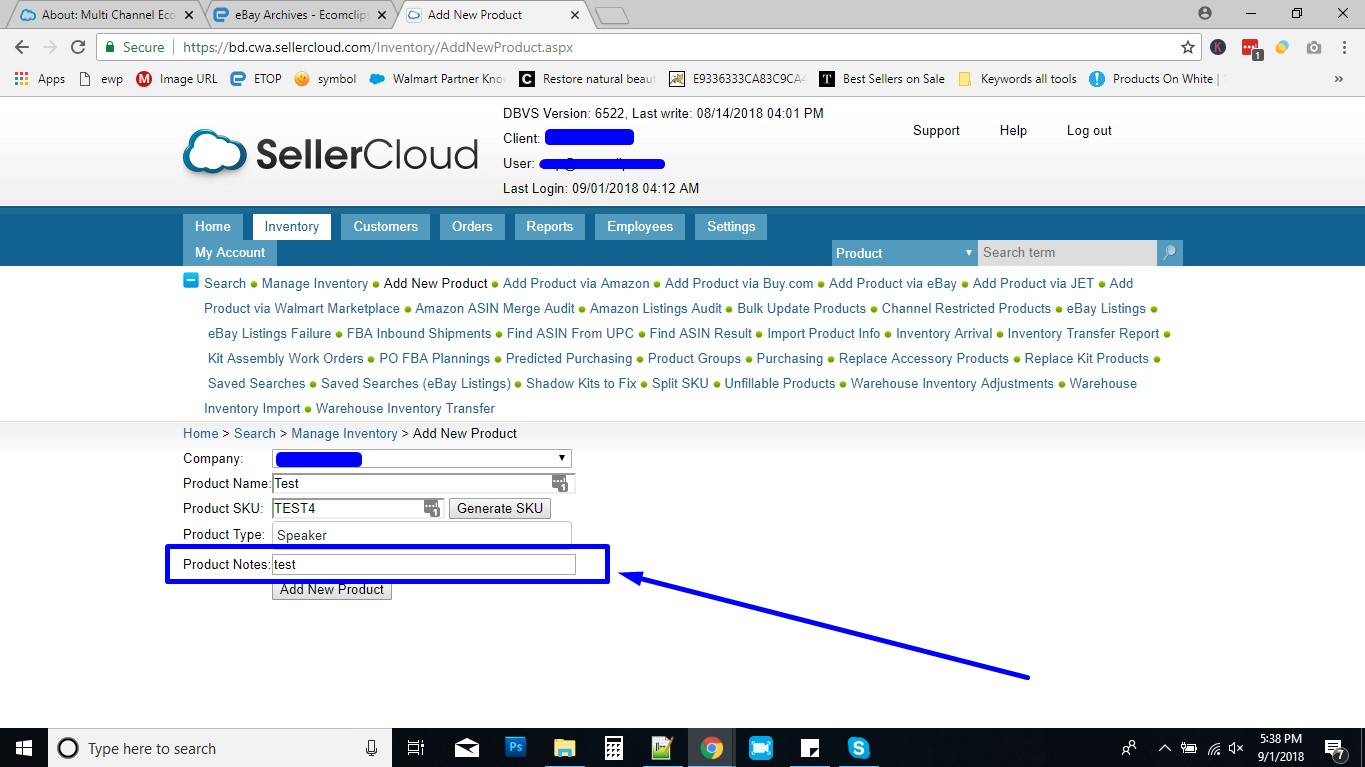
Then the following page will have 5 text input boxes where you have to provide information. Basically, this is the primary stage to add a new product. In this stage, you have to provide all the details and pieces of information about the product.
For 3 boxes product SKU, product type name& product name those boxes must be filled up with accurate informations. Otherwise it will show error.
First choose the company name where you want to add your product for your desired marketplace from the dropdown box.

Step 5:
Give your product name as per as your product

Step 6:
Now give your product an SKU. It can be whatever you want.

(** Note : If you want that SellerCloud will create your product SKU, then click the “ Generate SKU” button. After clicking SellerCloud will randomly create a SKU.
Step 7:
Give your product type as per as your product (like: Speaker, mobile etc…)

Step 8:
Give product a note for your better understanding.
Step 9:
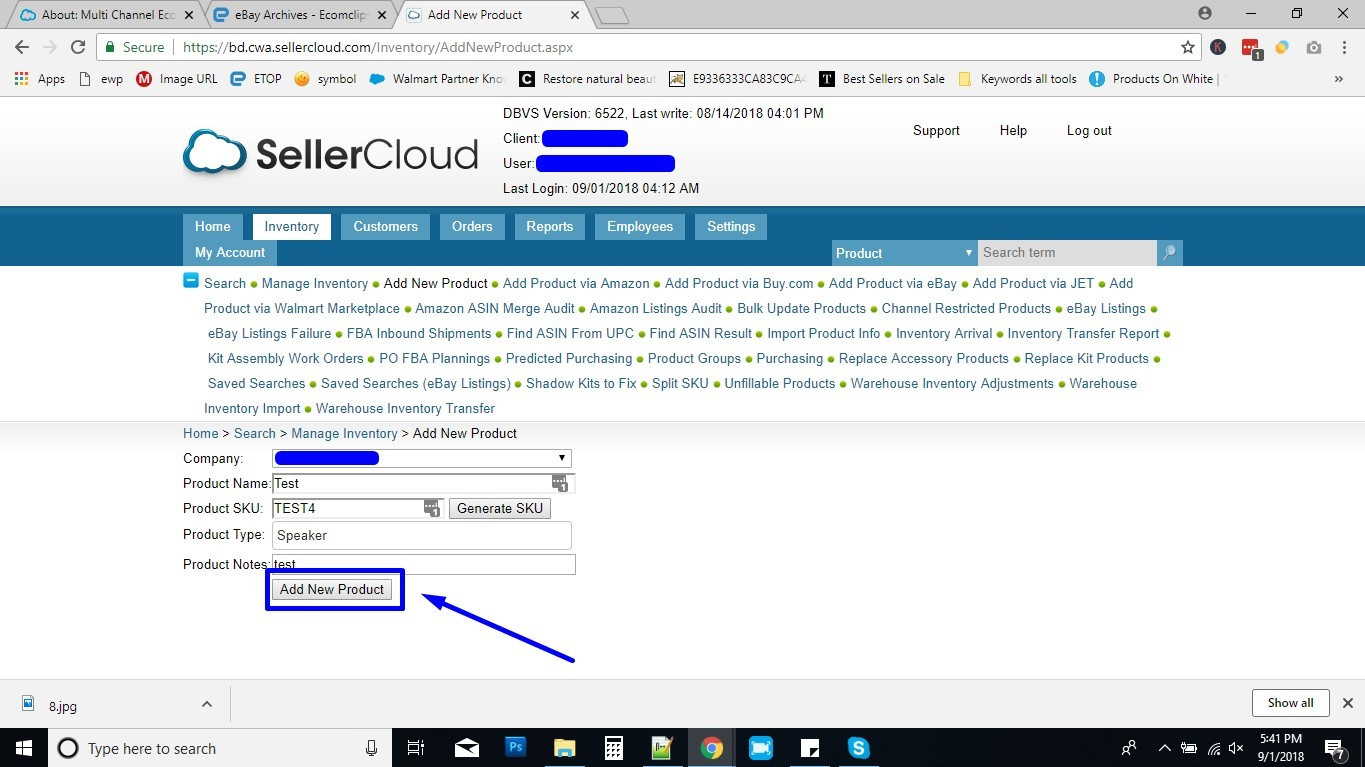
After completing all the 5 text boxes information please click “Add New Product” button for next stage.
Step 10:
In this stage you will able to enter products attributes. Similarly, we know that there is some important information we need to upload a new product in Multiple Channels. Some of the information will always be the same for all the channels such as Title, Description, Product SKU, Product Price, Upc, Quantity, Image, Dimensions etc. All information is not mandatory. You can only provide the most important information to get started really quickly or you can be thorough. Please check my following screenshots to get some ideas about some of this information.

Step 11:
After providing all the product information, scroll down the page and click the “Save Product” Button to finish the process.

Besides Using SellerCloud, you won’t need to reconcile between software programs or departments. You can manage your listings on all the channels from one single point. Also, you can edit and manage all your product details such as image, descriptions, prices. That saves a whole lot of time as you won’t have to re-enter information for each channel individually. SellerCloud enables us to track inventory which in the way to both users and customers. You can set shipping preference for each of your products.
In conclusion,
There are lots of multi-channel software on the internet. But if you ask me what will we use?
As an e-commerce specialist, We will definitely choose sellercloud. Because of it the best multi-channel software right now.
For now, this article is END. In the next article, we will come to another topic about another marketplace. So that you can boost up your business.
Please, Share your ideas with us, we tried to help you with an easier way,if you know other easier ways please comment.
Have a nice Day !!