
Magento offers various tools for creating a successful store. One of its important features is that it has a well-developed system of attributes and attribute sets. These allow you to organize your products easily and create a user-friendly catalog. If you’ve already created product attributes, you need to assign them to attribute sets. In this article, we will show the step-by-step process of creating and managing Attribute Sets on Magento.
What is an Attribute Set on Magento?
Magento attribute set is a collection of attributes that apply to specific types of products within your online store. When adding products, attribute sets make the process by allowing you to group related attributes. This way, you don’t have to assign individual attributes one by one for each product. There’s no limit to the number of attribute sets you can create. This means you have the freedom to design and customize attribute sets based on your unique product categories.
To create and manage the attribute sets, navigate to the Magento admin panel and follow these easy steps:
Create an Attribute Set
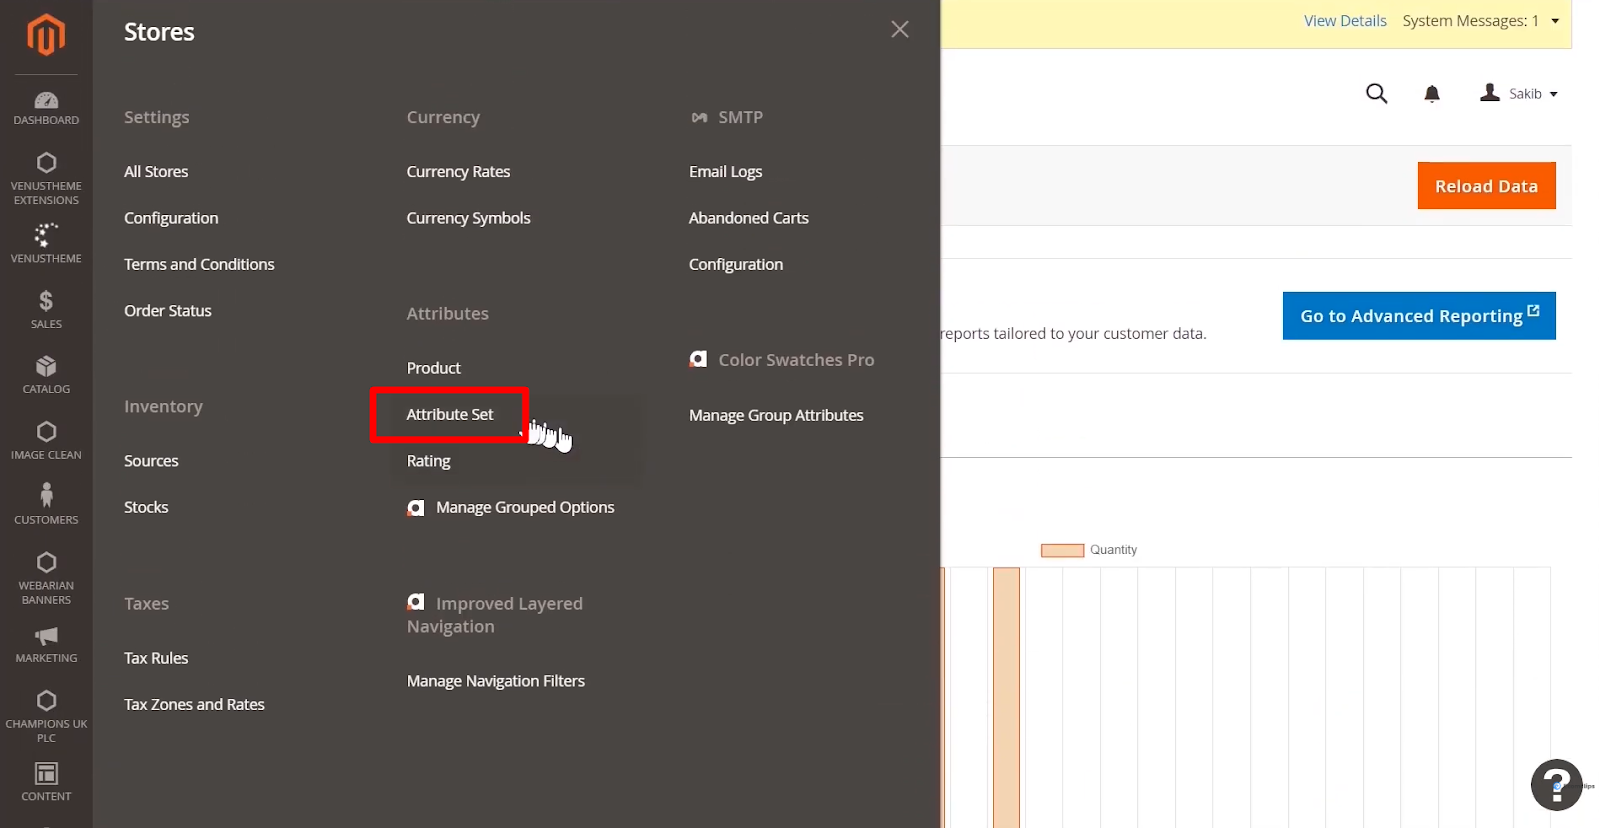
Step 1: Log in to your Magento account. Scroll down until you find the “Store” option in the left bar and click on it.

Step 2: On the Store page, locate and click on “Attribute Set.“
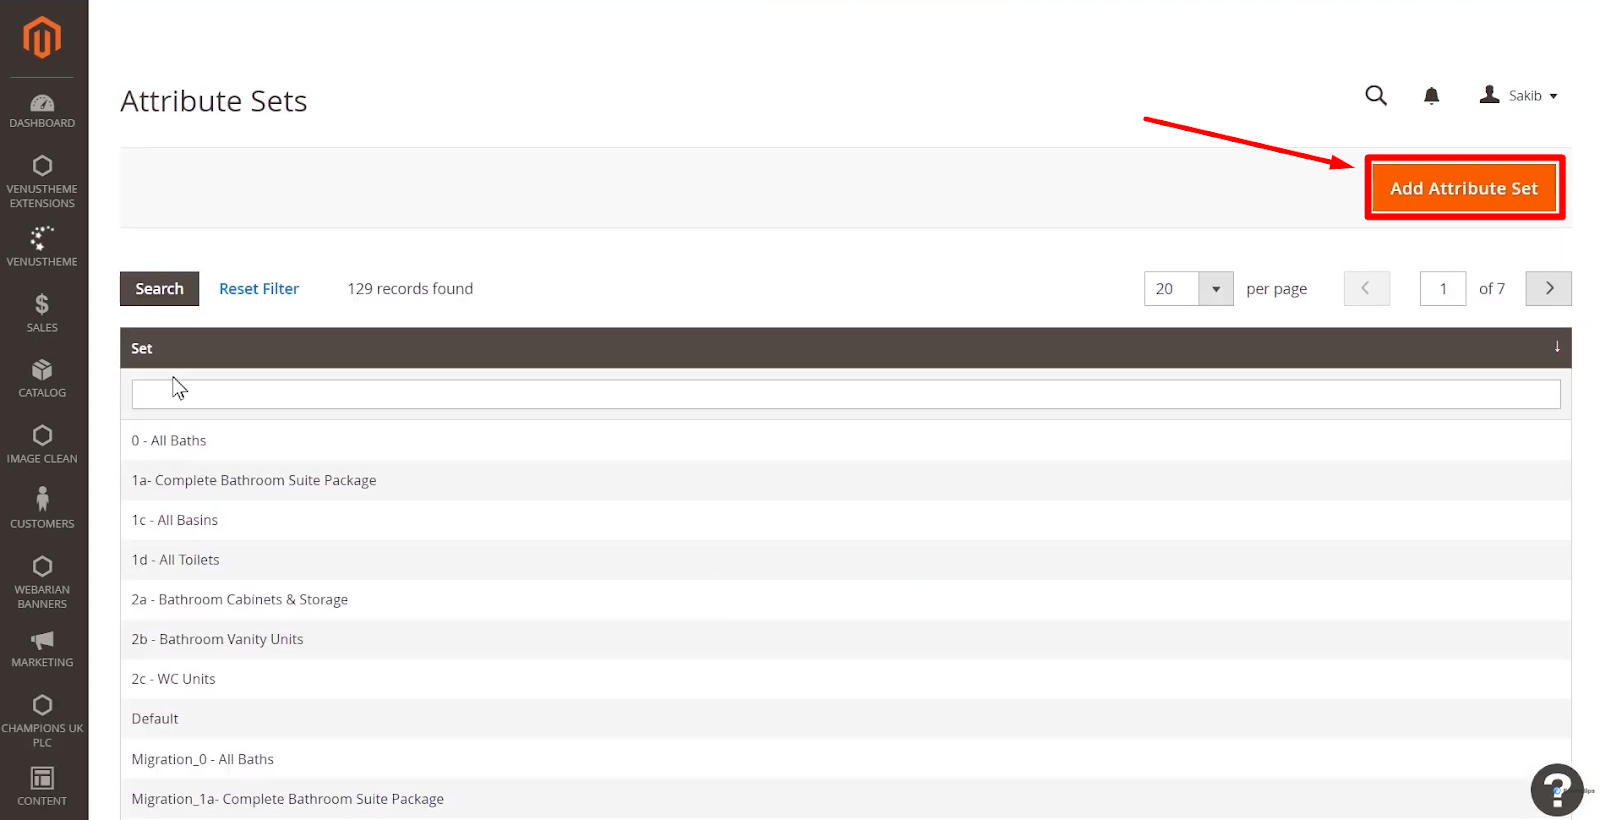
Step 3: Click on “Add Attribute Set” at the top right of the screen.
Step 4: Give a name to your attribute set and choose the preferred base for the attribute set from the dropdown menu. Once done, click on “Save.”

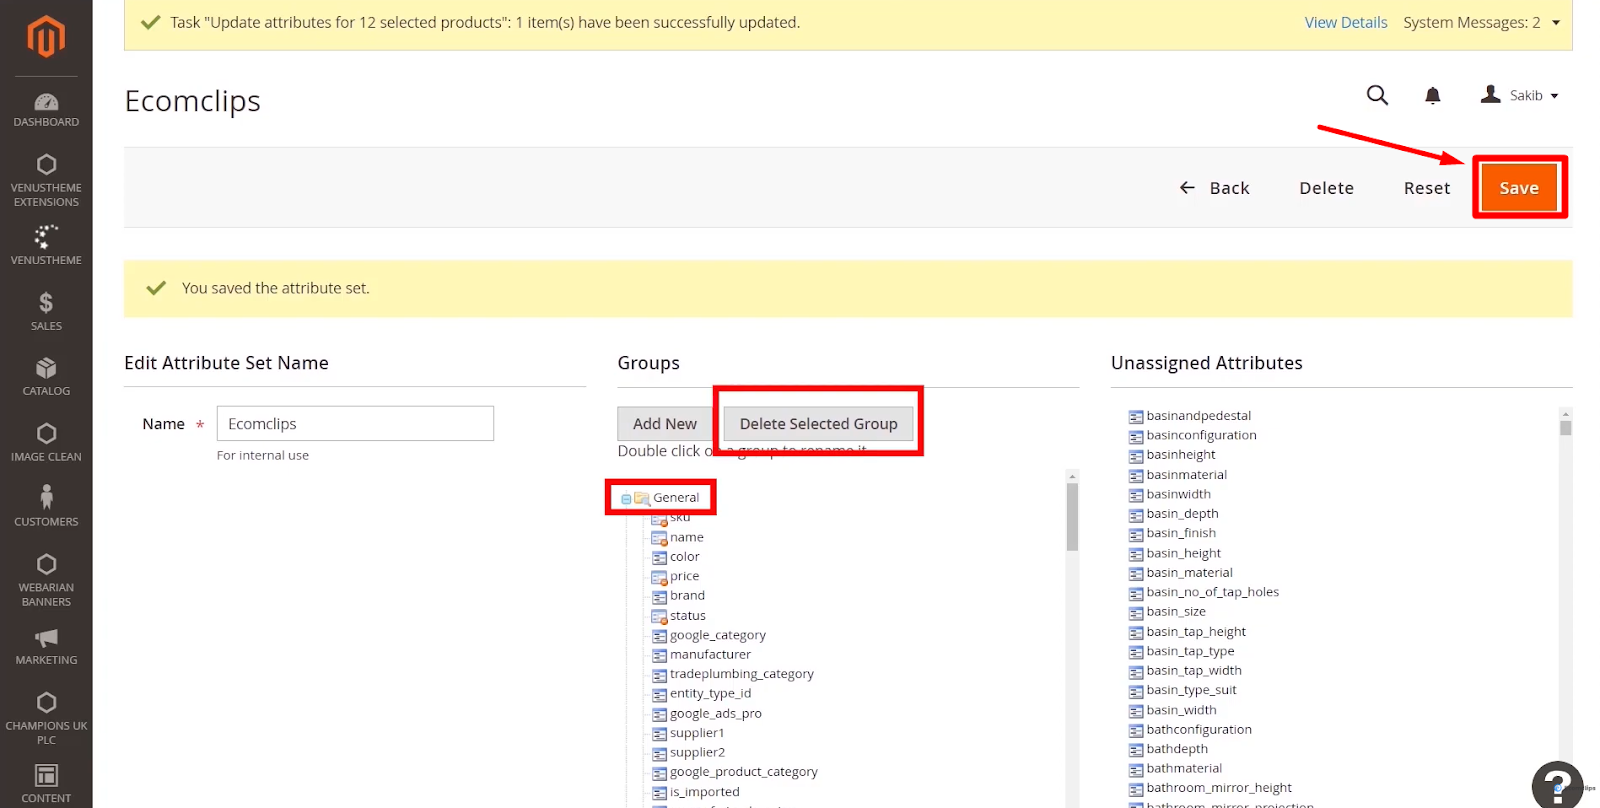
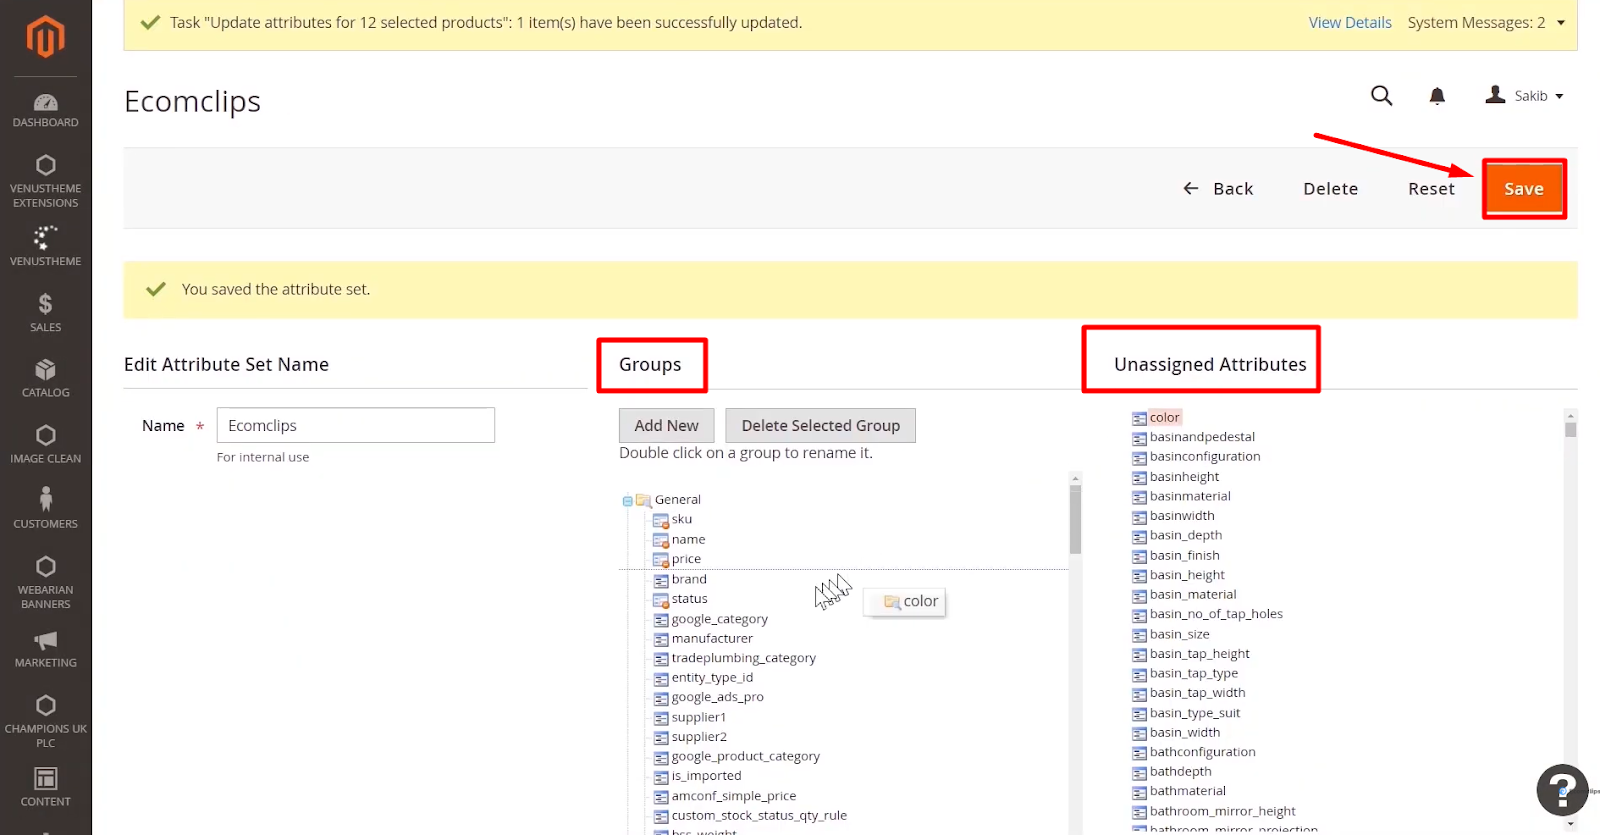
Step 5: After that, a new page will appear. Drag attributes from the “Unassigned Attribute” section to the desired groups to add them to the attribute set.
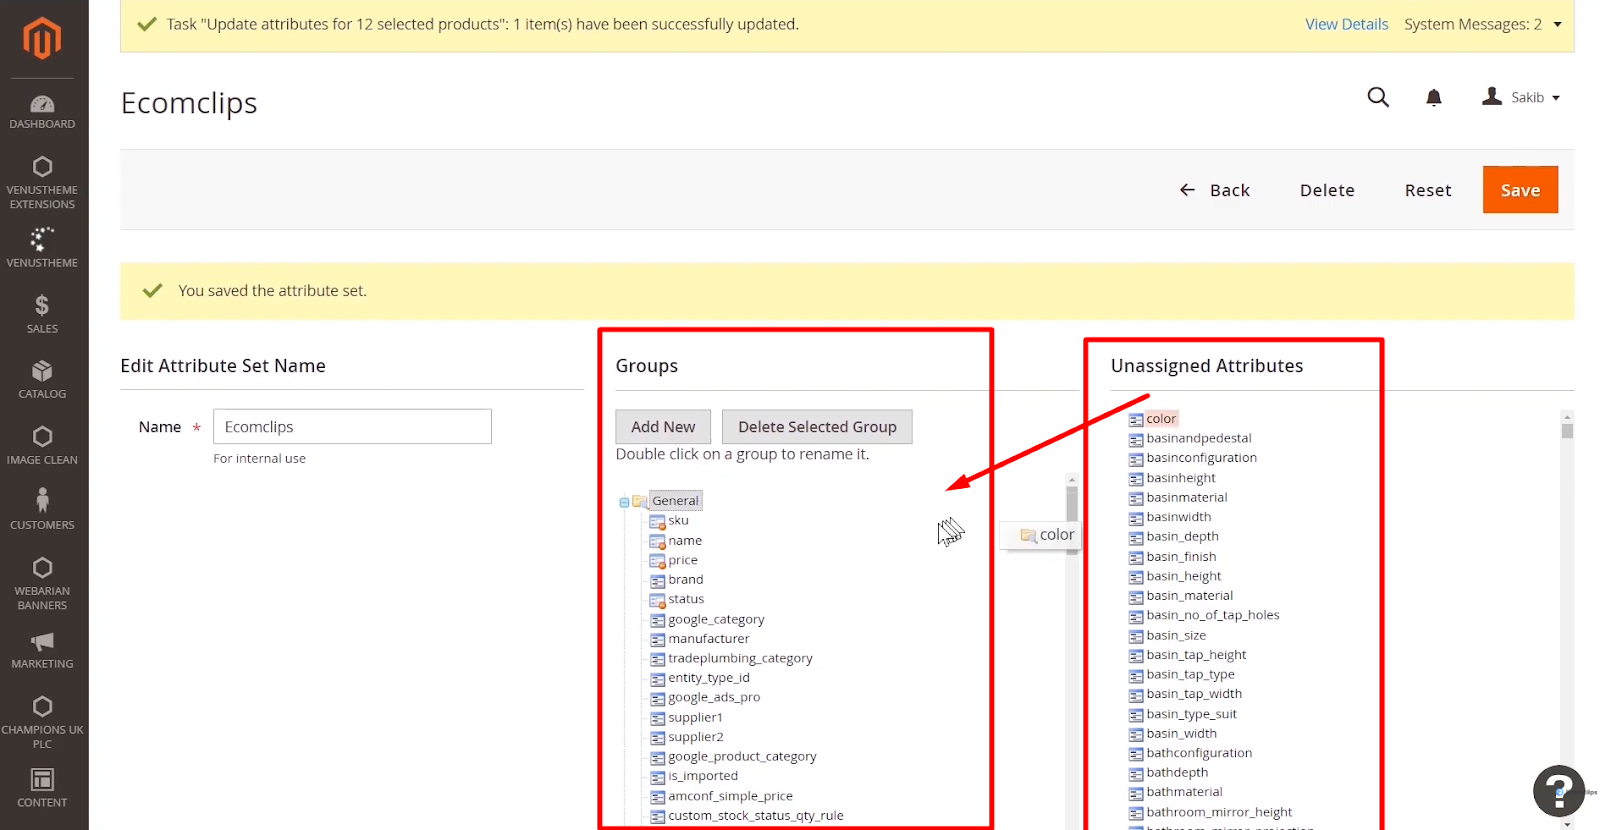
To remove attributes, drag them from the group back to “Unassigned Attributes.“
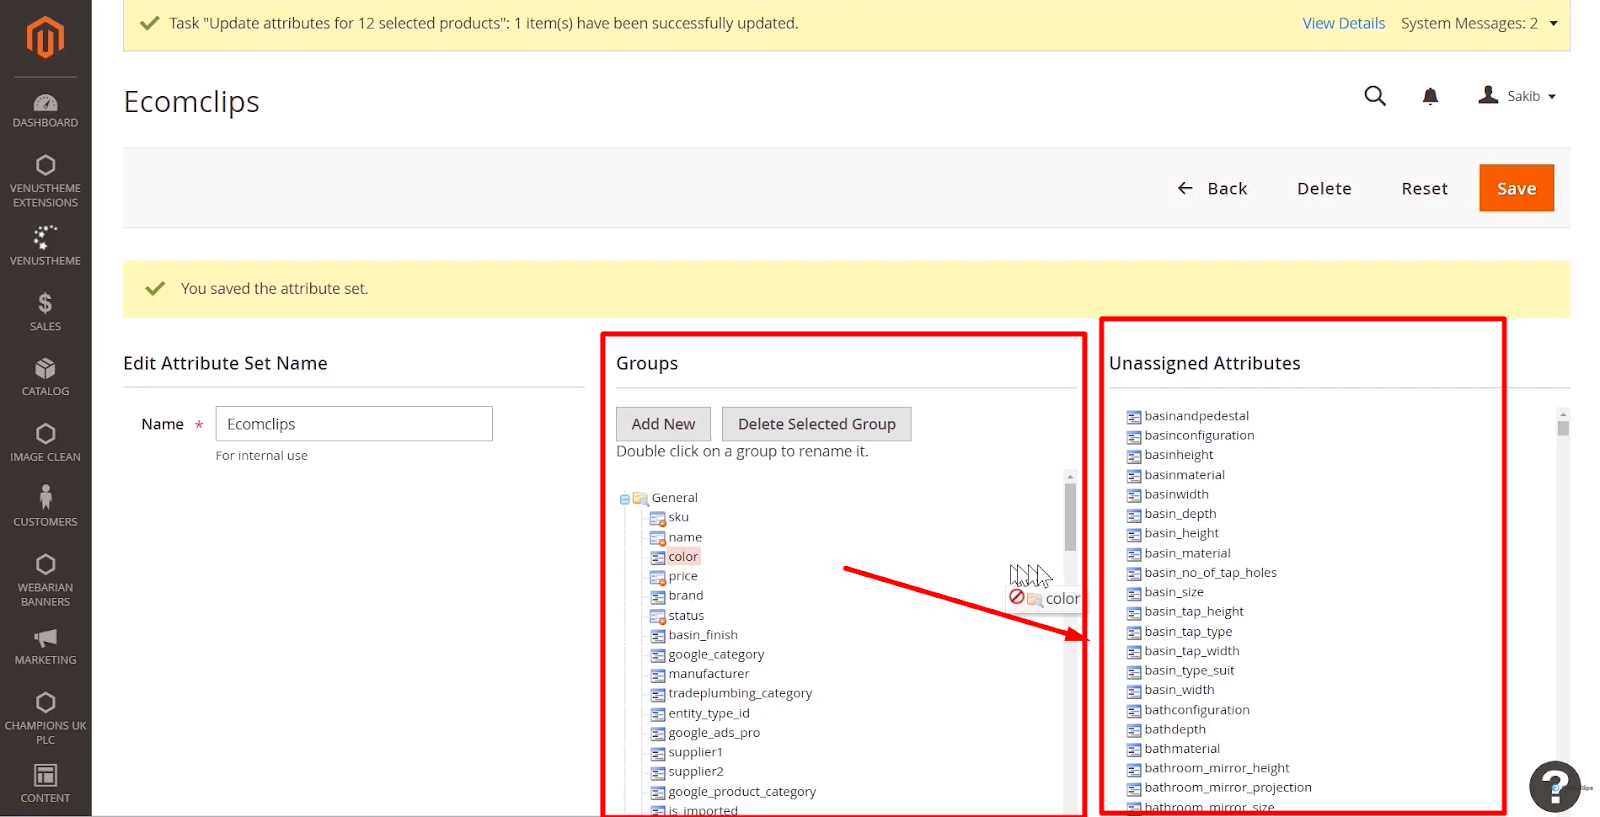
Step 6: Optionally, delete any particular group of attributes by selecting the group and clicking on “Delete Selected Group.” Click on “Save” to save the attribute set. Your attribute set is now successfully created.
Delete and Manage an Attribute Set
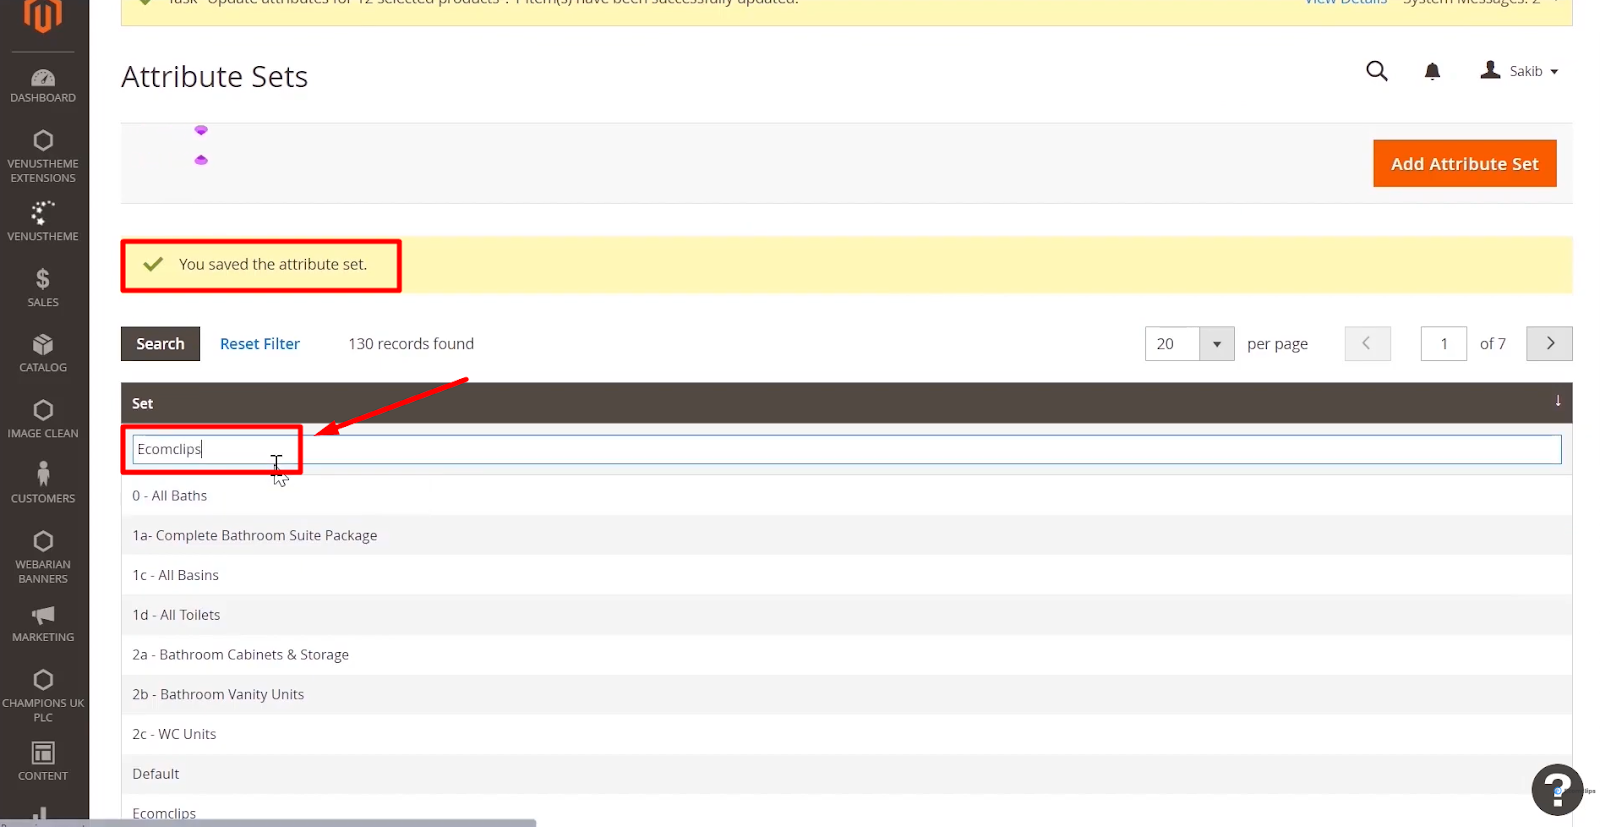
Step 1: To find a specific attribute set, search for its name in the previous Attribute Sets section.
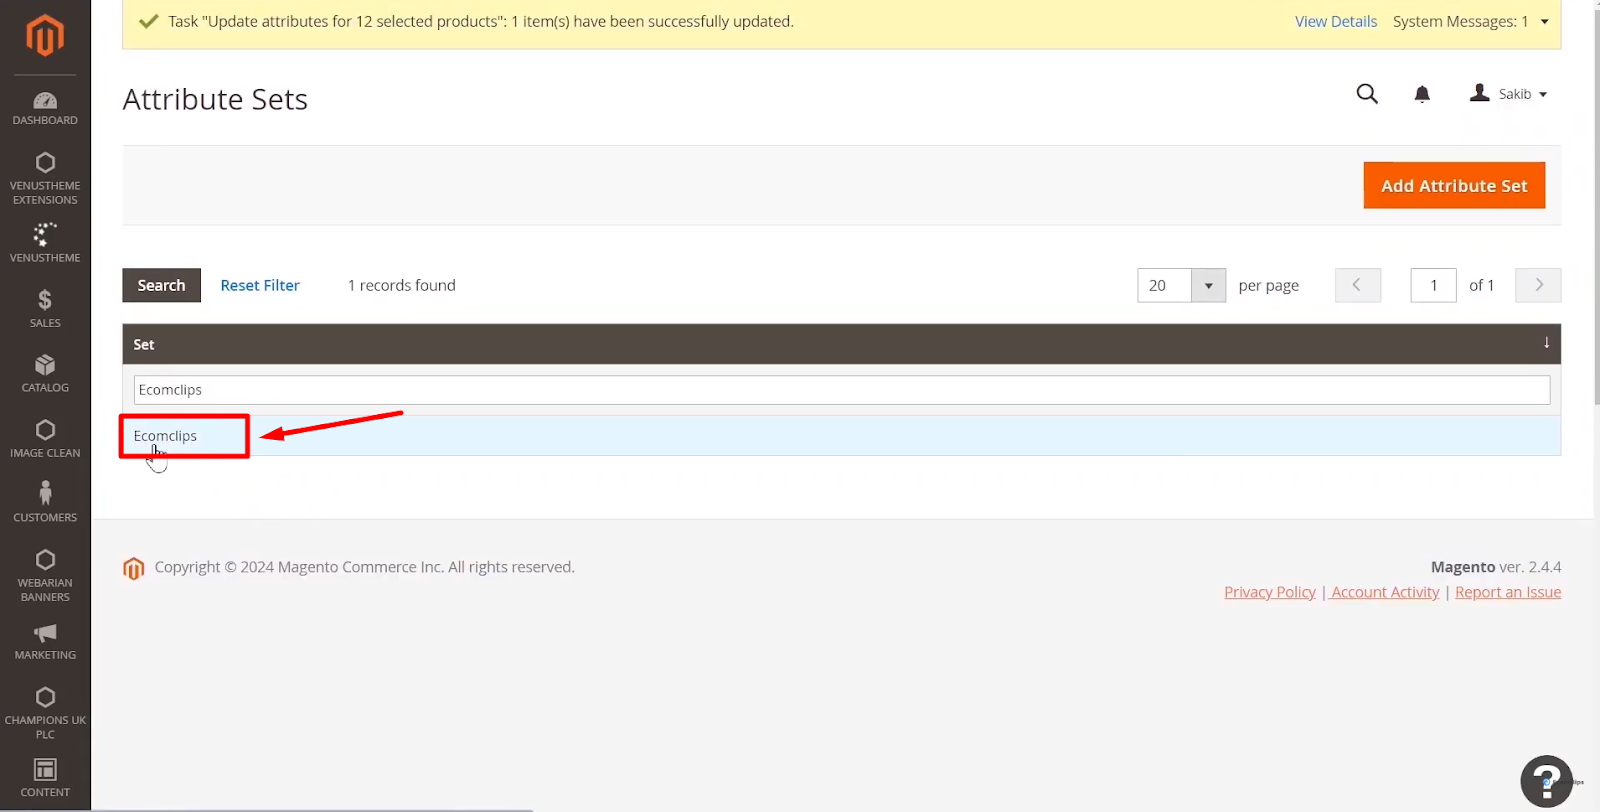
Step 2: Click on the name of the attribute set you want to manage or correct.
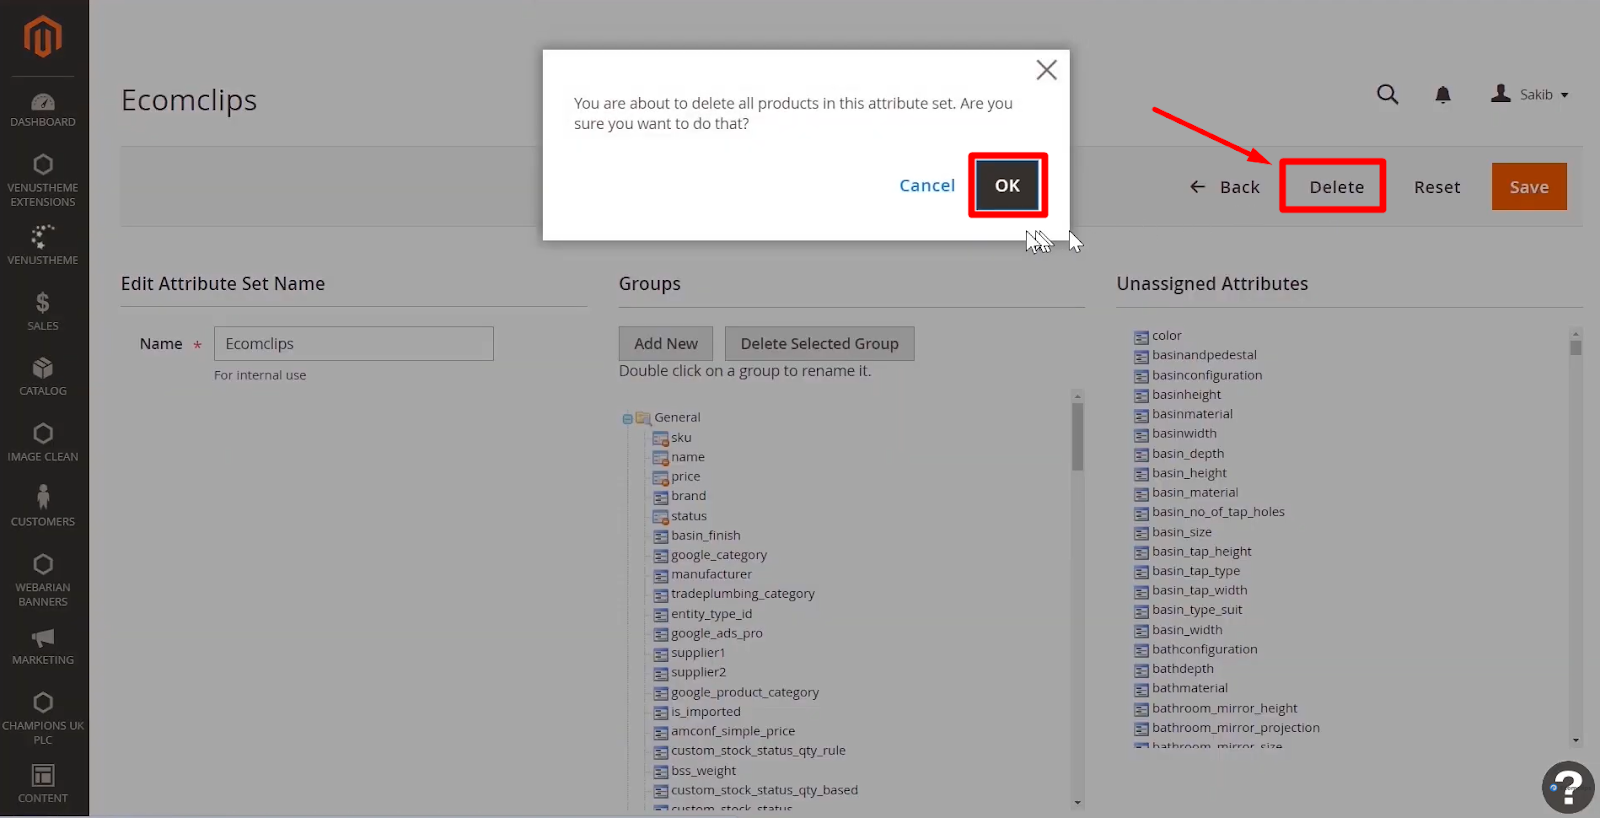
Step 3: If you want to delete the attribute set, click on “Delete” and then confirm by clicking “OK” in the dialog box.
Step 4: To update the attribute set, make the necessary changes and click on “Save.”
These are the simple steps to Create and Manage Attribute Sets on Magento.
We hope you understand the process clearly and can create and manage Attribute Sets on the Magento platform by following our given instructions. If you have any queries, please let us know through the comment box or email us at info@ecomclips.com. Our Magento experts are always there for you to answer your questions.
If you want to know more about Magento, please check out our other blog. Also, you can check our YouTube videos related to Magento.