
If you are looking for an easy-to-use free website builder with extensive features and customization options, then Ecwid is the perfect option for you. It’s a user-friendly solution that allows entrepreneurs to sell products, handle inventory, and boost earnings with ease. In this article, we’re going to guide you through the simple steps of adding your product on Ecwid.
A quick view into the article:
- What is Ecwid
- Why Sell on Ecwid
- Adding Products to Ecwid
- Final Thoughts
What is Ecwid
Ecwid is a fantastic e-commerce platform that enables us to sell products and generate revenue with ease. It integrates seamlessly with various websites and makes it simple to set up your store. It’s simple to use and free. You will receive everything you need to manage your products, accept payments, and sell internationally. It also provides a seamless way to sell products or services on various online platforms, including websites, social media, and mobile apps. With Ecwid, you can sell physical goods, digital files, and services, or resell products from other suppliers. You can also use dropshipping if you want to run an online store but don’t have your products to sell.
Why Sell on Ecwid
Selling on Ecwid offers several advantages for individuals and businesses looking to establish an online presence and engage in e-commerce activities. Here are some reasons why one might choose to sell on Ecwid:
- User-Friendly Platform: Ecwid is known for its user-friendly interface, making it easy for beginners to set up and manage an online store. The intuitive dashboard and step-by-step guides simplify the process of adding products, managing inventory, and handling transactions.
- Free Plan Available: Ecwid offers a free plan that allows users to start selling without upfront costs. This is advantageous for small businesses or individuals who are looking for e-commerce without committing to a paid plan immediately.
- International Selling: Ecwid supports international sales, allowing businesses to reach a global audience. Ecwid collaborates with major shipping carriers such as the Postal Service, UPS, FedEx, and DHL. For local businesses, doorstep delivery is an option. you can provide your customers with choices like curbside, drive-through, or in-store pickup, which is simple.
- Mobile Responsive: Ecwid’s online stores are mobile-responsive, providing a seamless shopping experience for customers on various devices. This is crucial in a world where a significant portion of online shopping occurs on smartphones and tablets.
Adding Products to Ecwid: Step-by-Step Guide
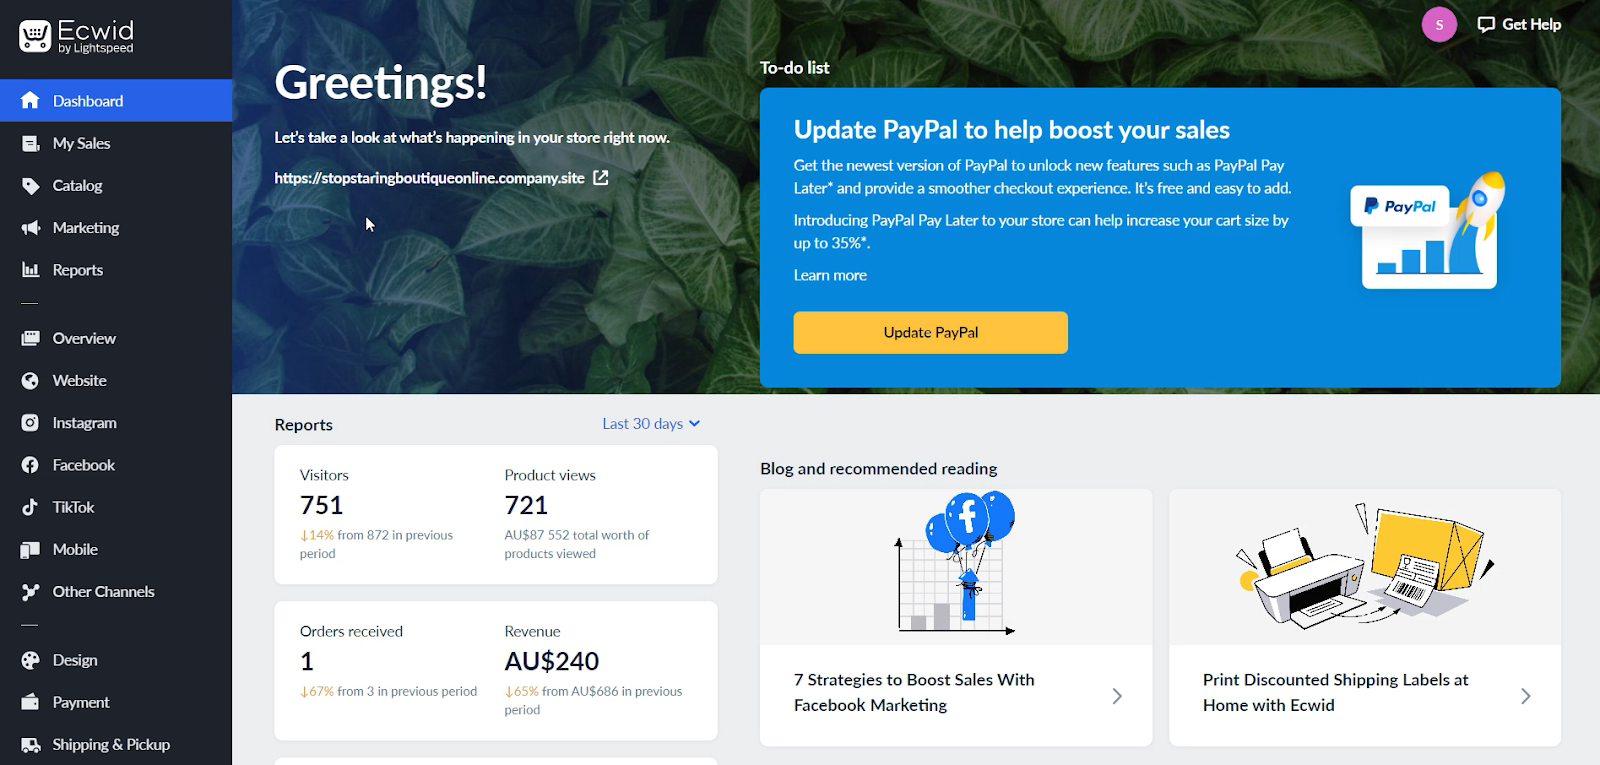
Step 1: Go to ecwid.com and log into your Ecwid account. Once logged in, you’ll land on the Ecwid dashboard.
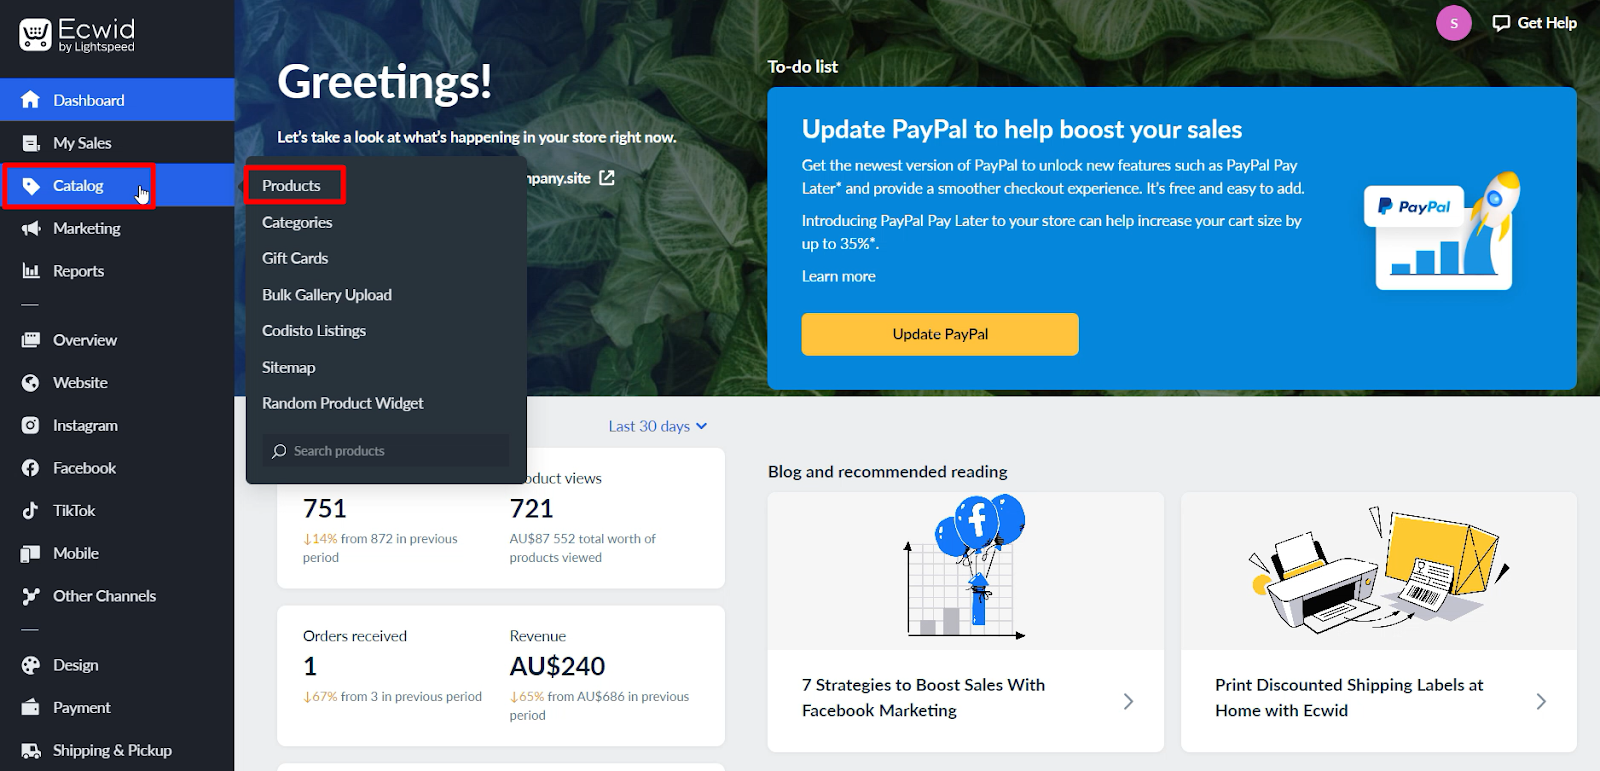
Step 2: In the dashboard, locate the “Catalog” and click on “Products.”
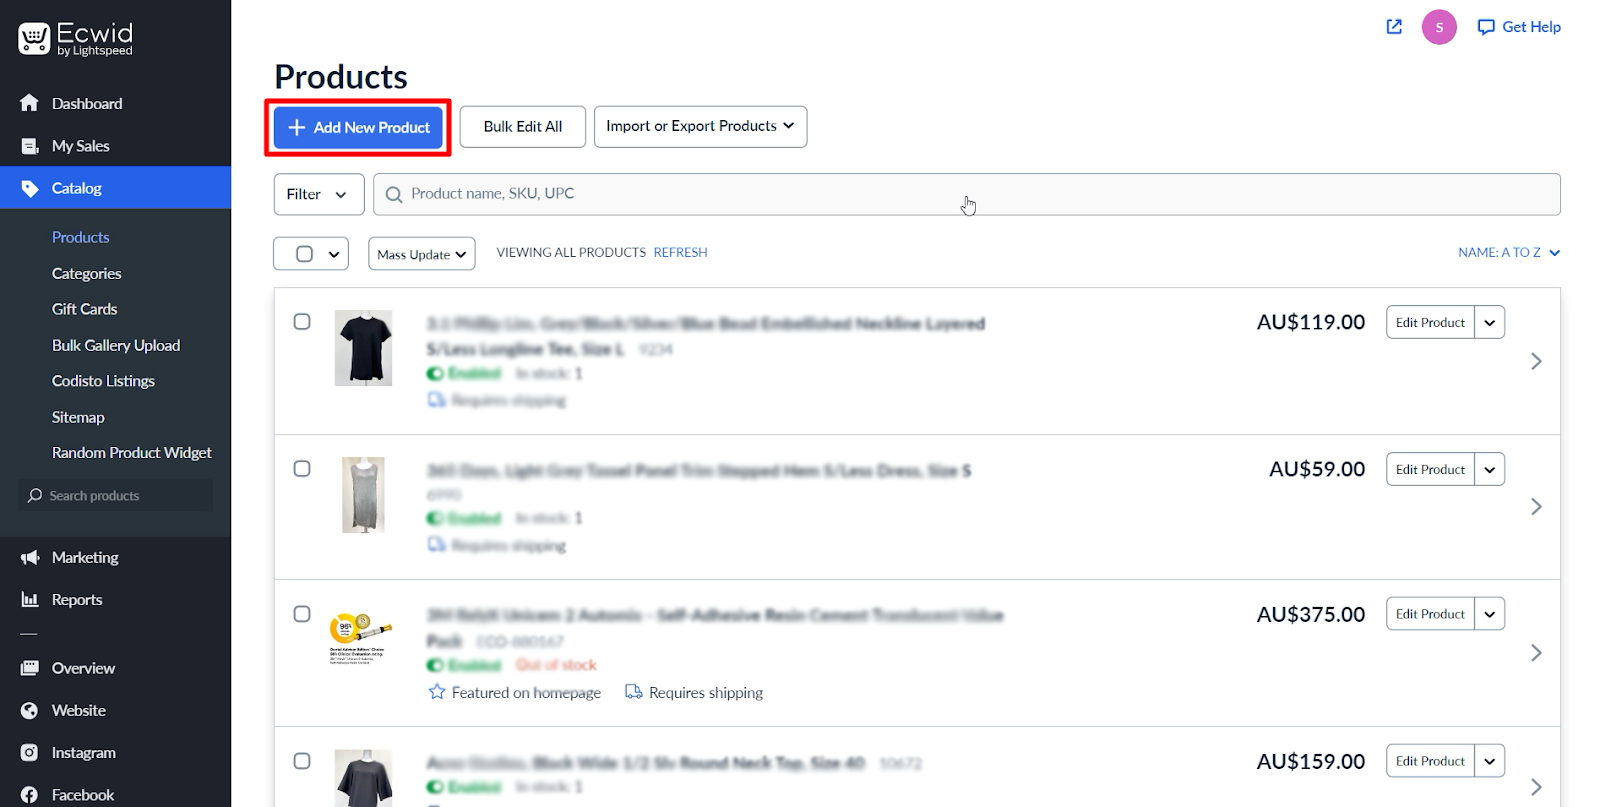
Step 3: This is where you’ll manage all your items within the store. Click on the “Add New Product” button to initiate the process.
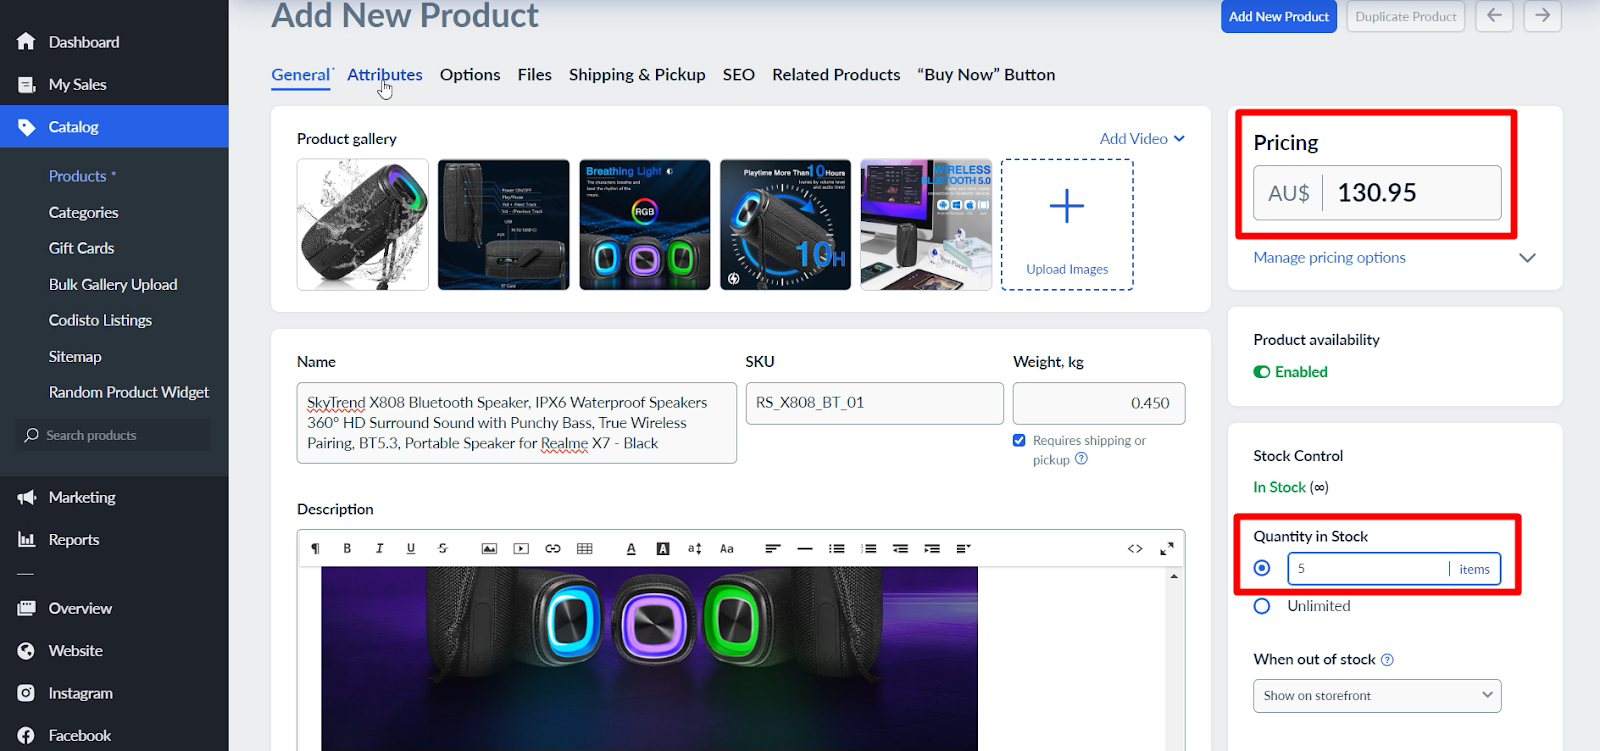
Step 4: From here, we will add a new product. By clicking Upload Image. You can add multiple images to showcase your product from different angles.

Step 5: Provide the essential information. Enter the product Name, SKU, and Weight in Kilograms. These details are mandatory for listing on Ecwid.
Also, describe your product in detail. You can get creative here with bullet points, numbers, or text styles. You can also add images or videos within your product description.

Step 6: Set the Pricing in your currency and add the Quantity in Stock.
If you have a paid plan, you can explore additional features such as Ribbons, Subtitles, and options for comparing prices or offering bulk discounts.

Step 7: Click on the Attributes segment, and add your product UPC and Brand name.
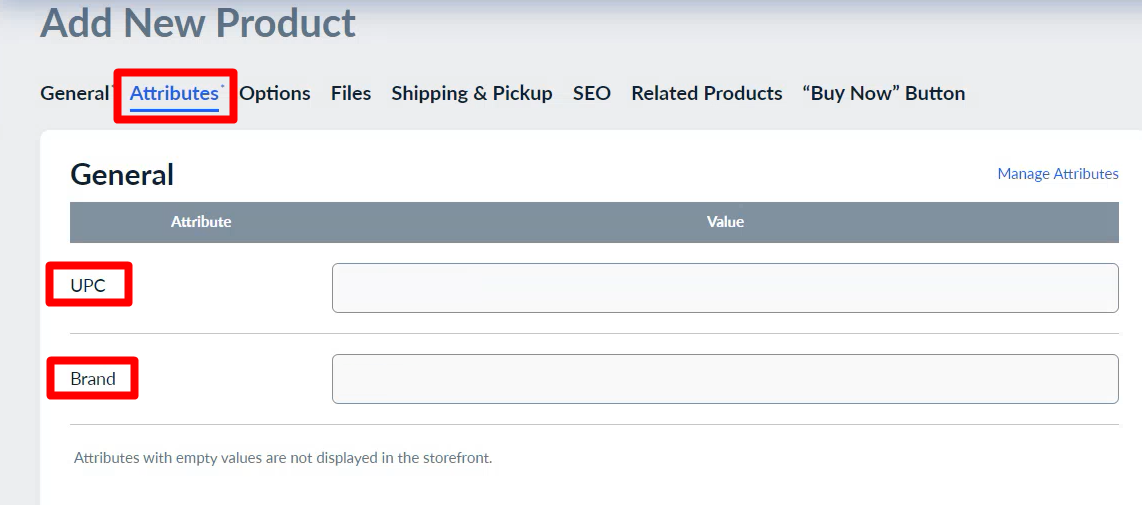
You can also add new attributes by using the Manage Attributes feature.


Step 8: Click on Shipping & Pickup then enter the item’s Weight and Dimensions.

After that, Choose a Shipping Rate. Select your preferred one from the list.

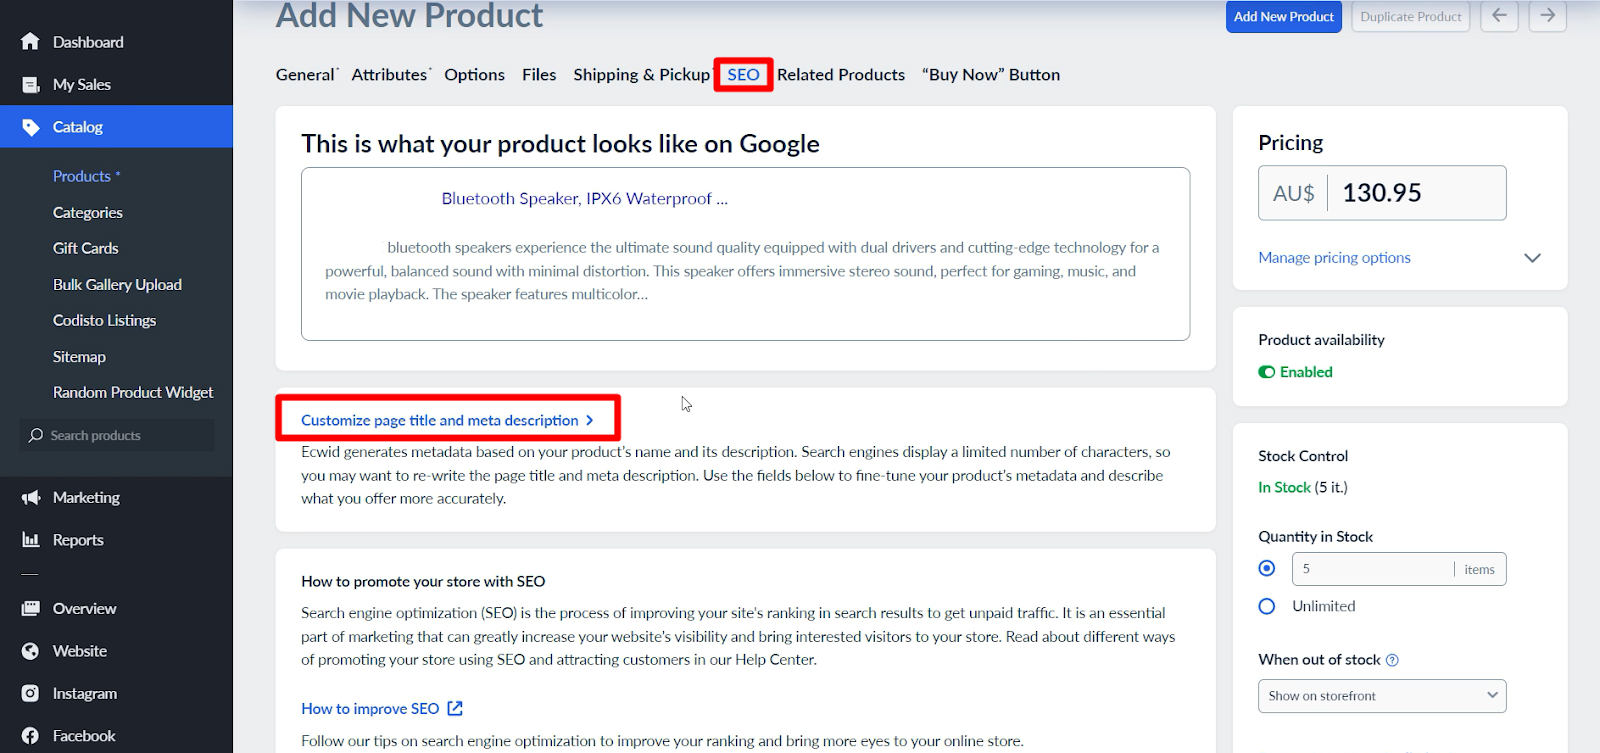
Step 9: Click on SEO to boost your product’s visibility by entering a Page Title and Meta Description. This makes your product content SEO-friendly, increasing the chances of appearing in Google search results.
Step 10: Click on Related Products and then click Enable Button to link related products. It will show the “You may also like” section on the product page to promote other products and increase sales.
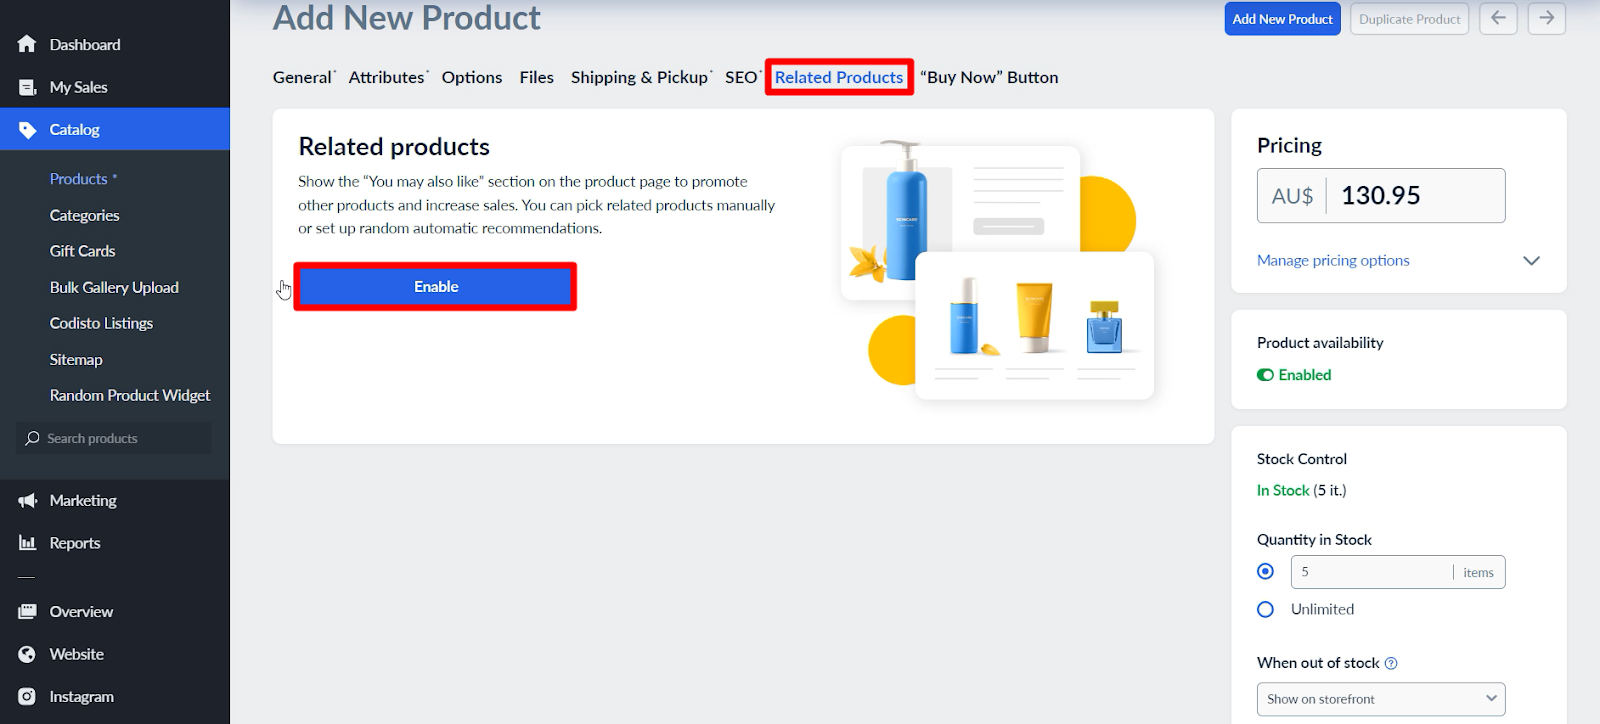
You can also pick related products manually or set up random automatic recommendations, by clicking on Add Products. This encourages customers to explore and potentially make additional purchases.

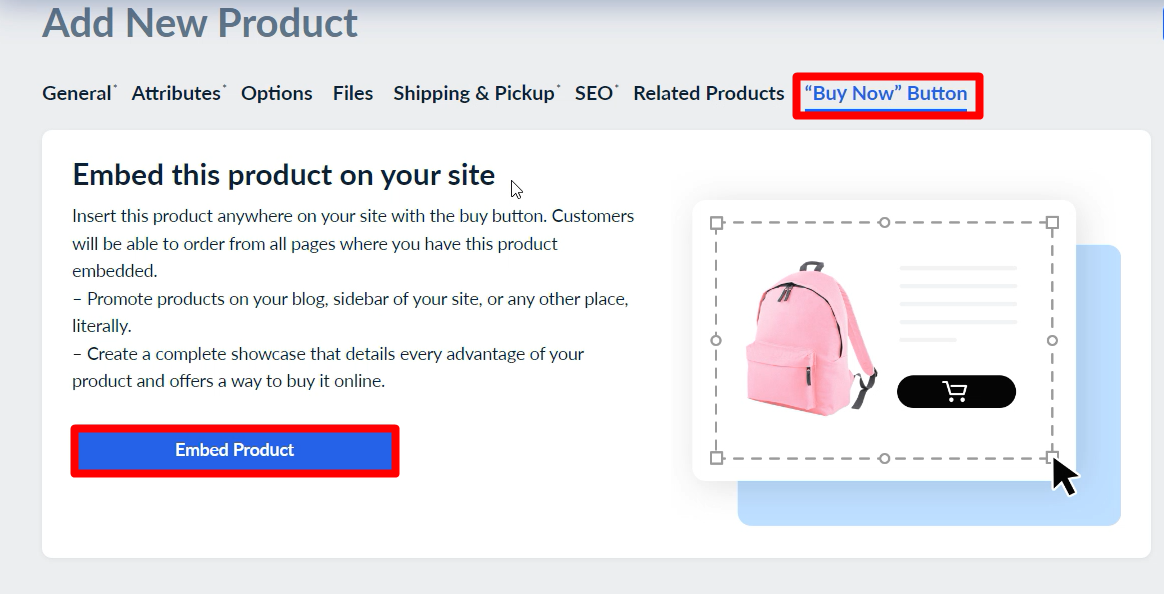
Step 11: Click on the “Buy Now” button and click Embed Product. It will allow customers to instantly purchase the product from any page where it’s embedded. This can significantly boost impulse purchases.
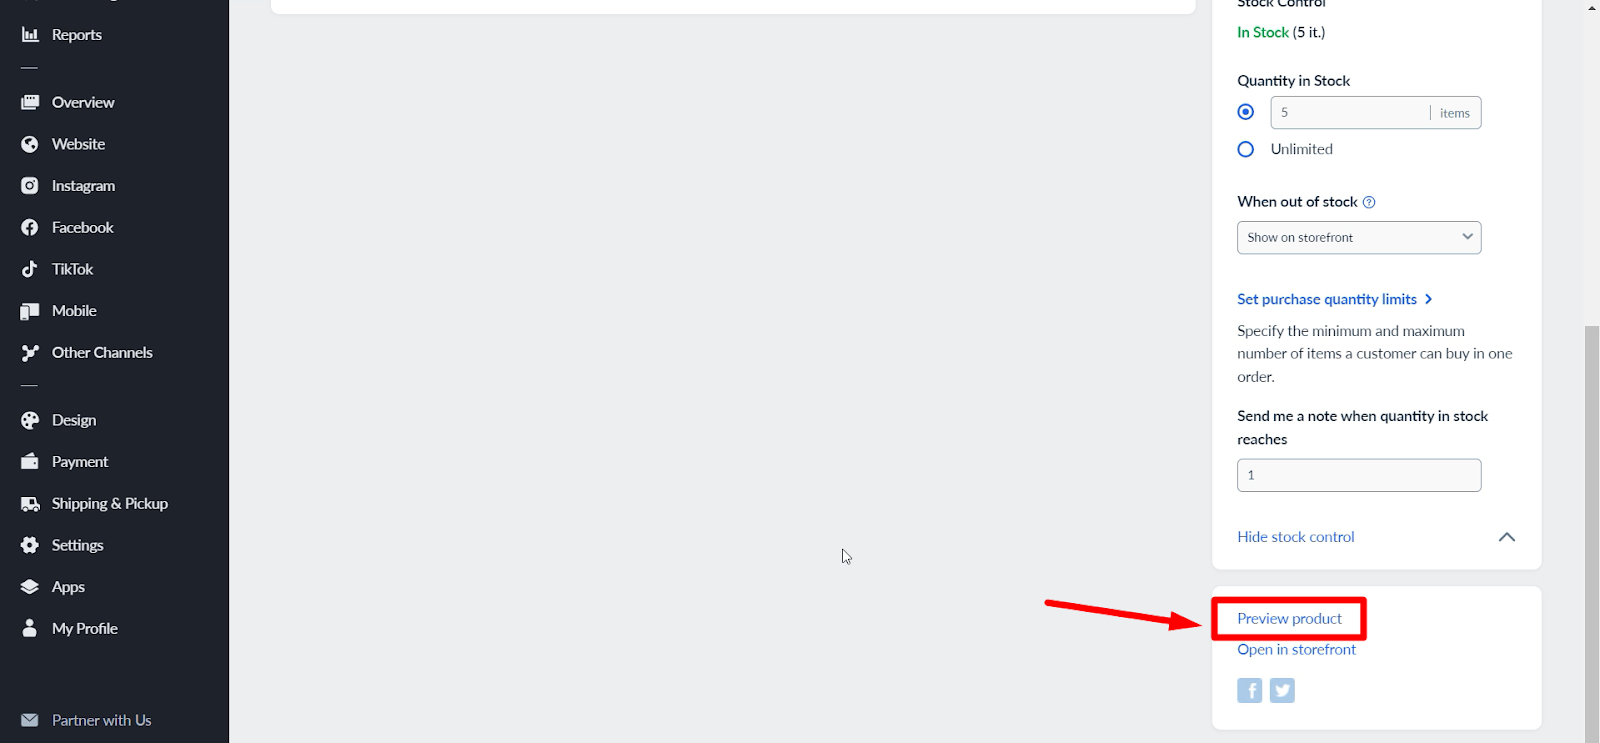
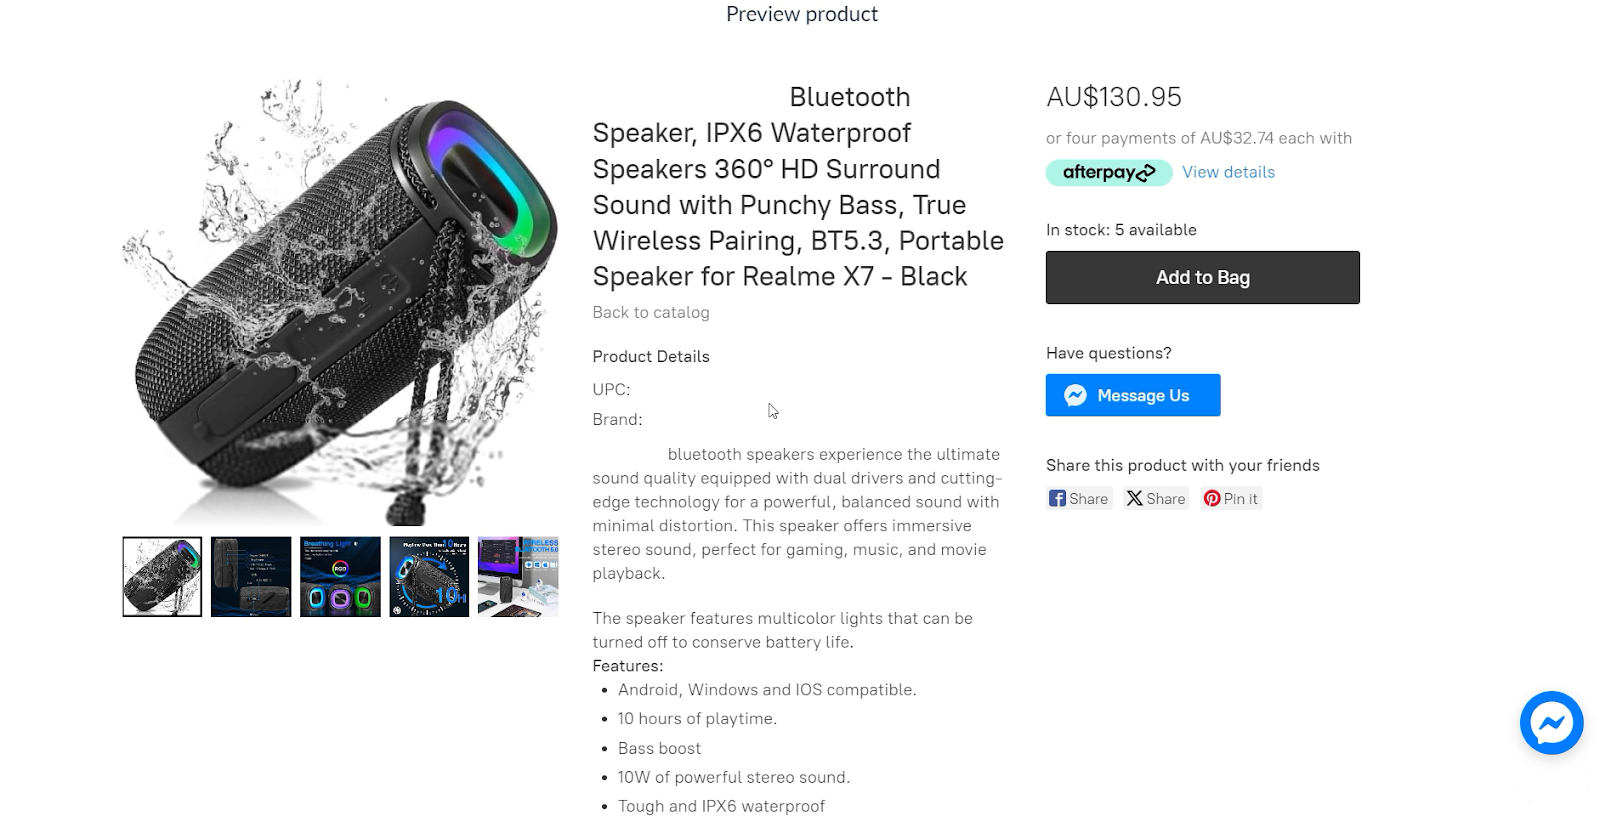
Step 12: Before finalizing, preview your listing on the right side of the interface. Click ‘Preview product‘ to review and make any necessary edits.
Step 13: Once done, click on “Save,” and your product will be listed on Ecwid.

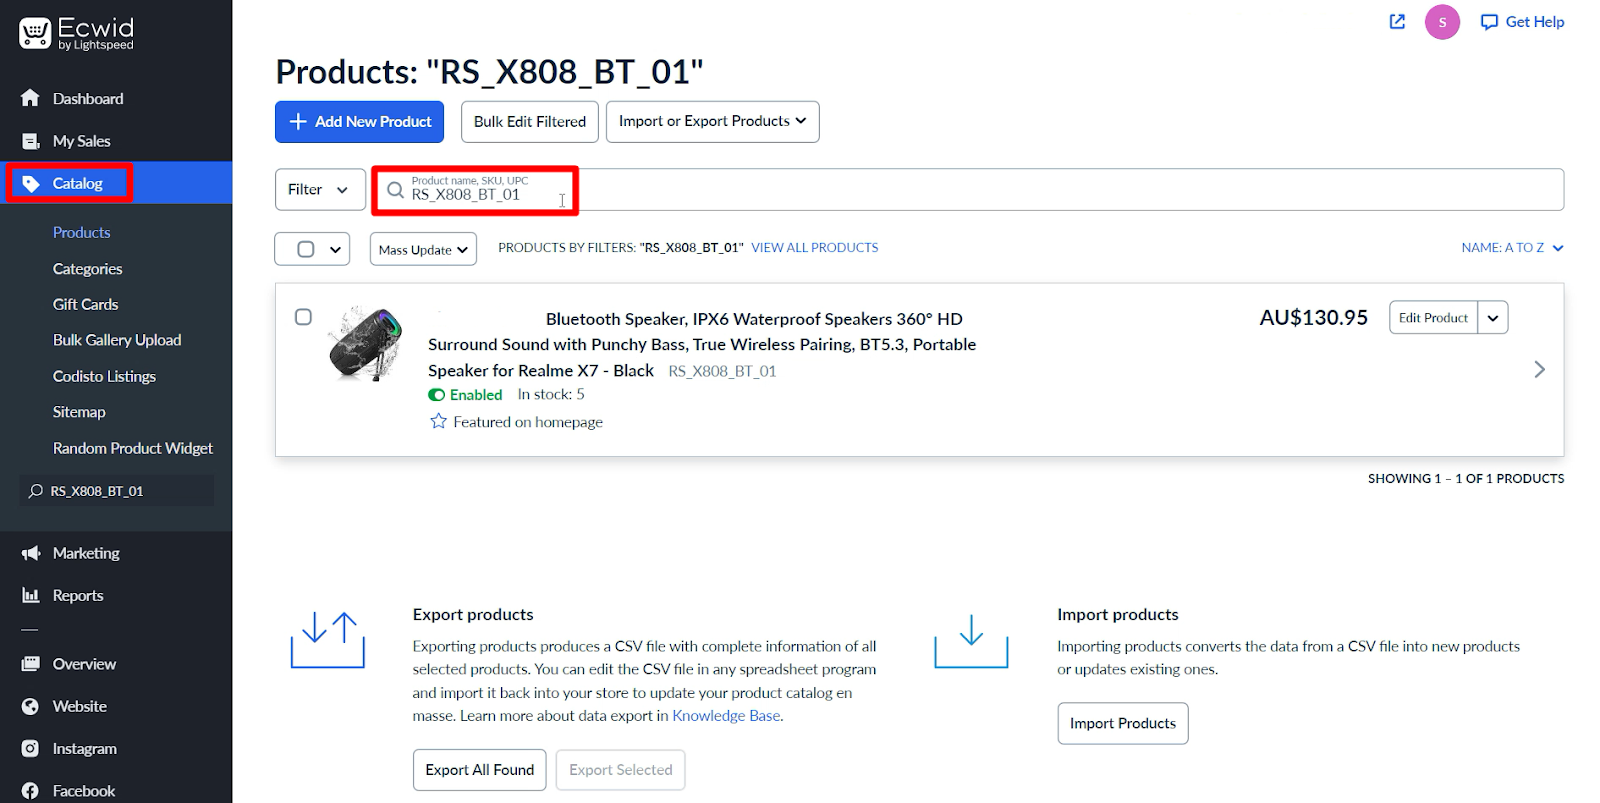
To check a listed item, go to ‘Catalog‘ and search by Name, SKU, or UPC. You can also search for the product on your website. Always double-check your product details to ensure accuracy.
Final Thoughts
Ecwid is a versatile e-commerce platform that simplifies the process of setting up and managing online stores. Its flexibility, user-friendly interface, and integration capabilities make it a popular choice for individuals and businesses entering the world of online selling.
If you have any queries, please let us know through the comment box or email us at info@ecomclips.com. We understand that every situation is different, so we offer a personalized approach to our service.
To know more about Ecwid, please check out our other blog. Also, you can check our YouTube videos related to Ecwid.
Ecwid Overview 2024 | Create an Online Store and Sell Products FREE Forever