
Amazon is the biggest eCommerce platform in the world and a significant eCommerce cloud services provider. There are millions of retailers selling their wares on this marketplace. Amazon opens sellers to a wealth of opportunities for turning a huge profit from selling their products. However, given the strict guidelines and standards of the marketplace, maintaining a healthy Seller Account is a must to scale your business. To maintain a healthy seller account and take your business to the next level, you need to know the basic things about Amazon Account Management Service. In this article, we will walk you through some basic things about Amazon Account Management that you need to do regularly.
Okay, let’s show you them one by one.
- Adding Products:
Adding products on Amazon sounds easy enough. You can list your products in 2-ways. They are:
a. Listing items Manually on Amazon
b. Listing items using Bulk file
To list your products on Amazon manually, First login to your account and go to the Inventory tab. Please select Add a Products from the dropdown.

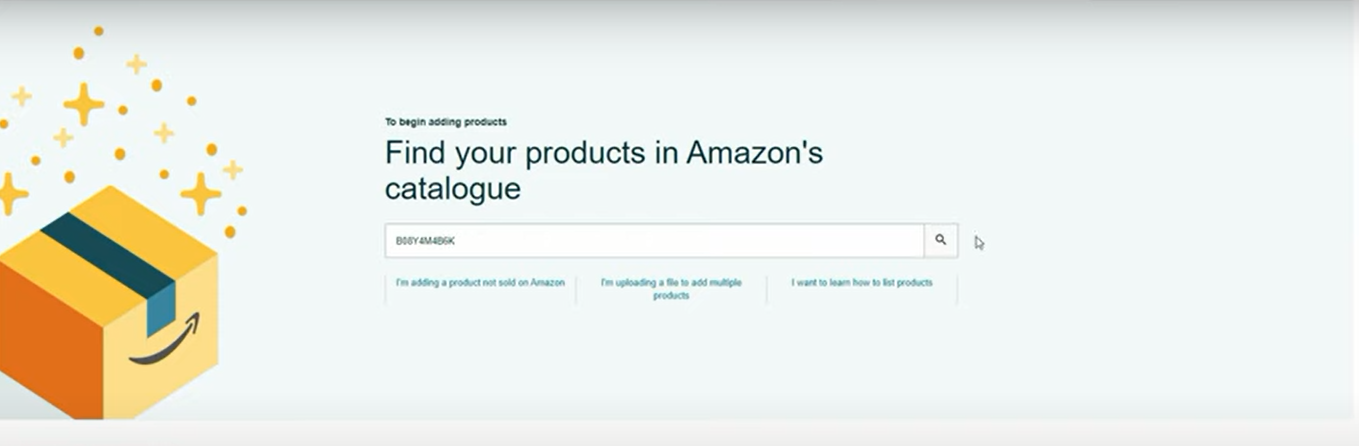
After that, you will find, Find your products in Amazon’s catalogue page. On that page, please click on the I’m adding a product not sold on Amazon.

Now, you can see the product category page. Form here, you need to choose your desired product category. You can choose the product category from the Search option or select the product category from the Select a category option under the Browse section.

After selecting your targeted category, you need to fill up all the required attributes from the product details page. Please go to every menu tab like Vital Info, variations, Offer, Images, Description etc and fill up all the required fields according to your products.

After filling up all the mandatory fields, please re-check them once again and press the Save and finish button to complete the process. It will take a maximum of 15 minutes to publish the items.

To list multiple products at once by using a flat-file, go back to the home page and click the Inventory menu tab. No select Add a Products via Upload

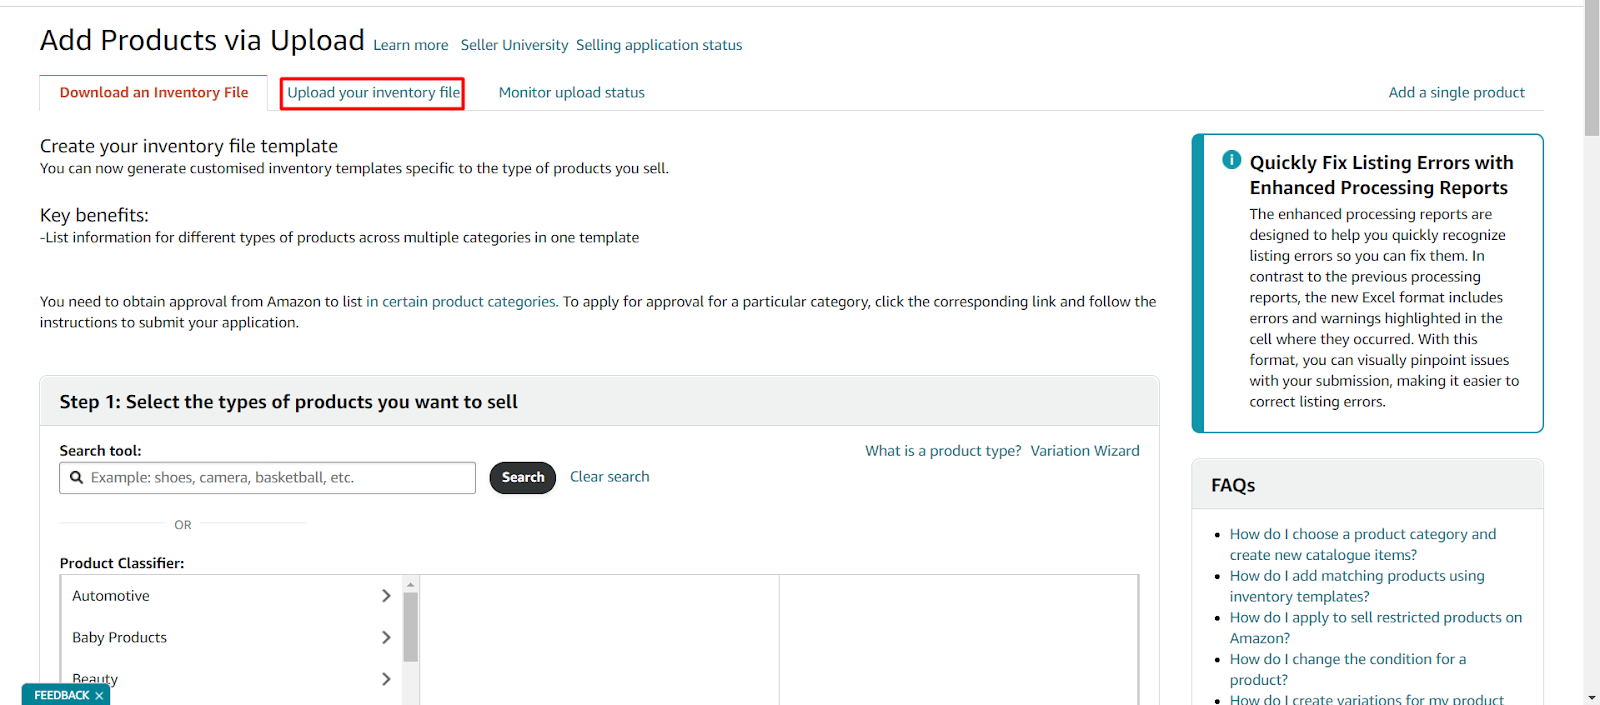
Now click on the Download an Inventory File option

From this page, please select the suitable category for our products.

After selecting the category, scroll down and click on the Generate Template option and download your feed file.

Please open your generated feed file and fill up all the required fields according to your products like Product type, SKU number, Brand name, Title, Product ID, ID type, etc.

After completing the file, click on the Upload your inventory file option from Add Products via Upload file page. Then drag and drop your prepared feed file or click on the Browse files option to upload your file from your computer.

Now, you are just one step away from listing your products via feed file. Please press the Upload file button to complete the process.

This will take you to the Monitor Upload Status page and you can see the results here.
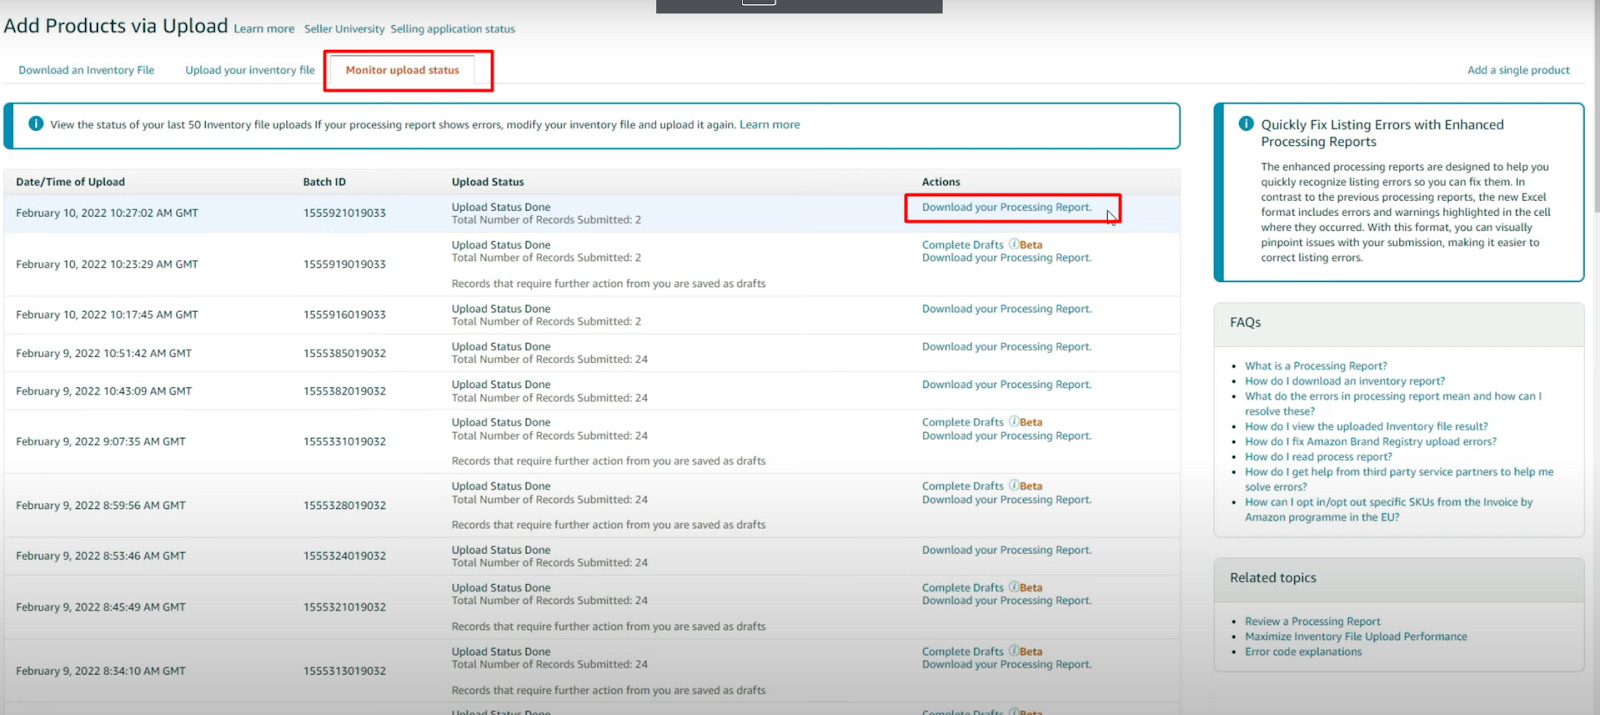
If you receive any error you can check it from the Download Your Processing Report option
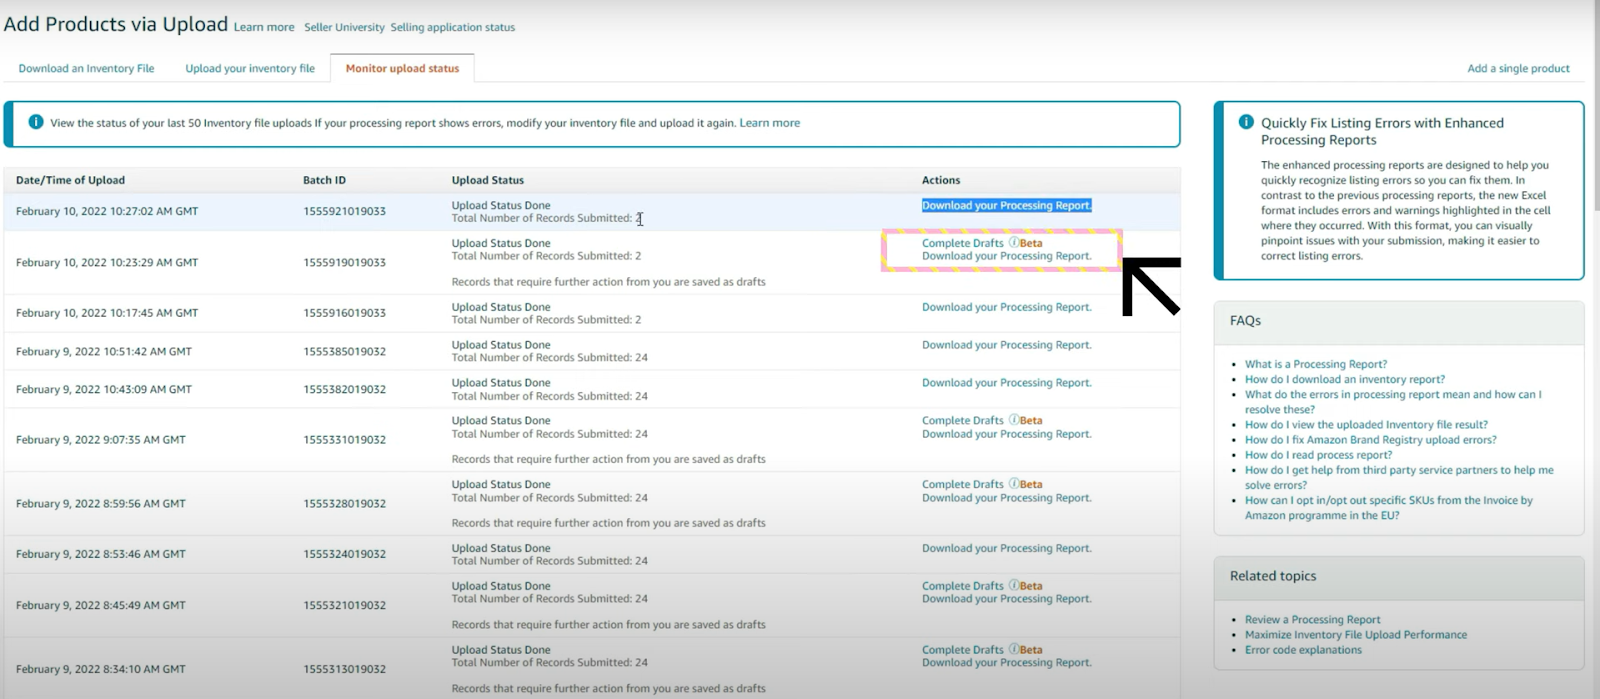
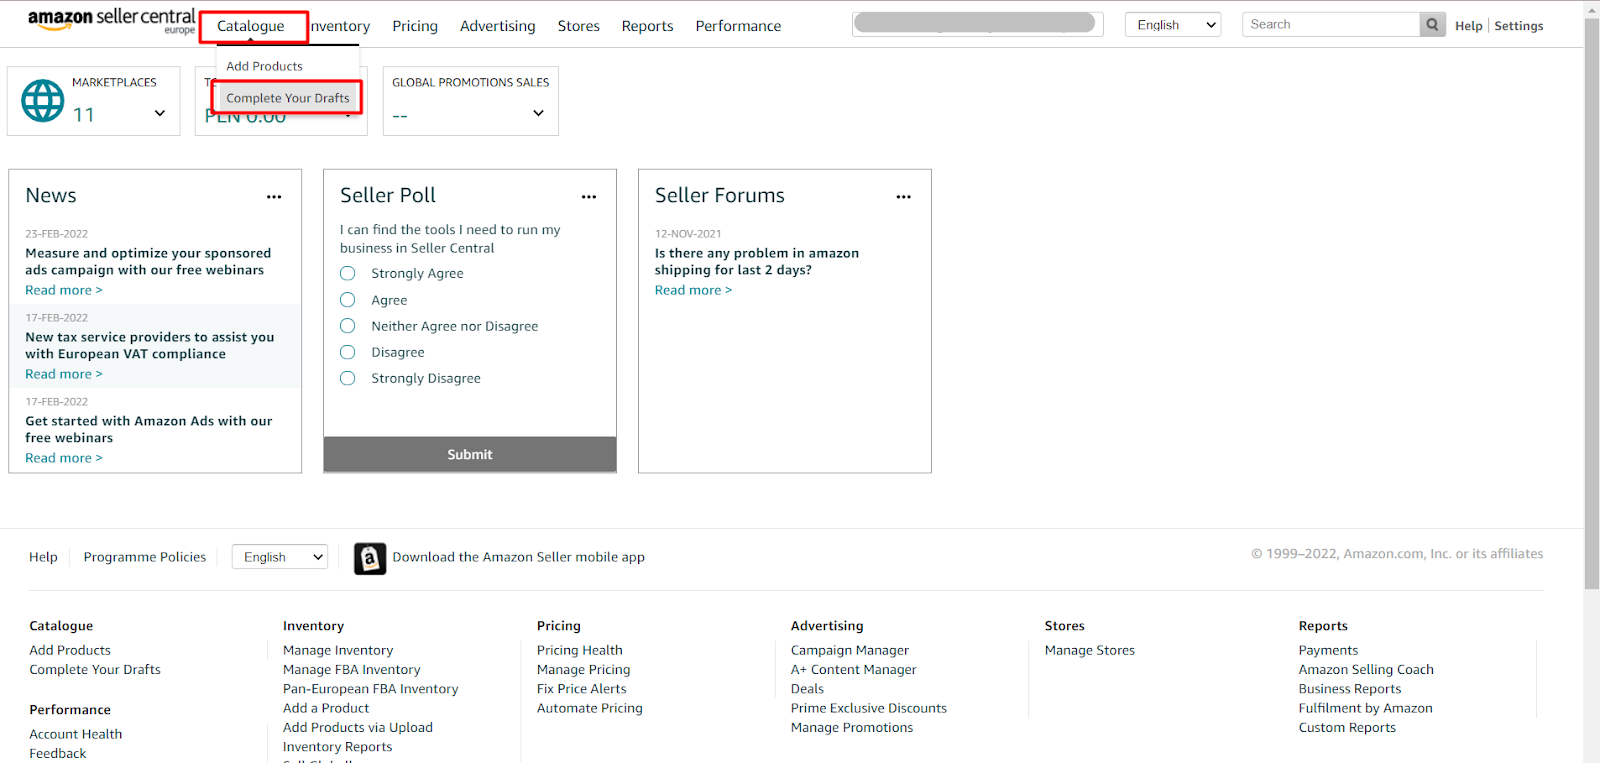
- Fix Incomplete Listings:
Also, if any listings are not successfully completed you can fix them easily. To fix incomplete listings, go to Complete Your Drafts from Catalog, and fix them one by one according to the error comments.
- Upload Videos on Listings:
To upload your product’s video in the listing, go to the Inventory tab and select the Upload and Manage Videos from the dropdown menu.

From here you can upload your product’s video. Please select your video from the computer, input the ASIN number for your products and press on the Upload video button for submitting/uploading your video.

- Updating Price and Quantity Using Loader File:
To update the product price and quantity by using the Inventory Loader file, please click on the Download an Inventory File option from the Add Products via Upload page.

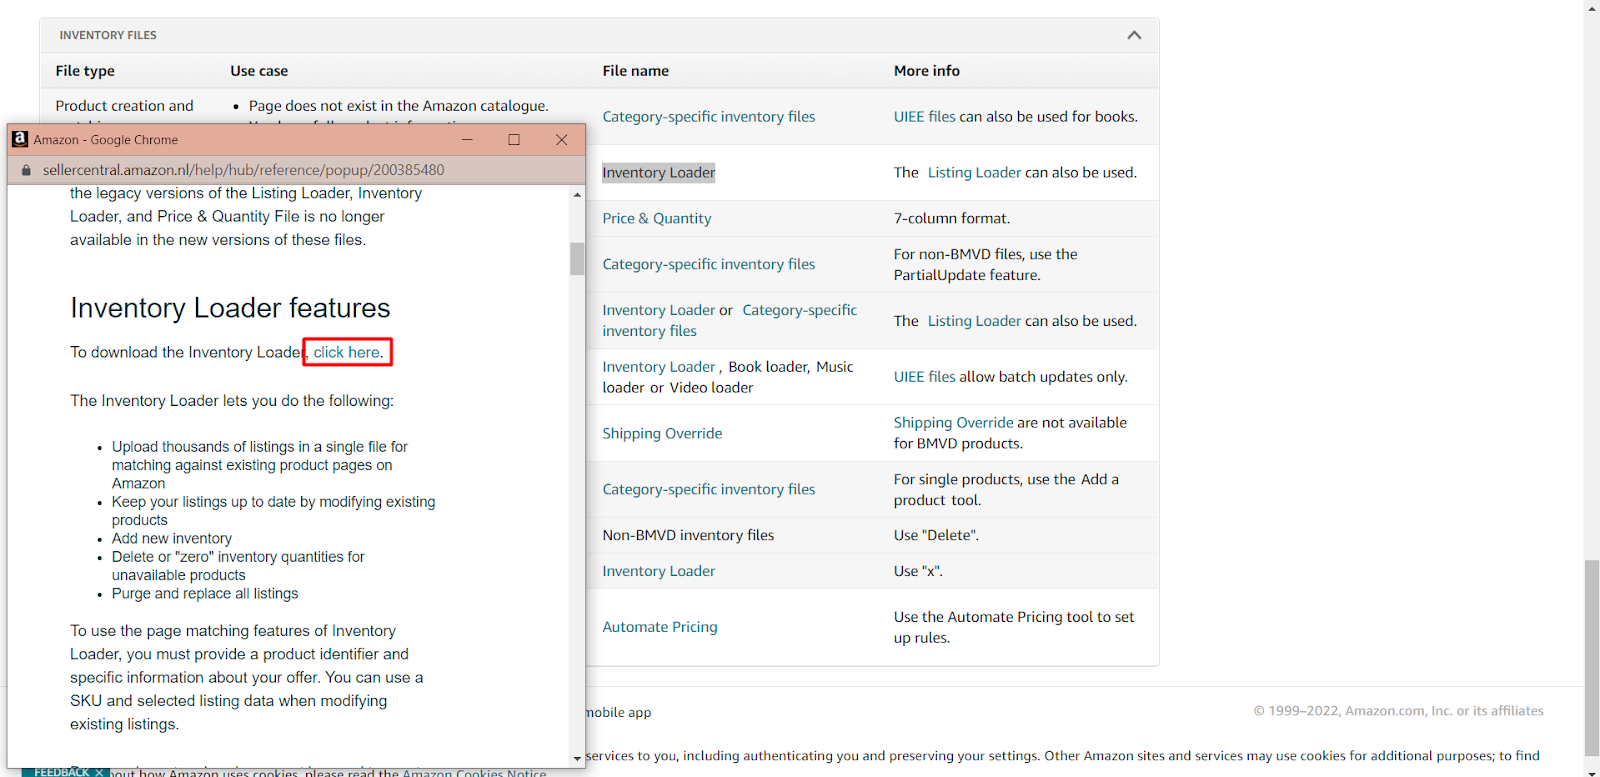
Now, scroll down and choose the Inventory Loader from INVENTORY FILES

A new window will open, and you will find the Inventory Loader Features section. To download the inventory loader file press on the Click here option.
Fill up the file with appropriate product information. You need to provide the SKU number, Product id, Product id type, Price, and Quantity.

When you finish filling up, save the file. Then upload the file on Amazon from Upload your Inventory File. This will take a maximum of 15 minutes to update the price and quantity.
- Existing / Catalog Listings :
You can create existing listings which are created by a different seller. This is called Amazon catalog listings. To add an existing listing, go to the Inventory menu and click on the Add a Product option from the dropdown.

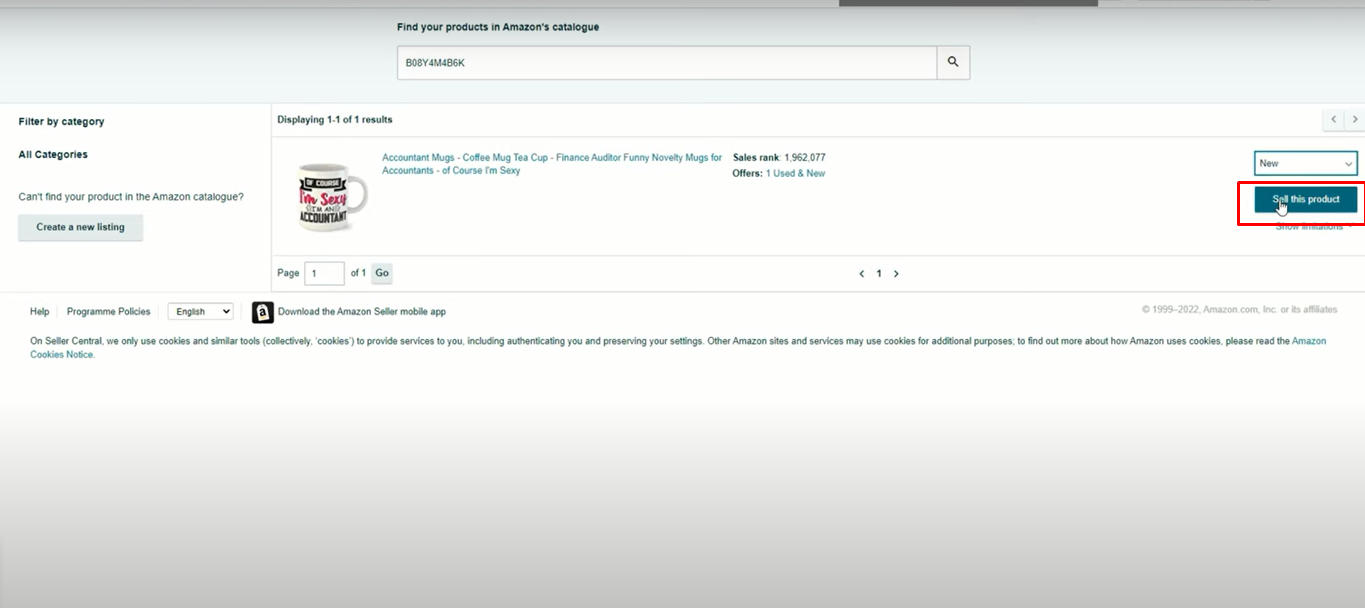
Right after, you need to search the appropriate items by their ASIN/UPC or name from the search option.
After that, you will find Select a condition on your right side. Click here and select the condition.

After selecting the condition, click on the Sell this product option.
Now, you need to fill up all the required fields from the Offer page.
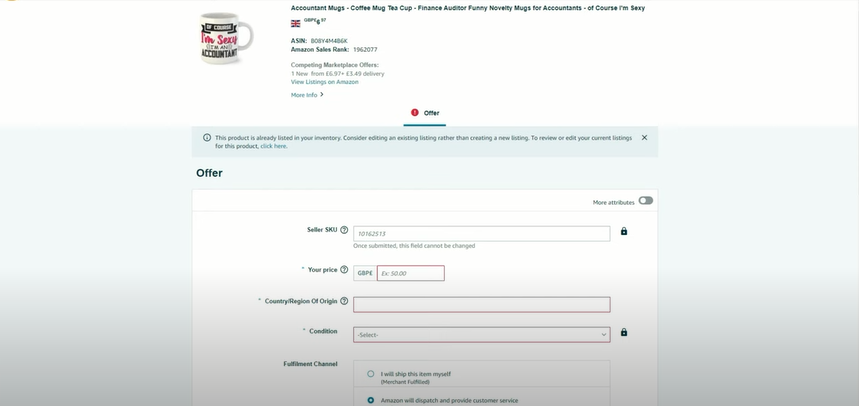
To complete the process, press the Save and finish button. Also, you can do it by using the inventory loader file.

- FBM to FBA Conversion:
FBM stands for Fulfillment By Merchant which means the seller has to handle all the procedures like order, delivery, returns etc. And FBA stands for Fulfillment By Amazon which means everything will be handled by Amazon-like delivery, returns, refund, even review. To convert your FBM listing to FBA without creating the new listings.
Go to the “manage inventory” and click on the Edit button beside the product listing.
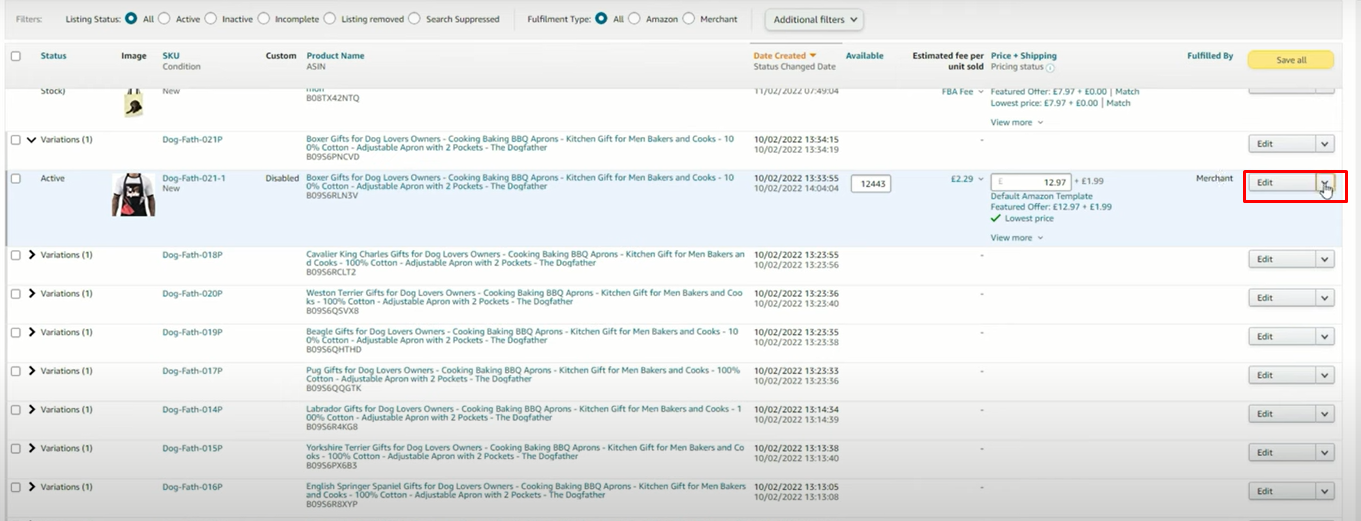
After that, you need to click on Convert to Fulfilled by Amazon from the dropdown menu.

Then you need to follow the procedure to convert the items to FBA. Also, you can convert your items to FBA by using the Inventory Loader file.
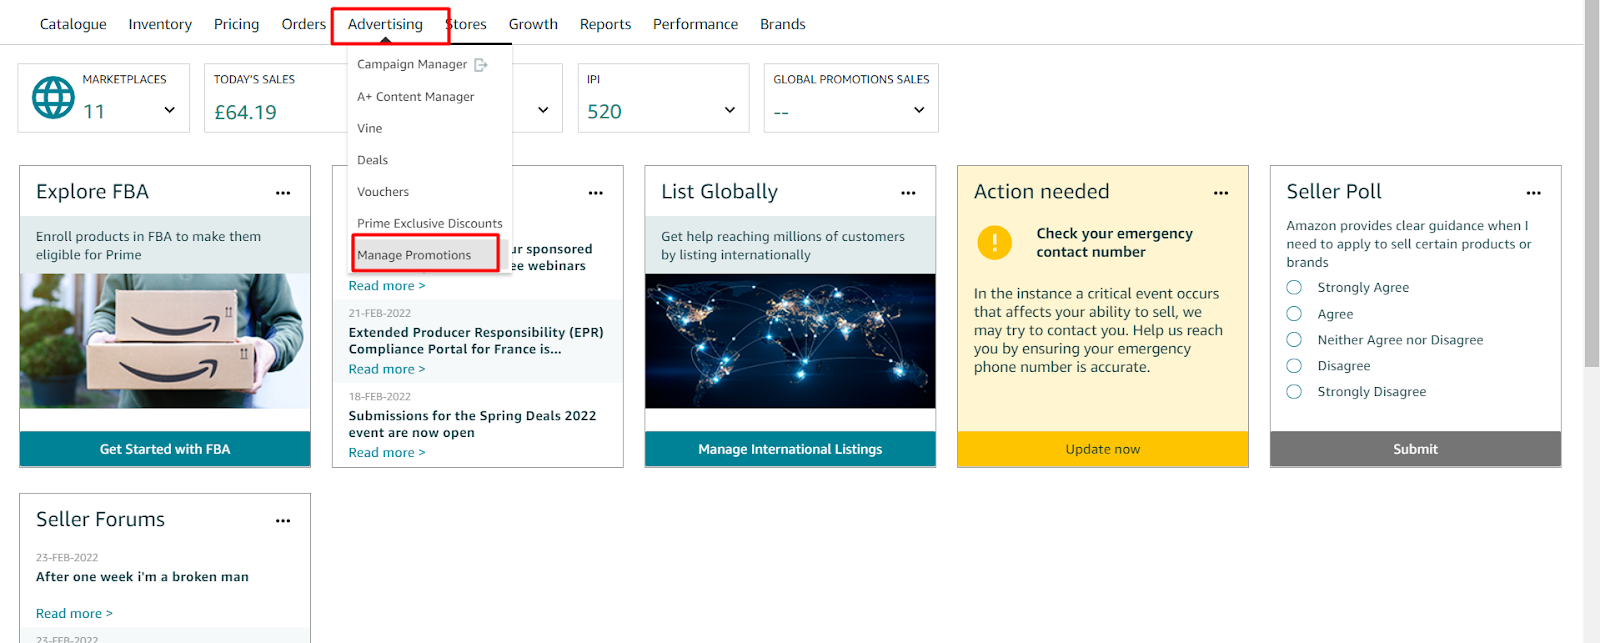
- Managing Promotions:
If you want to give promotions to your products, go to Manage Promotions from the Advertising menu tab.
After that, a promotion page will appear. On that page, you will find 2-types of promotion. One is Money Off and another one is Buy One Get One.

For Money Off promotion, click on the Create button

Now fill up all the required sections here and then a Money Off promotion will be created.

For Buy One Get One, you have to follow the same procedure as like Money off promotion


- Vouchers & Discounts:
If you want to add vouchers and Discount offers for the customers, you can also add them. To add Voucher and Discount, go to the Advertising and press on the Price Executive Discounts and follow the further steps.

- Managing PPC:
You can do Pay Per Click Advertising, which is called PPC. You can do it with the help of the Campaign Manager option under the Advertising menu tab.

After that, you need to click on the Create campaign button.

Now you need to give the Campaign name, campaign start, and end date, then you need to set your Daily budget

After that you need to set Targeting, here are two types of targeting, Automatic Targeting, Manual targeting.

Right after, you need to give the Ad group name, and add your products from the Products section.

Also, you can add Negative keyword targeting here

At last, providing all the information, you need to click on the Launch campaign button to complete the process.

- Managing A+ Content:
If your brand is registered with Amazon’s Brand Registry Program, you can use the A+ Content. To do this, Hover over Advertising then click on A+ Content Manager from the dropdown.

Now you need to click on Start creating A + content and you will be able to create your A + content right away by following further steps.

- Creating Stores:
If you want to create your own brand store, you need to have a brand registry first. Then you can create your own brand store on Amazon.
To create a Store, hover over Stores then click on Manage Stores . Now you can see a Create Store Button in the middle of the page. Click on it to create your own Store page on amazon.

- Creating Virtual Bundles:
If you have the brand registry then you are able to create Virtual Bundles from the Brands tab.

From here, you can sell your two or more products together.

You can apply for GTIN Exemption on Amazon if you have the brand registry so that you don’t need any product ID like UPC, GTIN, etc.

- Amazon Repricing Tools:
You can do repricing by using the Amazon repricing tool which is under the Pricing tab. You need to click on Automate Pricing and then you need to follow the procedures.

You need to set a pricing rule, click on the Create a customized Pricing rule.

Then you need to choose what type of rule you want to create from the dropdown and then you need to give a name for the rule. Now click on the Proceed to marketplaces selection button

Then you need to set other rules according to your needs and click the bottom Save this rule in Amazon.com button

- Inventory Reports:
You can generate Inventory Reports from the Inventory tab

Select Report Type from here and then click the Request Report button

Also, you can check your Order report, Seller performance, Brand performance report, and other ASIN-based reports from Business reports which are under the Reports tab.


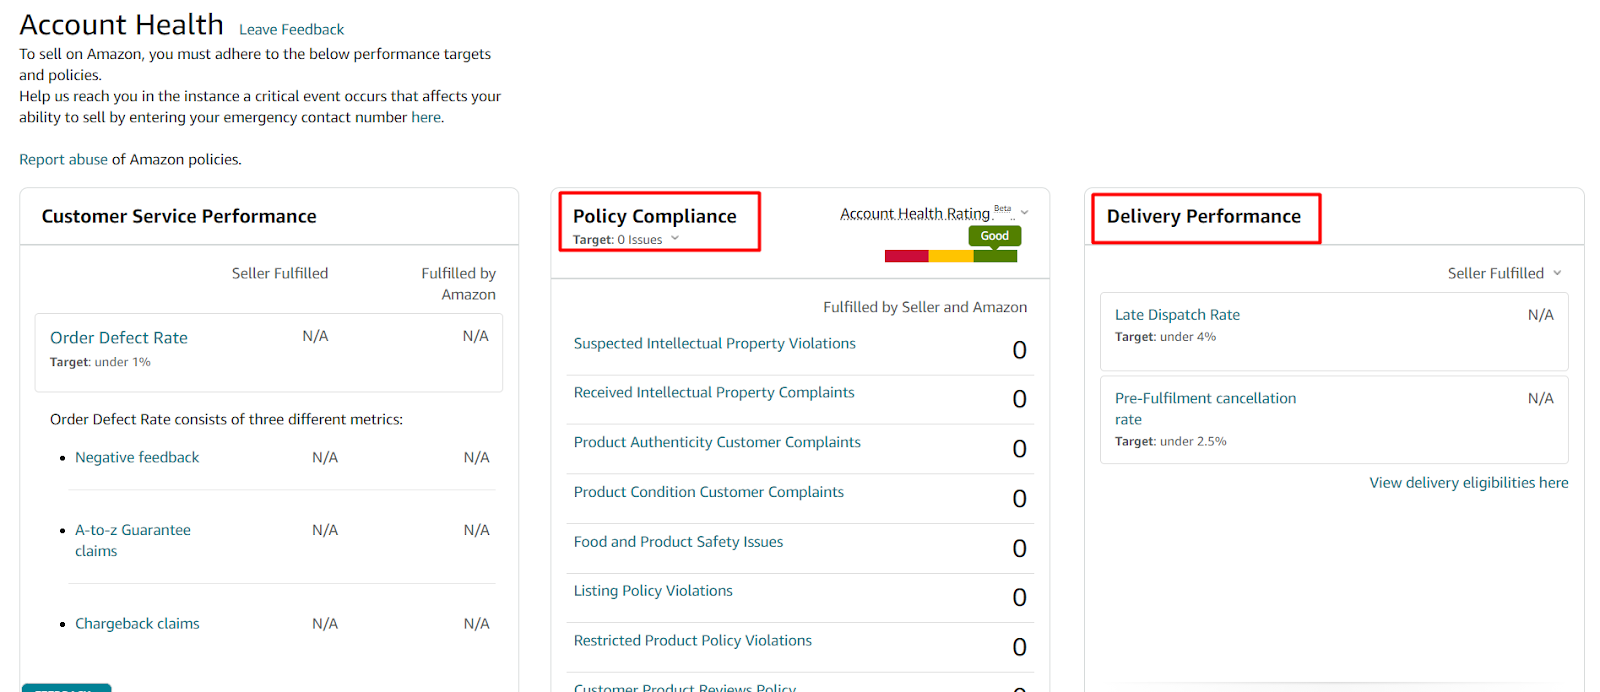
- Performance Analyzing:
You need to regularly follow up on your seller Account Health from the Performance tab.

If you find any issue then you need to fix the problem from here. You will find all the Policy Compliance and your Delivery performance on the Account Health page.
- Checking Listing Tools:
You can check Listing tools every day, if you receive any suppressed error or Listing quality error, you can fix this from here.

- Parent-Child Issue Fixing:
Parent-child relation is broken which is called the Split issue, you can fix split issues by using feed files.

- Applying Variation Wizard:
Sometimes you need to update your product information but Amazon is not updating information. In this case, you need to apply the variation wizard process, which means you need to delete your items using the inventory loader file and you need to wait for 48 hours at least. After that, you need to relist the items by using updated information.
- Contacting Seller Support:
Also, on a regular basis, you may face various issues, sometimes you can fix them easily and sometimes you may not be able to fix them by yourselves. in this case, you need to contact amazon support and you need to create a case on Amazon. For that, click on the Help button, you will find it in your top right corner.

Now, click on the Get Support button for further steps.

After that, you need to click on browse for your issue in the menu

Now, you need to select the category of which types of issues you are facing. Please describe everything regarding your issue. You can create a case or you can schedule a call with amazon. Also, on Amazon UK you can do live chat as well.

To sum up, start and develop a thriving business on Amazon, you need to follow its strict guidelines and standards. Hope all of the above-mentioned things will help you out to take your business to the next level. Try these by yourself, If you find any difficulties or you have any suggestions please don’t hesitate to write them down in the comment section below. We are always here to sort out your issues.