
StoreFeeder is one of the most potential and multi-channel eCommerce software solutions. It enables retailers to integrate with most sales channels like eBay, Amazon, Online Stores, and many more. In Storefeeder, you can easily export the entire product catalog by using the feature Product Import/Export. In this article, we will guide you on how to import/export products from StoreFeeder.
The Listing Import-Export feature will allow you to export all your listings to a single channel for you to review or make changes, and create new products in bulk. Through this feature, your listed products are exported in a “.xls” format which can be easily viewed with most spreadsheet editing tools.
Export Products from StoreFeeder,
Let us show you the whole process with some steps,
Step 1: First, Log in to your StoreFeeder account

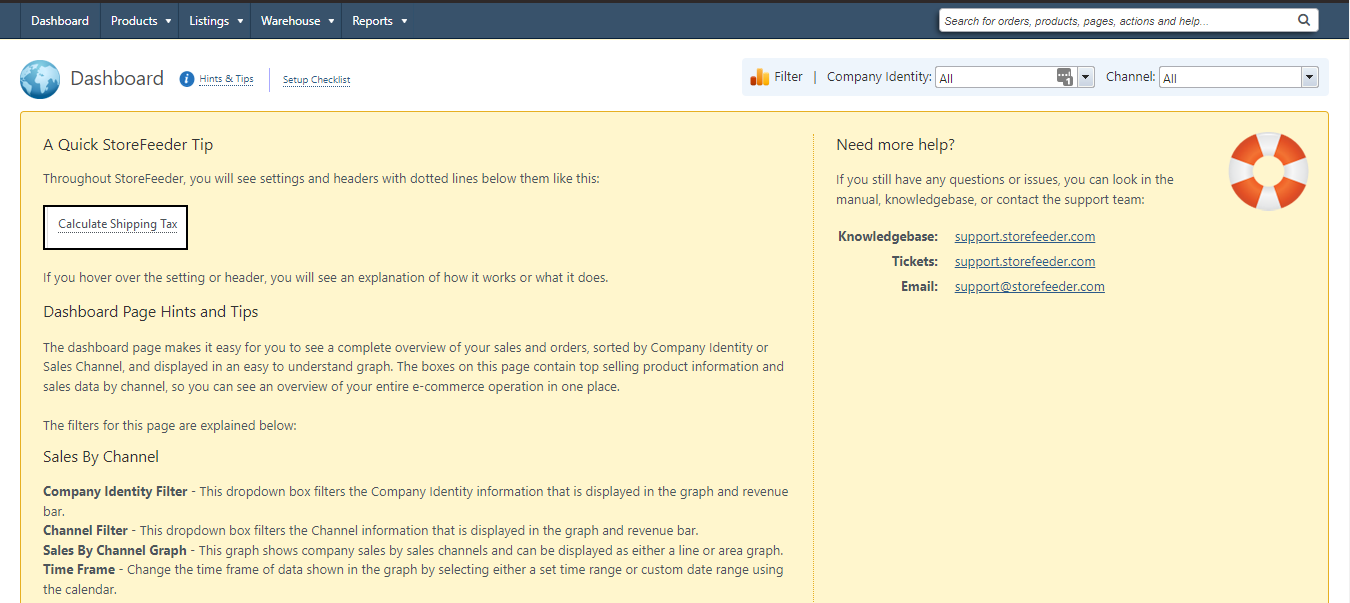
Step 2: After login into your account, you are able to see the Dashboard page which is the initial page in StoreFeeder.
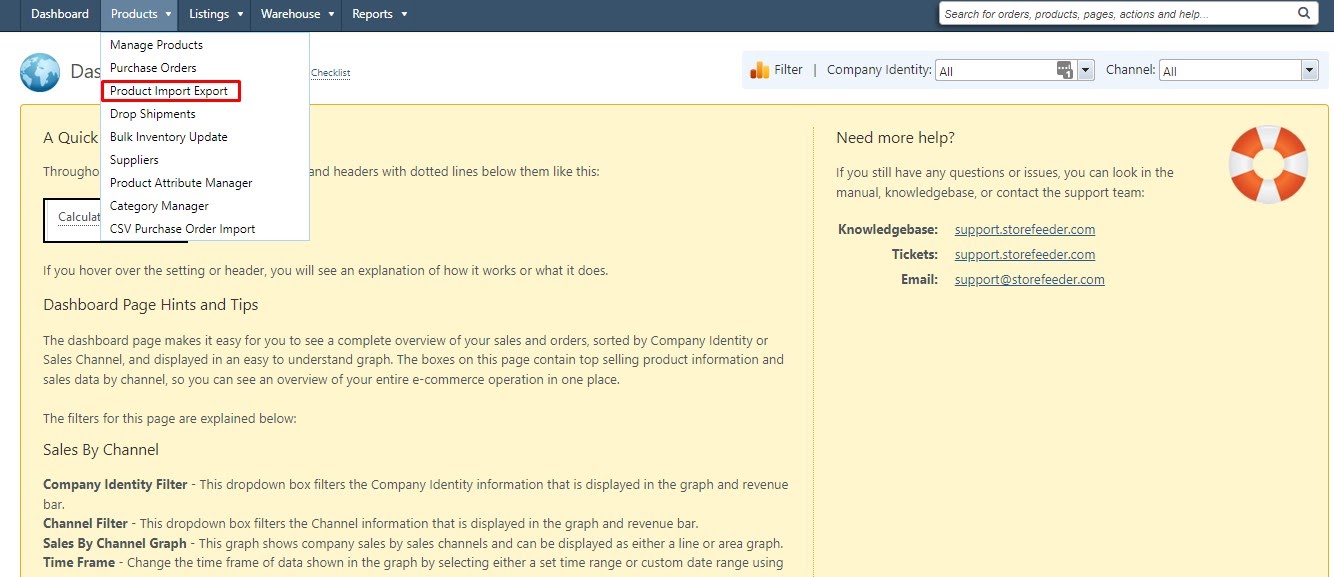
Step 3: Go to the “Products” tab and scroll down to “Product Import Export”
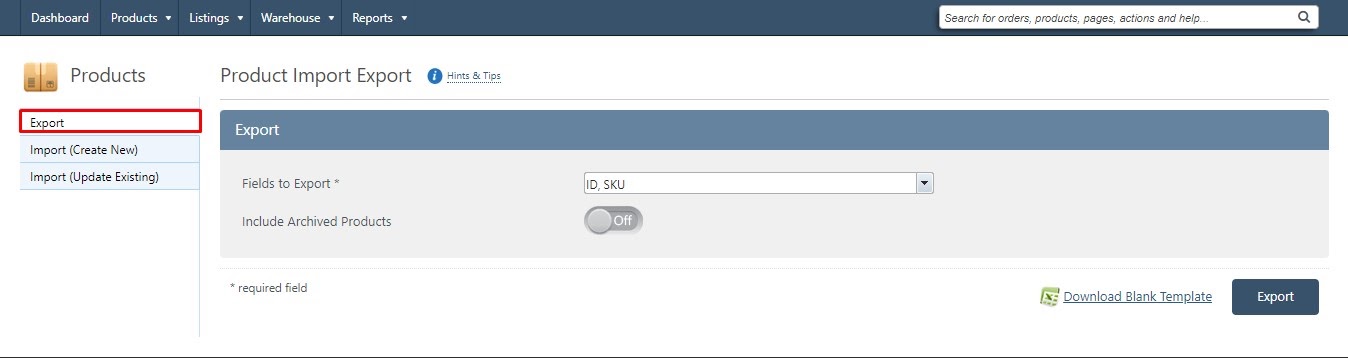
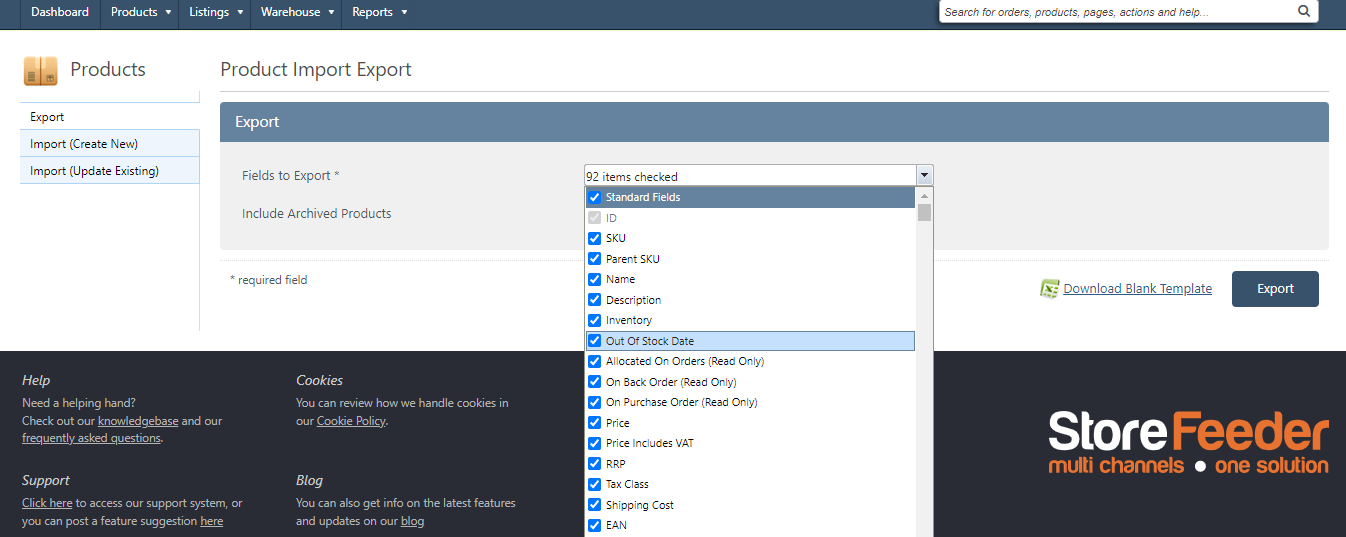
Step 4: You will find the “Export” tab on the top left corner
Step 5: You will see a drop-down menu containing all the fields relevant to your products, including any “Custom Attributes” and “Variation Attributes” you may have.
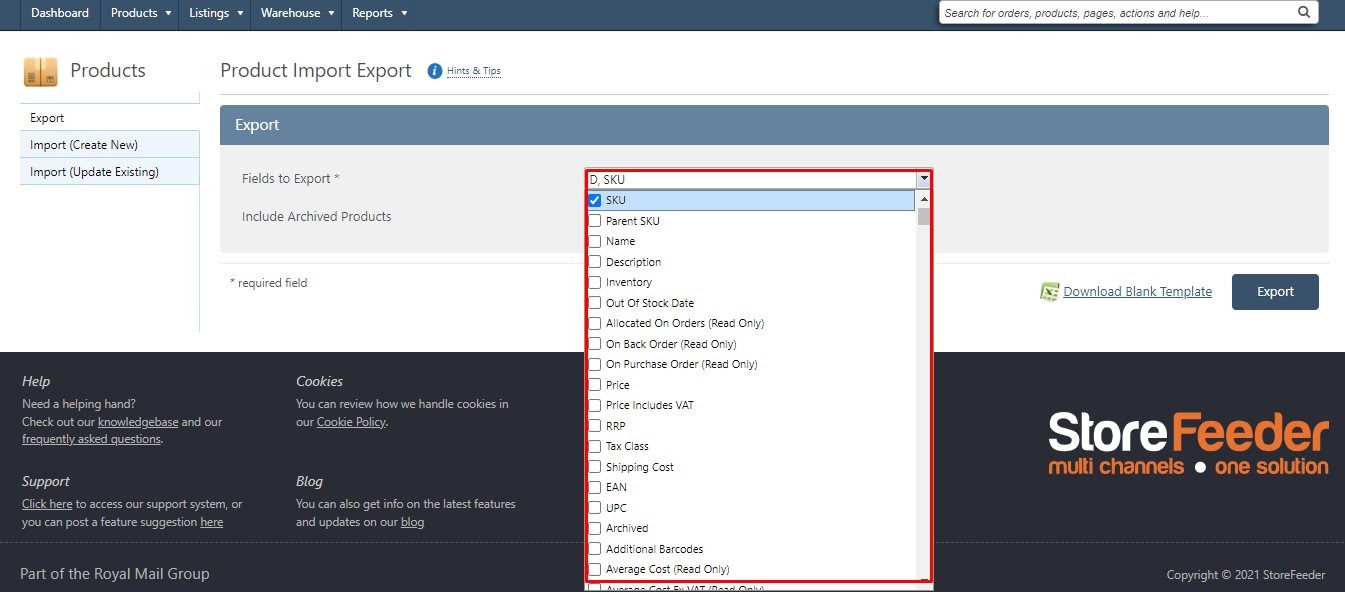
Step 6: To select a field to export simply check the box next to the field name you wish to review. Checking “Standard Fields” will export all product information, not including any Custom or Variation Attributes.
Step 7: When you have selected the fields to export, click the “Export” button to download the product information.
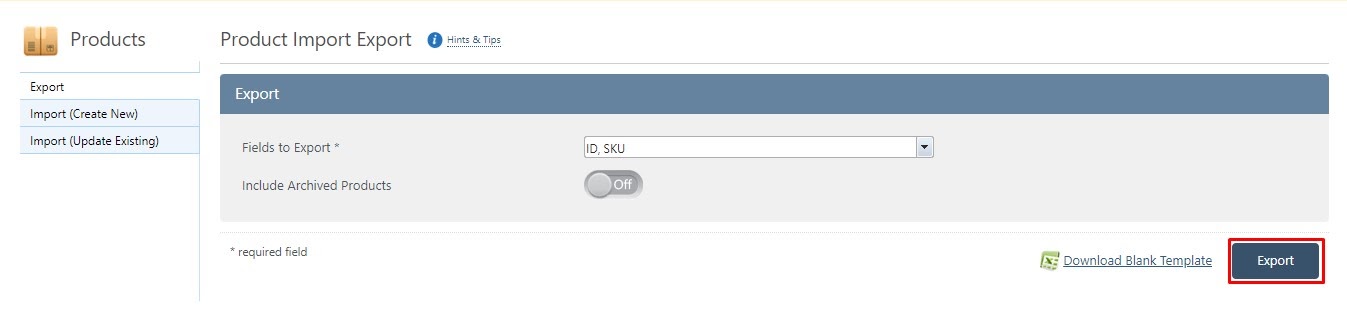
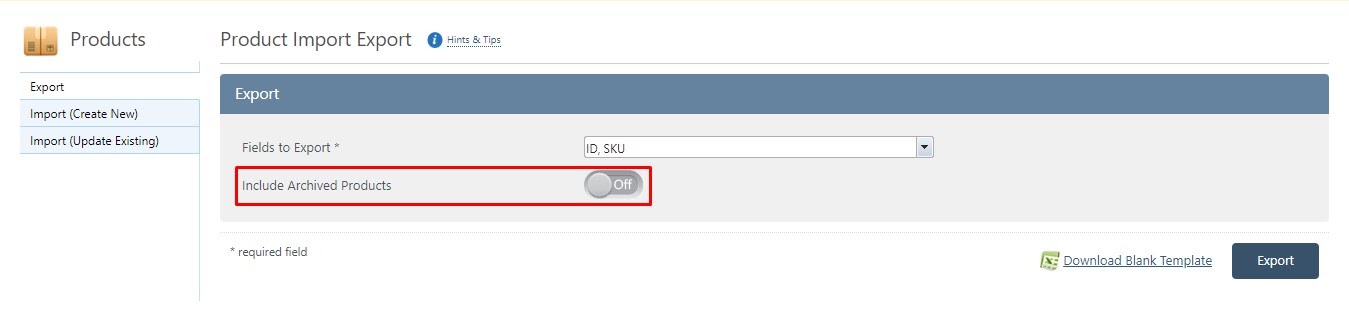
Step 8: You can also get the “Archived Products” if you click on the Archived Product checkbox.
Note: You can download a “Blank Template” from StoreFeeder also. So that, you can modify it and add new products to StoreFeeder

You will receive a message when the file has finished exporting.
Import Products from StoreFeeder,
Step 1: Go to the “Products” tab once again. Now, scroll down to the “Product Import Export” option from the drop-down and click here for the next option.
Step 2: You will find 2 options here in the top left corner.
- Import (Create New)
- Import (Update Existing)
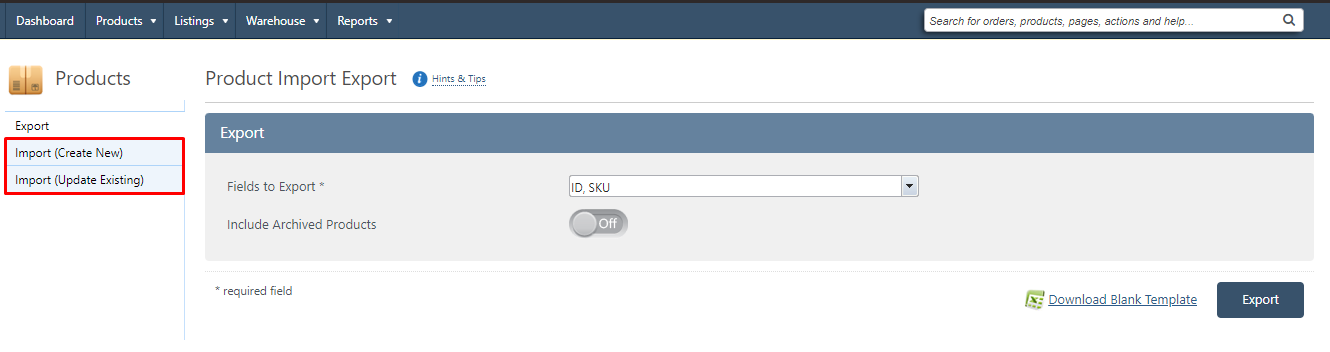
Step 3: To create a new import file, please click on the “Import (Create New)” option.
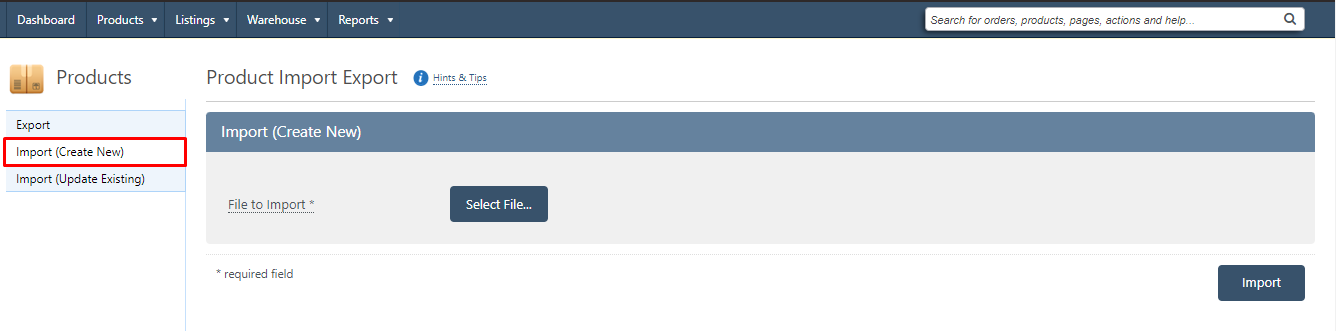
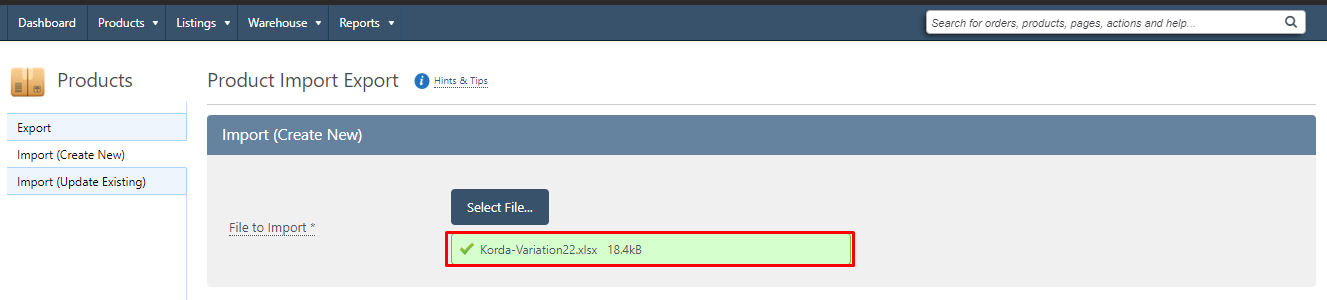
Step 4: Here you will first need to click on the “Select file” button to upload the spreadsheet. Please upload your desired file from your laptop.
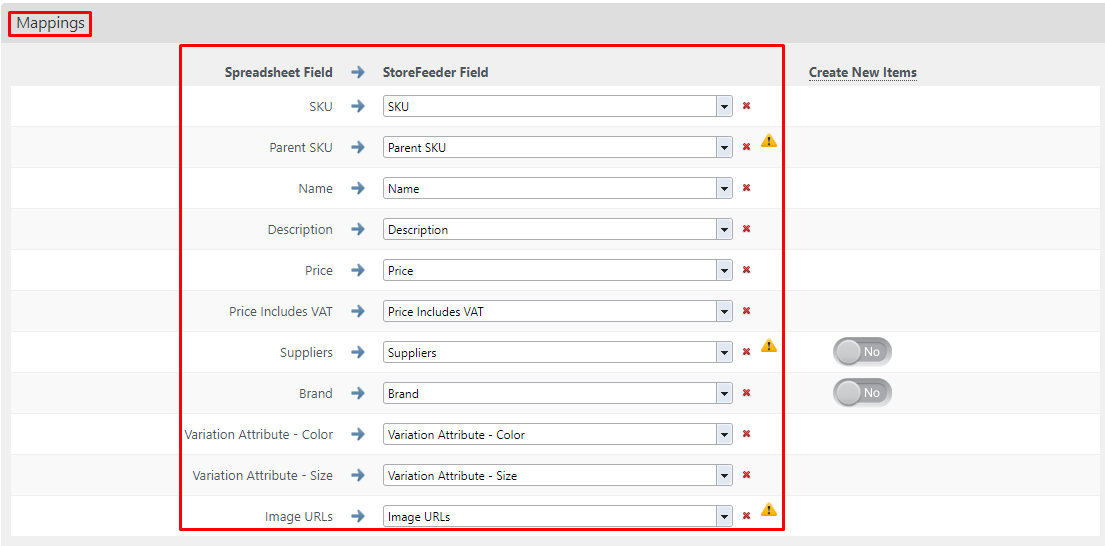
Step 5: Once the file has been uploaded, you will need to “Mappings” the “Spreadsheet Fields” to the matching field in Storefeeder.
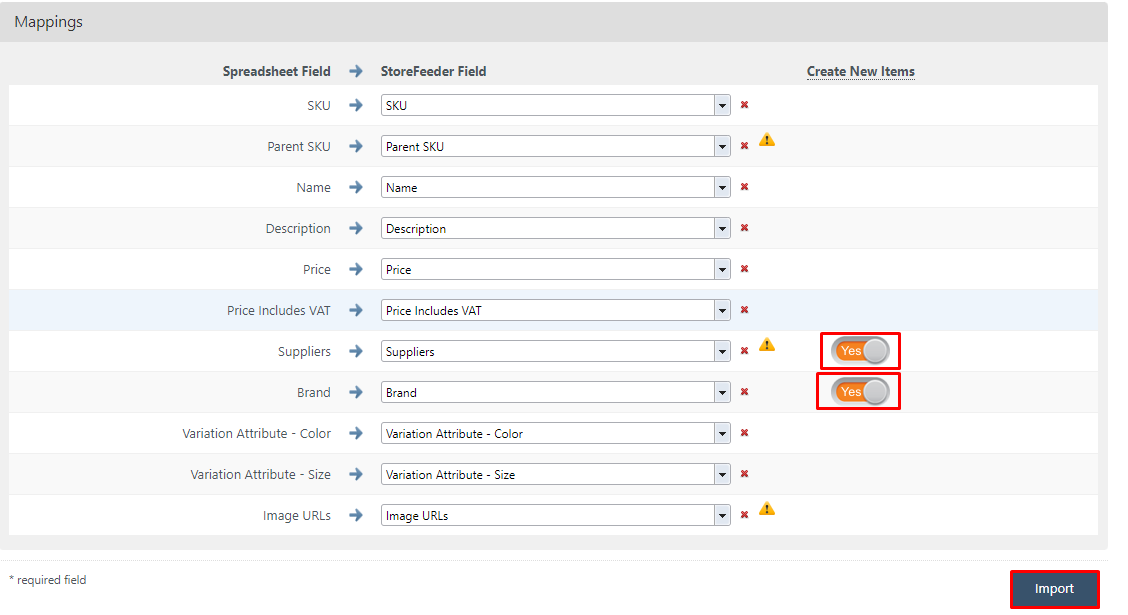
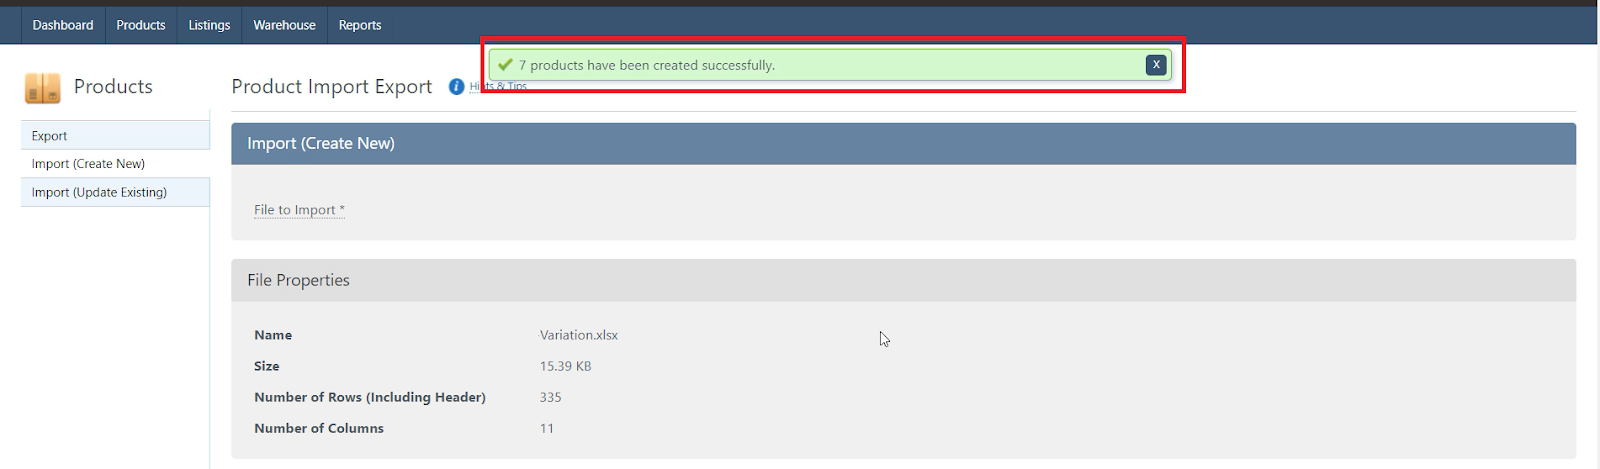
Step 6: On that page, you can see 2 enable/disable buttons and both buttons are OFF. You need to ON both buttons first and then click on the Import button to upload your file.
Step 7: You will receive a message like the marked area in the below screenshot when the file is uploaded successfully.
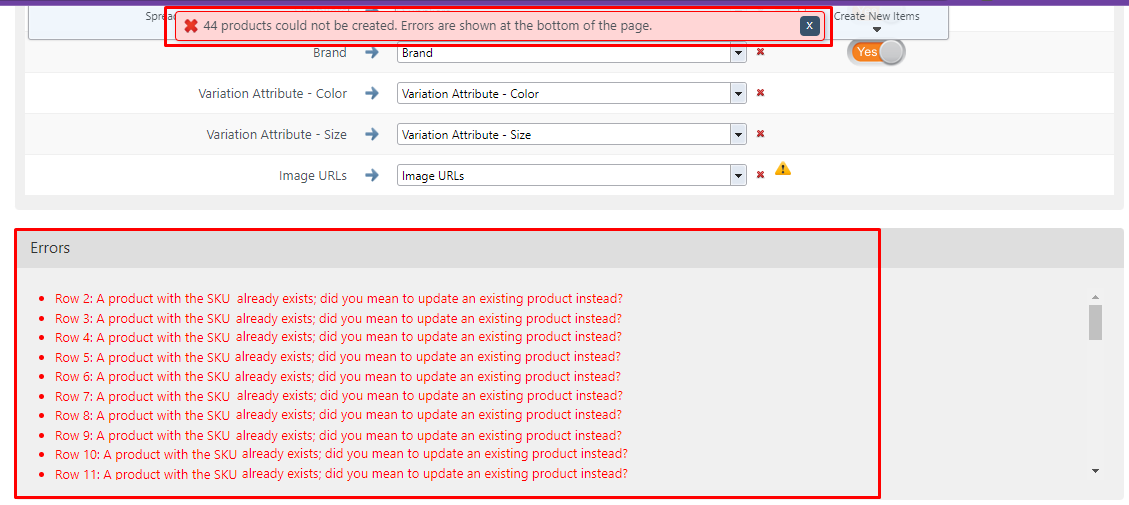
Step 8: If you made any mistake, the errors will be displayed in the same order as they were imported. You can easily find it out where you made mistakes in your file because it will show you error types with lines.
So, this is the process of importing and Exporting products on Storefeeder.
We hope that you understand the whole process clearly and can import and export products from Storefeeder easily by following our given instructions. If you like our discussion, please comment, share, and subscribe to our blog. Also, do not hesitate to ask if you have any queries regarding Storfeeder. We would be glad to hear from you and answer your questions.