In this article, we will discuss how to delete product from Sellercloud both in manual way and in bulk using excel or CSV file format.
SellerCloud has become a popular and powerful eCommerce solution to run business successfully on diverse marketplaces. We have already posted many articles regarding Seller Cloud. To stay updated with more in-depth tips and guides you can go through the following link.
Today we are showing items removal from SellerCloud. Sometimes it becomes necessary to remove items from Seller Cloud. It is possible to remove items manually from the manage inventory page and also through a bulk update. It is possible to remove only those SKUs which do not have related Warehouse Inventory, Purchase Orders, Orders (open or shipped), Listings and any other relation to products like shadows, n-matrix, or kits. Those SKUs have orders, they can be set as Inactive to remove them from the default search results on the Manage Inventory page and from product searches elsewhere in the system.
Products deletion on the Manage Inventory page
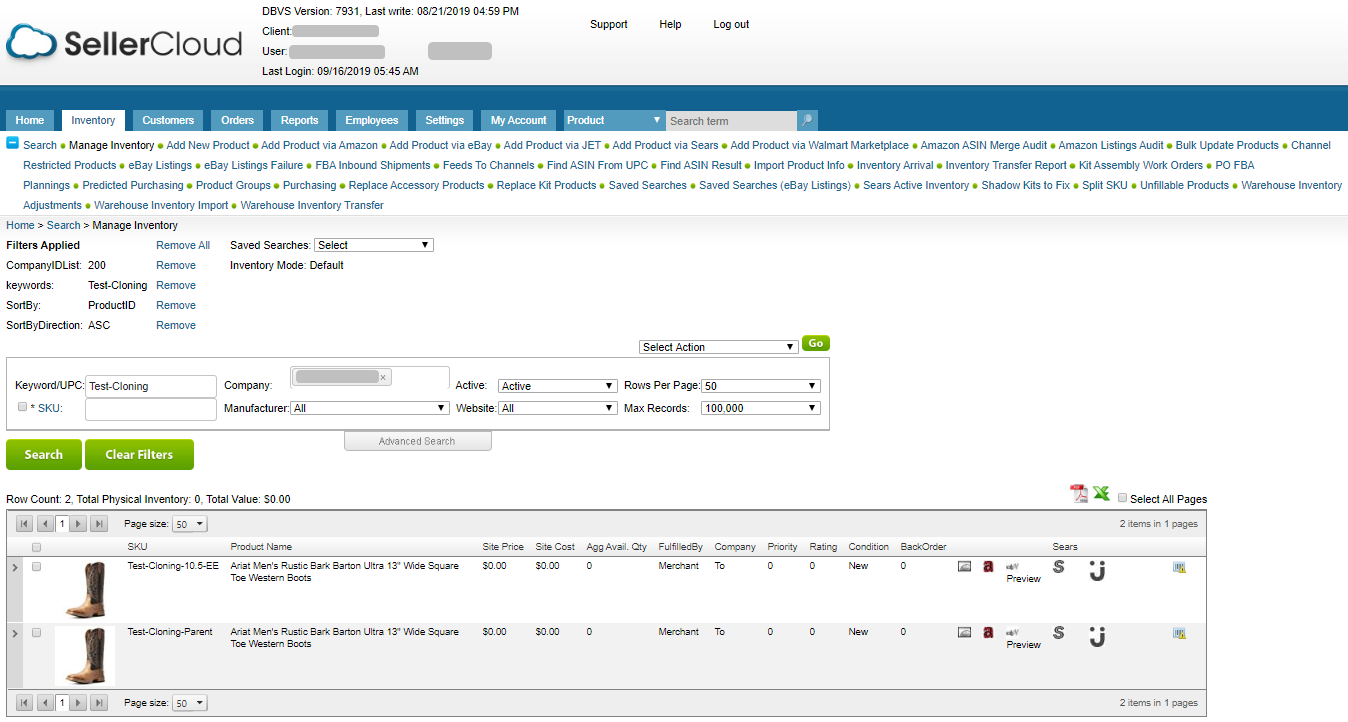
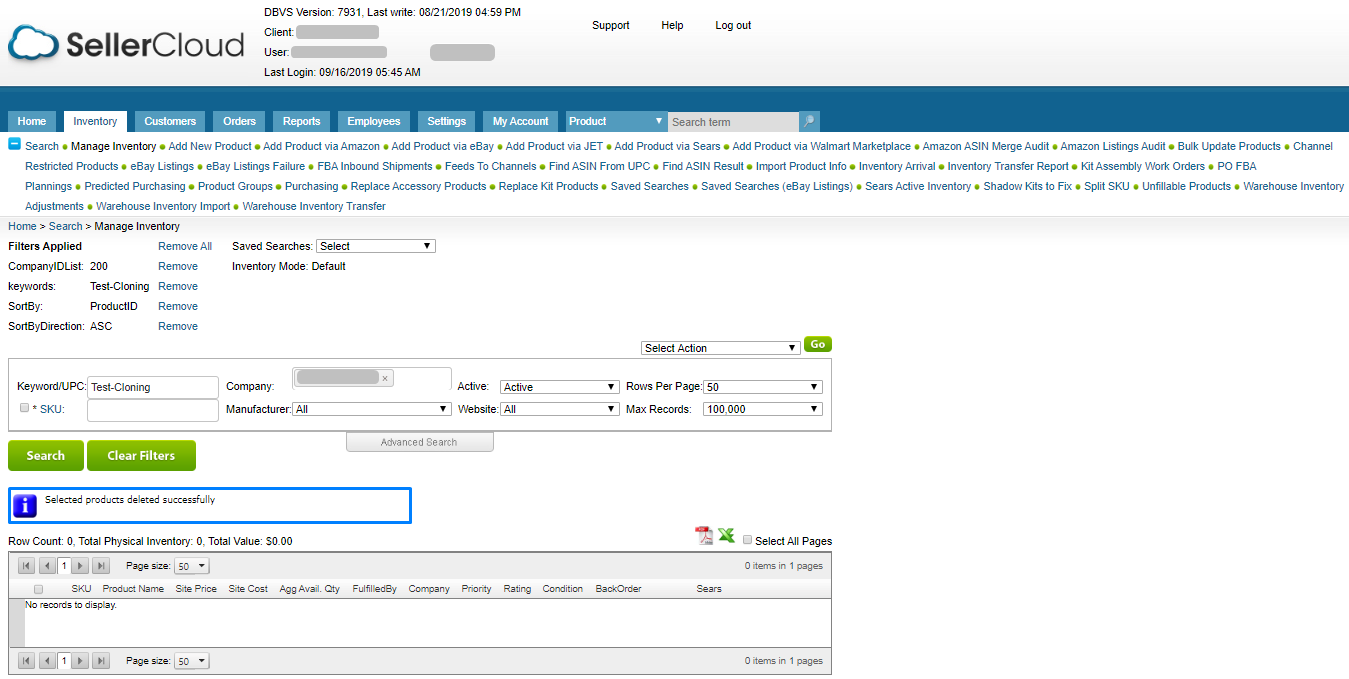
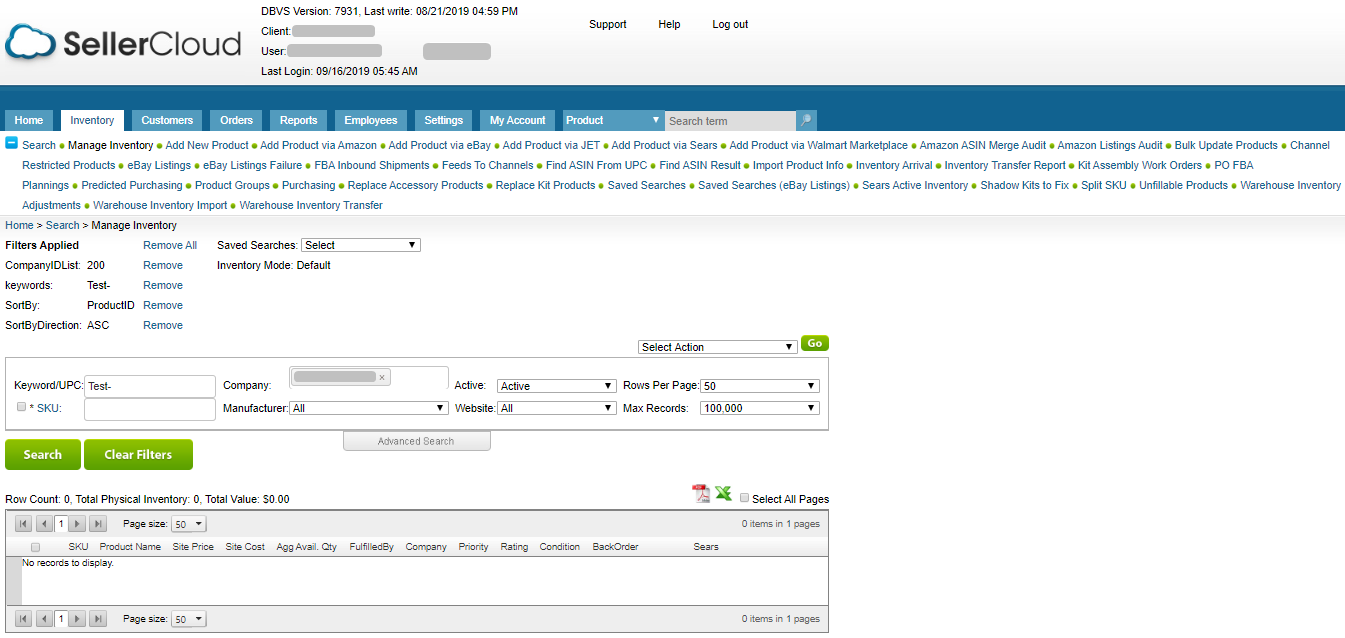
Search for the SKUs you want to remove on the Manage Inventory page.
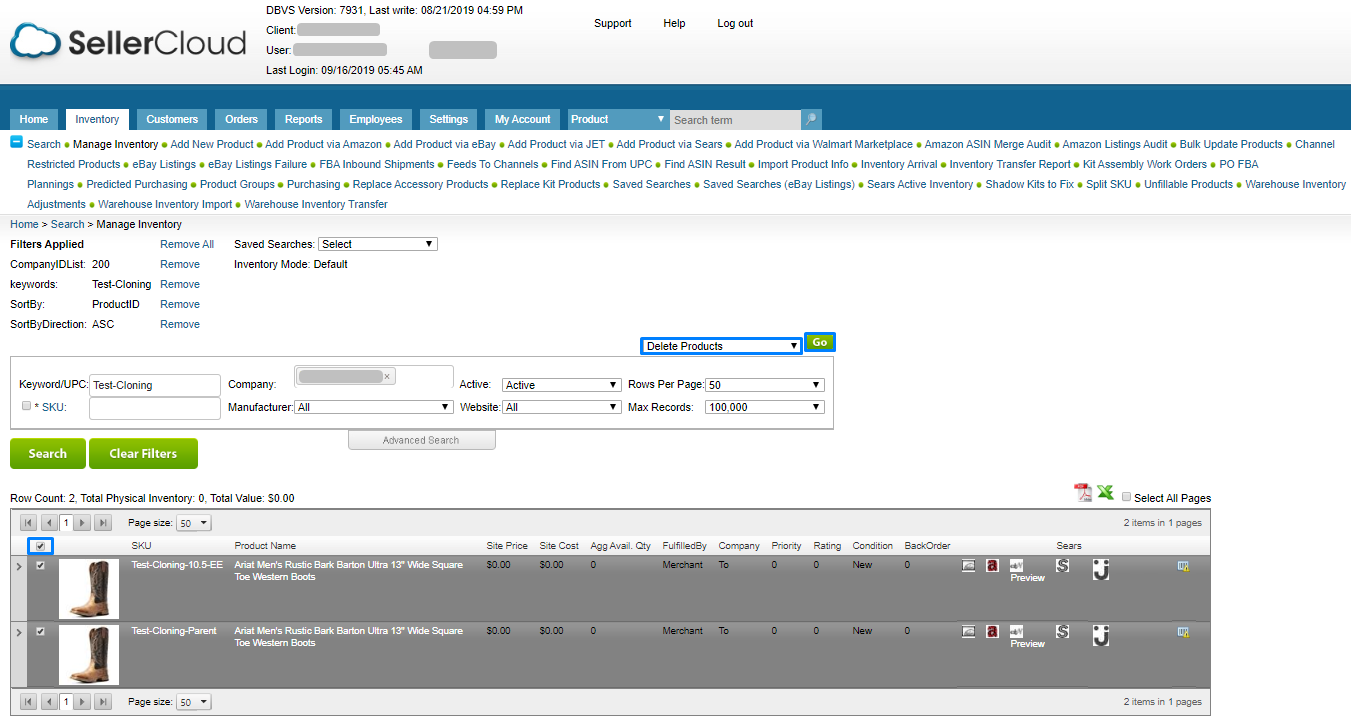
Select the items, also select Delete Products from the action menu and click on Go.
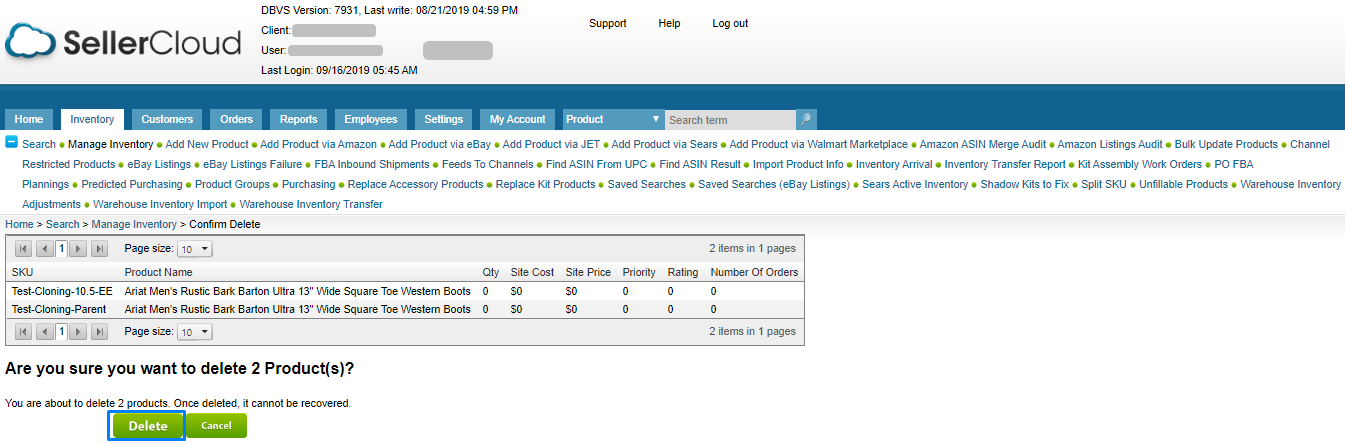
You will be asked for confirmation of deletion products. Click on the Delete button.
You will be confirmed that the selected products deleted successfully.
Delete products using bulk update file
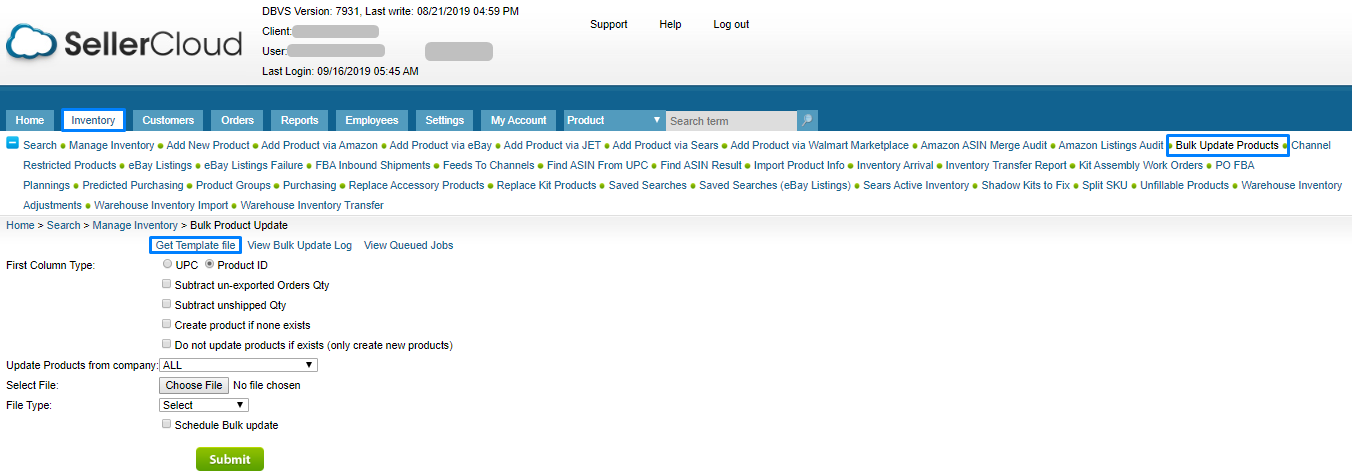
You can get template from Bulk Inventory. Click on Get Template file.
A pop-up window will appear. Select the Format in which format you want to download the template. Select _Action and _Action_Confirm clicking on the arrow.
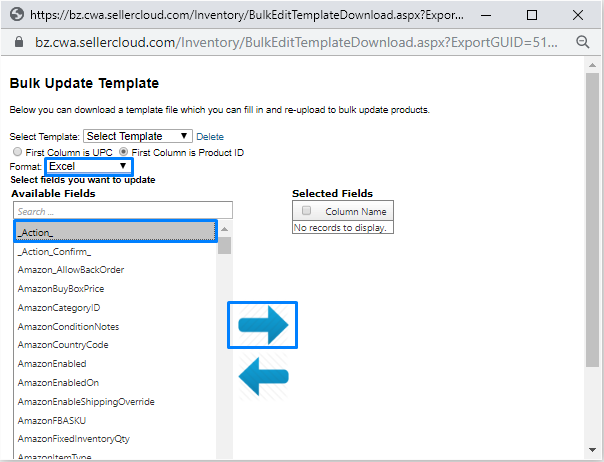
After selecting _Action and _Action_Confirm click on download template.

Populate the ProductID column with those SKU’s you want to delete. Enter the value DELETE under _Action and _Action_Confirm columns.

Note: You can prepare the feed instead of downloading the template. In that case you have to name the columns exactly ProductID, _Action and _Action_Confirm. If you change a little the headers, the deletion will not take effect.
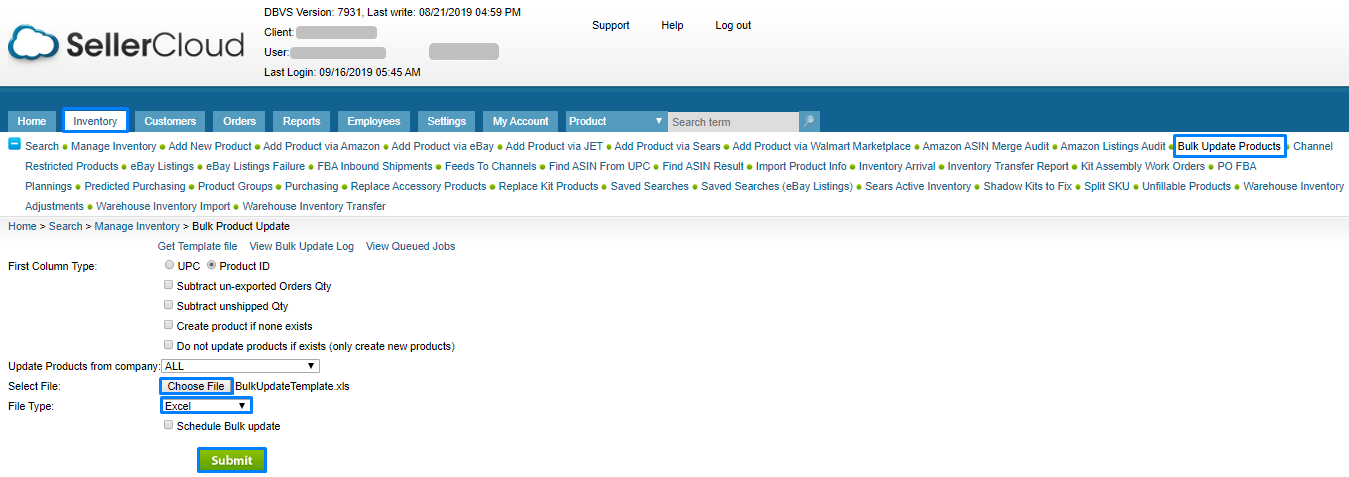
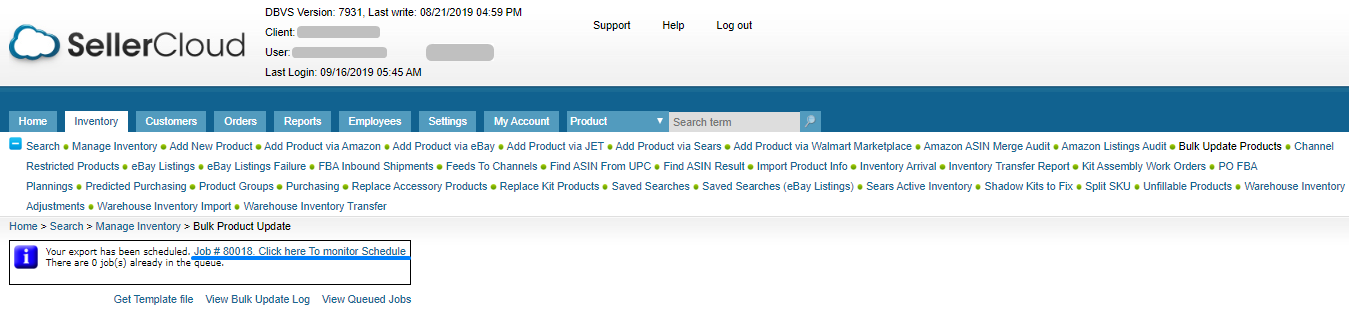
Go to Inventory and click on Bulk Update to upload the feed on SellerCloud. Click on Submit button.
Click on the Job ID to monitor the job.
After a while, you will find the status is complete.
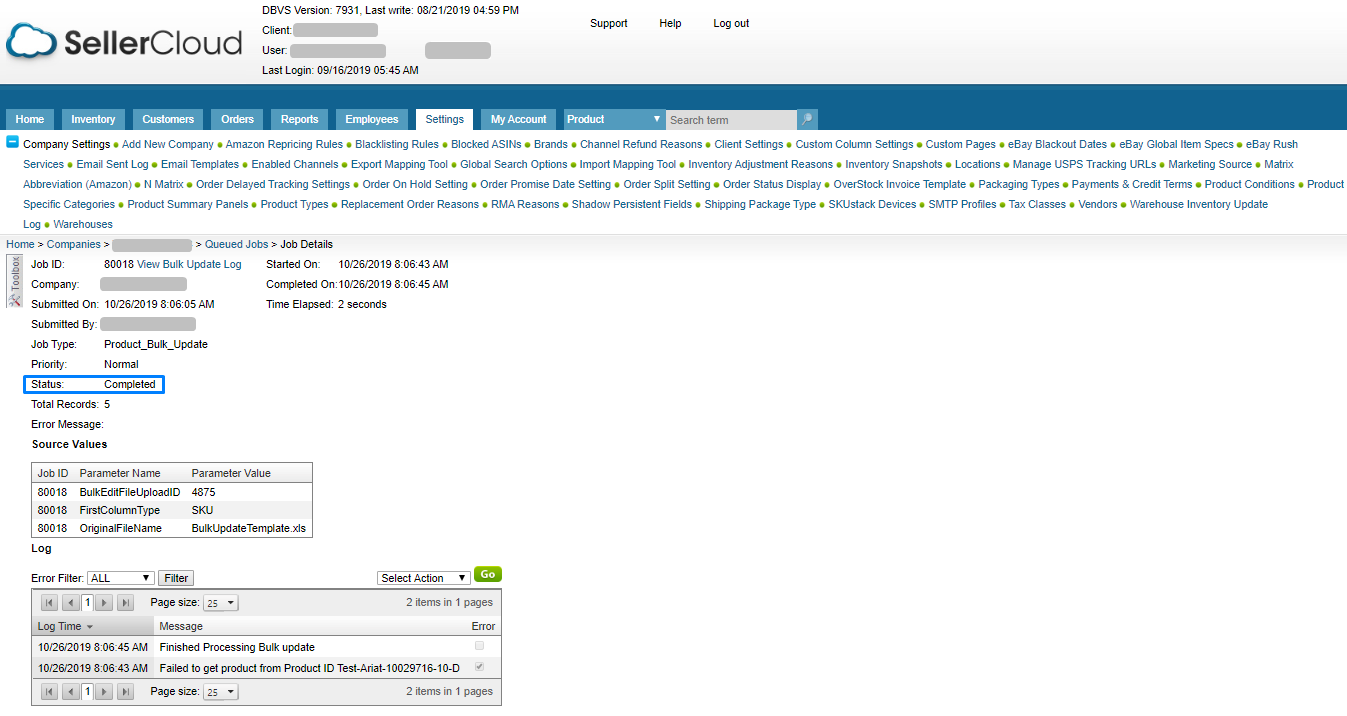
After the job completion you will find the deleted SKUs do not exist on SellerCloud anymore.
Stay updated with us and don’t forget to share your opinion about this SellerCloud solution. Leave comment regarding any kind of ecommerce related query.