This Inkfrog eBay lister is so fast and effortless that one-of-a-kind, rare or unique items are quick and easy to list. It’s a management and eCommerce listing software for vendors selling through major eCommerce platforms (e.g., Amazon, eBay, BigCommerce, etc.). Inkfrog is one of the best eBay listing management software with more flexibility and more features. Today we are here to show you how you can easily use InkFrog to list your products on eBay smoothly and without any issues!
Previously, we introduced InkFrog to you and went through all the basic features of Inkfrog, and discussed what you can do there. Today, we are going to show you how you can list products on eBay, set a shipping policy, and provide other details.
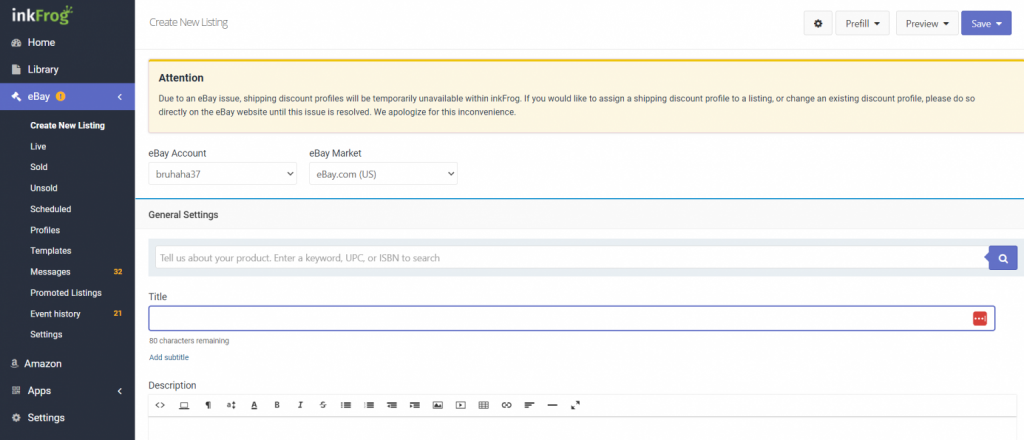
Step 1: Login To Inkfrog Account
First off, we will need to get into our inkfrog account by placing our user id and password. Then we will be taken directly to the inkfrog home page where we can see a huge selection of tabs.
Step 2: Start Drafting on Inkfrog
If we want to create a brand new listing for eBay, we will need to select “eBay” and click on “Create New Listing”. If you are using the master profiles then select the pre-fill option located in the top right corner of your screen. The “Tell Us About Your Product” field is used to add eBay catalog product details to your listing.
Here you can type in the product you are wanting to list and hit search to get all the results listed below. You will be able to find a few category suggestions from eBay based on your used keywords.
Step 3: Select the Category
You can directly select the category for the suggestion and get to work. Or you can scroll through other different categories of suggestions to select the best one that is similar to your product.
If you are not satisfied with the suggested categories you can close the suggestion window and list your product without selecting the catalog selection.
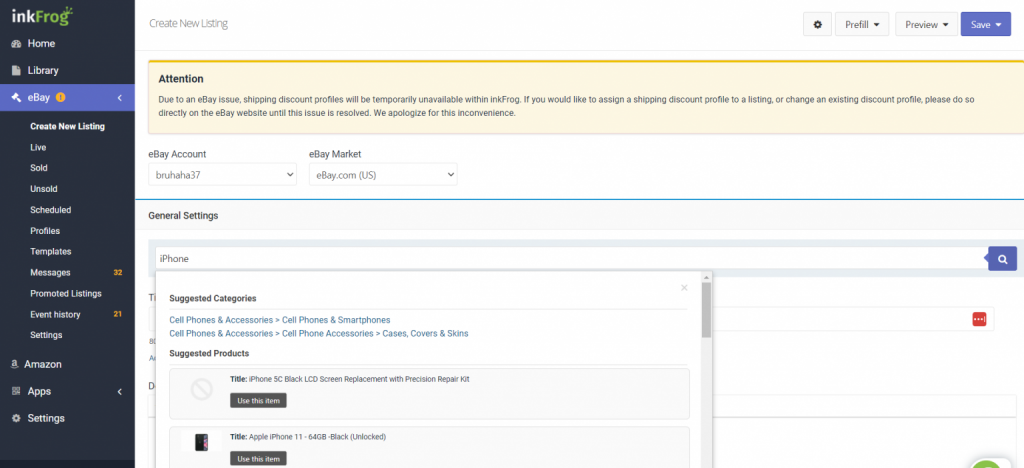
But if you have selected an item for the suggestion list, then you will see that all the categories have already been filled out automatically. Here, you can add your own eBay catalog details in the stock photo for your listing.
Step 4: Put UPC or GTIN (Optional)
If the selected listing does not have the required information prefilled, you will need to provide a title and an item description. If your product has a product identifier like UPC, MPN, EAN, ISBN, or GTIN then you can enter it here.
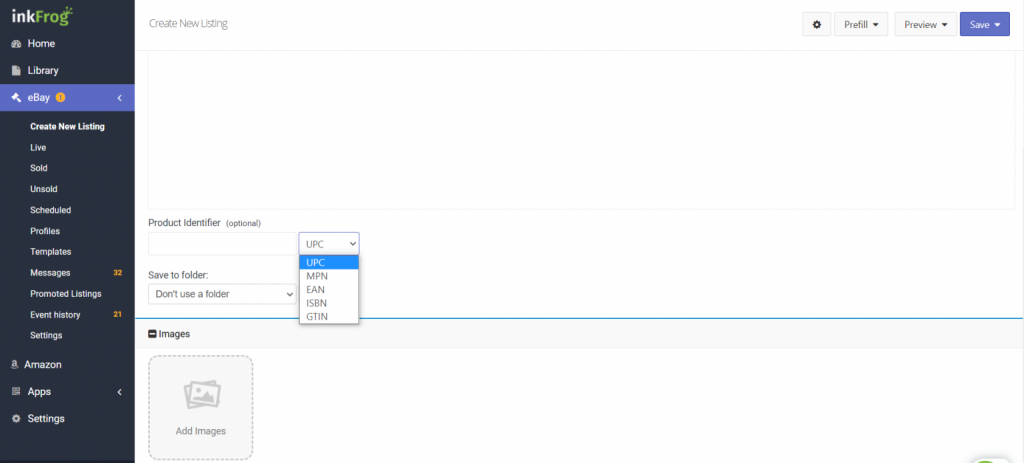
Step 5: Save The Listing To eBay Folder
Now you can click on the SAVE button to save your listing or create a new eBay folder to enlist even more information by selecting the PLUS button if you need it. Here you can easily upload your product’s image even if you use the preset template from eBay and make a change to it.

If you have created listing profiles beforehand, then you have the choice of linking that profile to your listing or manually fill the necessary details. The main use of listing profiles is to save listing details regarding your product category and quickly add them to your new listings or bulk listings very easily.
Step 6: Put Duration And Variation
Now, as we have already selected the eBay category and matched it with inkfrog, we can now choose your listing type, auction, fixed price, or multi-variation fixed price. Choose your listing duration and note that all fixed-priced listings are automatically GTC or Good Till Canceled.
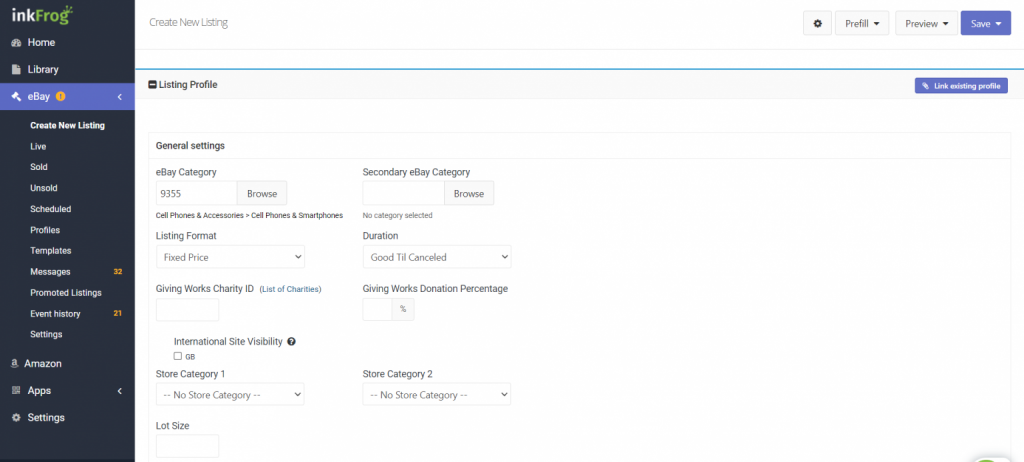
You can also choose to give your charity ID which is optional and you can also set a certain percentage that you will be donating to that charity. You can make your international site visibility selections if applicable, and doing so will charge you more. This will allow your listing to be displayed on the selected eBay sites in addition to your own eBay default site.
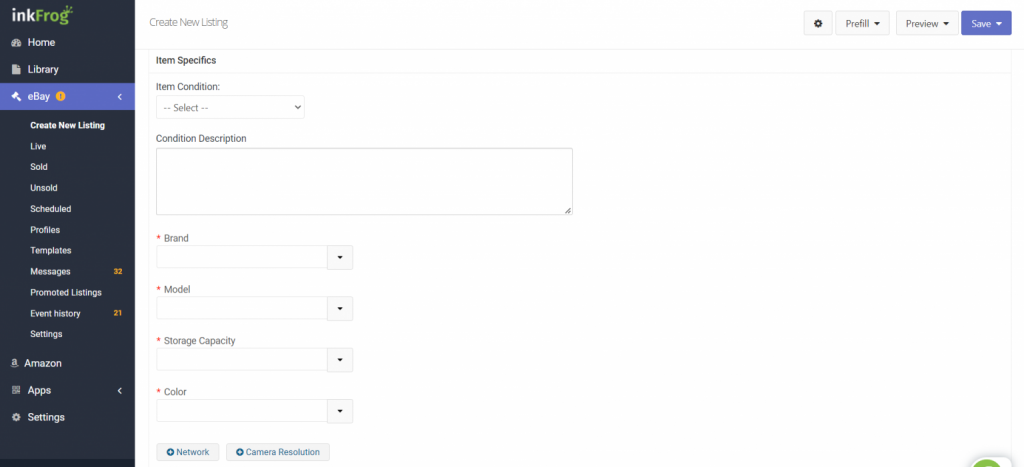
Step 7: Put the Description
Next, you will see a field for Description. This can only be accessed if you have selected any other category apart from New. After that, you now can add any type of item specifics regarding your item. Always know that, if you see a RED Star beside a category then you will definitely need to fill out that field. You can also add any other optional item specification to your listing.
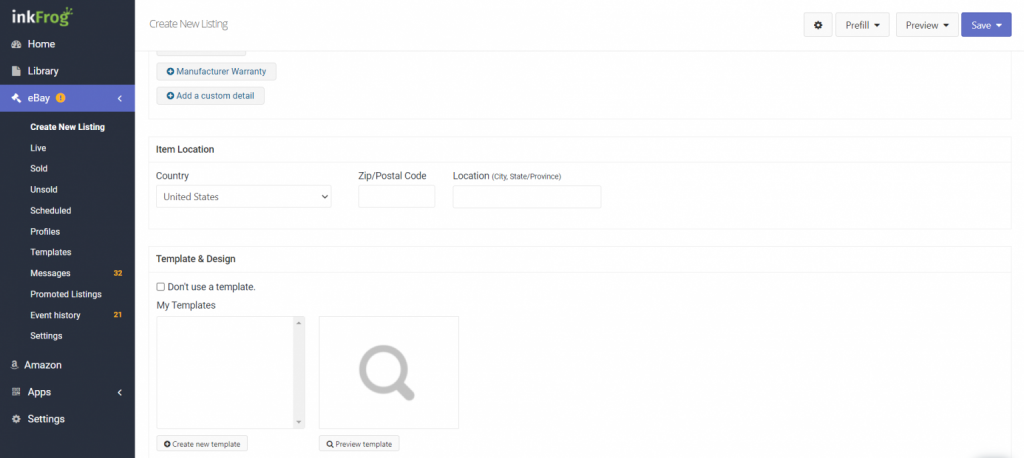
Step 8: Set the Shipping Info
Next, you will need to select the country and the postal code from which the items are going to be shipped. After that, if you have 1 or more templates, you may choose any of the templates to be used with this specific item.
You also have the option of creating a new template by clicking the New Template button. But if you don’t want to create any sort of templates for the item, then you can skip all these all together and proceed to the next set.
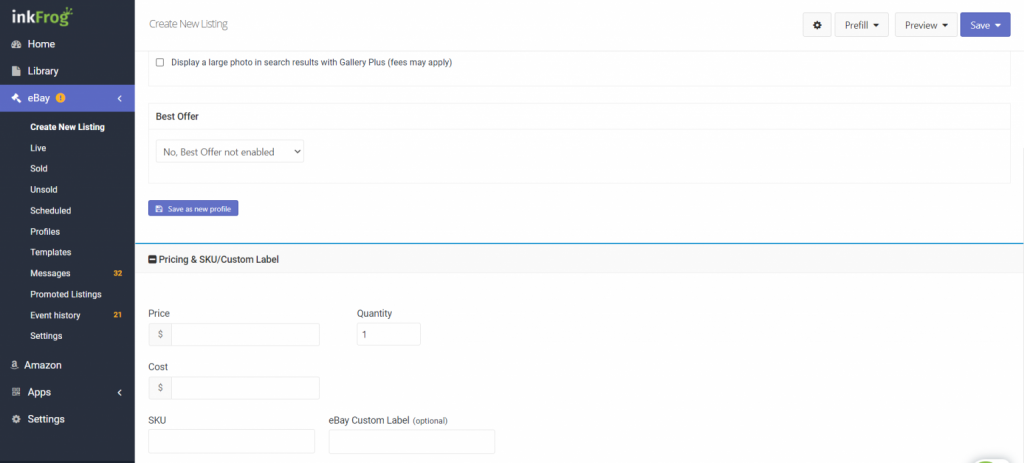
Now, you can choose to make any best offer by choosing the options from here. Add your product pricing and quantity, add a sale price (if needed), and add an SKU. If you do not type in your own SKU, then INKFROG will generate a random SKU for your product.
If your product does not have any variations then you can skip this part but if it does then follow these steps. When you want to add variations to your product, you will select the Add Variations button. Here you can choose to put variations for sizes or colors.
Step 9: Put Price and Quantity
Next, you will need to add in the base price, base quantity, and base SKU. Now you can select from the pre-formatted variation option or create your own variation. Enter the option values for each option name and select the specific pricing for each inventory.
Step 10: Put the Return Policy
If you want to use a return profile, you can choose to link the profile with this link. Or, you can skip this process and proceed to the other requirements below. You can select whether or not you want to accept returns from here. Here, you have the option to select the number of days an item must be returned within.
Select how you are going to provide the refund to your customer. You can also choose who is going to pay for the return shipment too.
Now, you can proceed to make the shipping profile for your product listing. Here, you can either choose from existing shipping profiles or make a new one for that specific product listing.
Next, you will need to select the shipping type. This option varies on the different types of eBay marketplaces. If you want to go for eBay’s global shipping program then you can select this option.
Step 11: Select Handling Time
After that, you will need to select the handling time. This TIME refers to the time you get paid to the time it takes you to place the product to your shipping courier. Note that, this TIMING does not refer to the time it takes the buyer to receive the product.
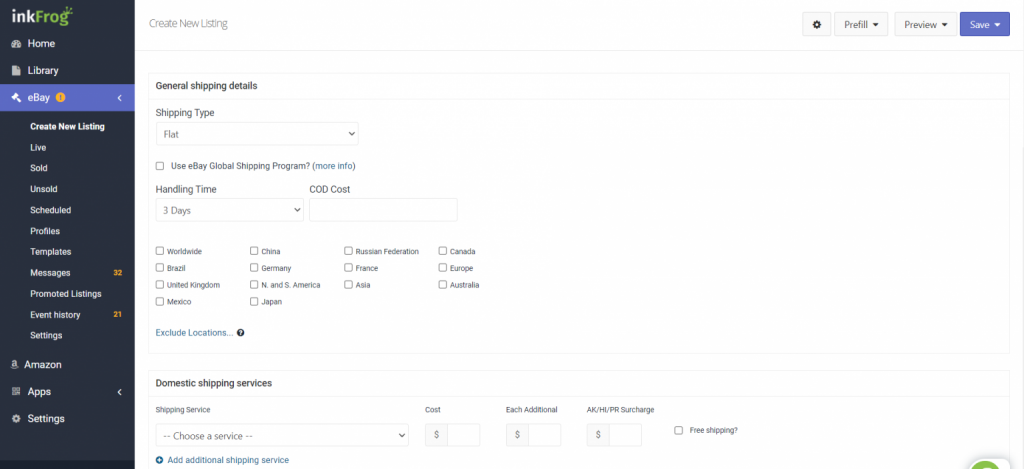
You can also set any sort of include or exclude shipping locations to the product listing. You have the choice of choosing from one or more local shipping services to ship the product. There is an option here too, that lets you choose between one or more international shipping services.
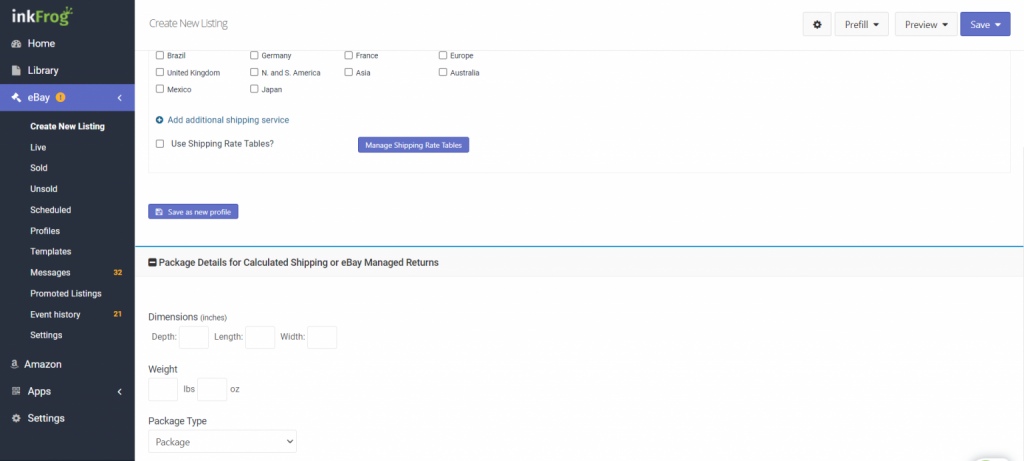
Step 12: Put the Package Dimension
Now, you will need to place all the information about your product regarding shipping like package dimensions, weight, and the type of package. This information is a must-have when you are doing calculated shipping.
Step 13: Add a Payment Gateway
The final set is to add a payment gateway for your product. If you are using a payment profile, then you will have to option to link the product with the profile and if not, then you can continue to the next steps.
You can add your PayPal account and email here. You can also select More Options to add additional payment information for your product.
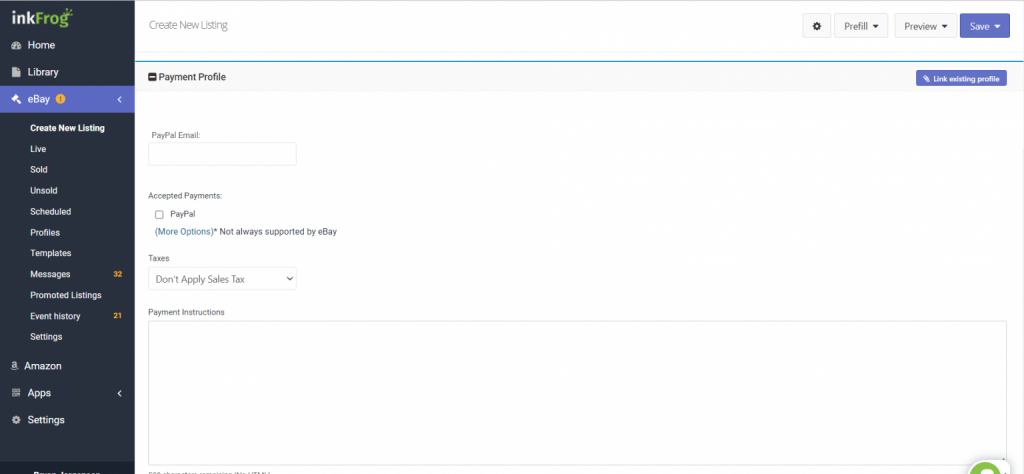
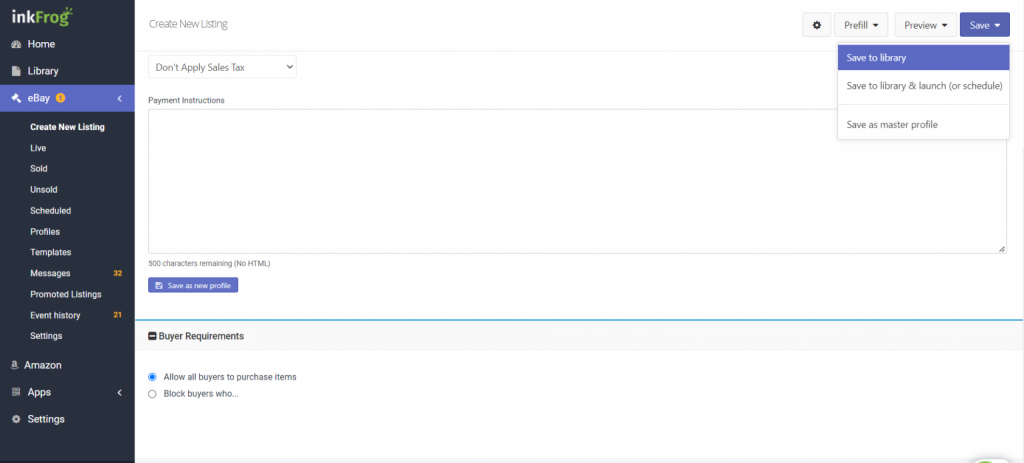
Provide your sales tax, add any sort of additional payment instructions for your customers and finally make any needed buyer requirement selections from here.
Step 14: Save and List
After all this information is filled in, you can now select the Save button to either save the product listing to your library or save it to the library and launch or set a schedule for your listing on eBay.
Insights!
In the entire post, we have gone through the process of showing how to list an item on eBay and set the shipping details. I hope you have understood how you can easily list products on eBay via InkFrog.
If you have anything more to know regarding InkFrog, please write down your questions in the comment section. Moreover, you can also let us know your question via mail at info@ecomclips.com. Till then Take care, and stay safe. See you soon.