Add Variation Item on Jet Marketplace Using Sellercloud Interface – Jet Variation Listing Overview in Sellercloud
Jet has become one of the largest marketplaces within a very short time. Most of the customers like Jet because it sells at cheaper prices than elsewhere on the Web. We know SellerCloud is a powerful multi-channel software, in this brief discussion we will explain how we can easily create listings on Jet.com directly from SellerCloud.
Important Note: Before starting Listing on Jet from Sellercloud we have to make sure, we integrated Jet Store correctly with Sellercloud , as well as we must need to list a test item on Jet to activate the Jet Store
To list items on Jet the products must be ready for Jet to be posted. There are two ways we can follow to make item ready for Jet Listing.
- 1. Making the items ready individually
- 2. Making the items ready in Bulk using Excel or CSV Feed file Template
It is possible to make the items ready for Jet one by one. When we want to list very few items we can process in this way. But it is time-consuming to list huge items one by one. To list huge items at a time we make all of the items ready in Bulk. At first, we will see listing items individually. Then, in the next step, we will see the bulk process using Excel or CSV file.
Making Items Ready for Jet – Individually
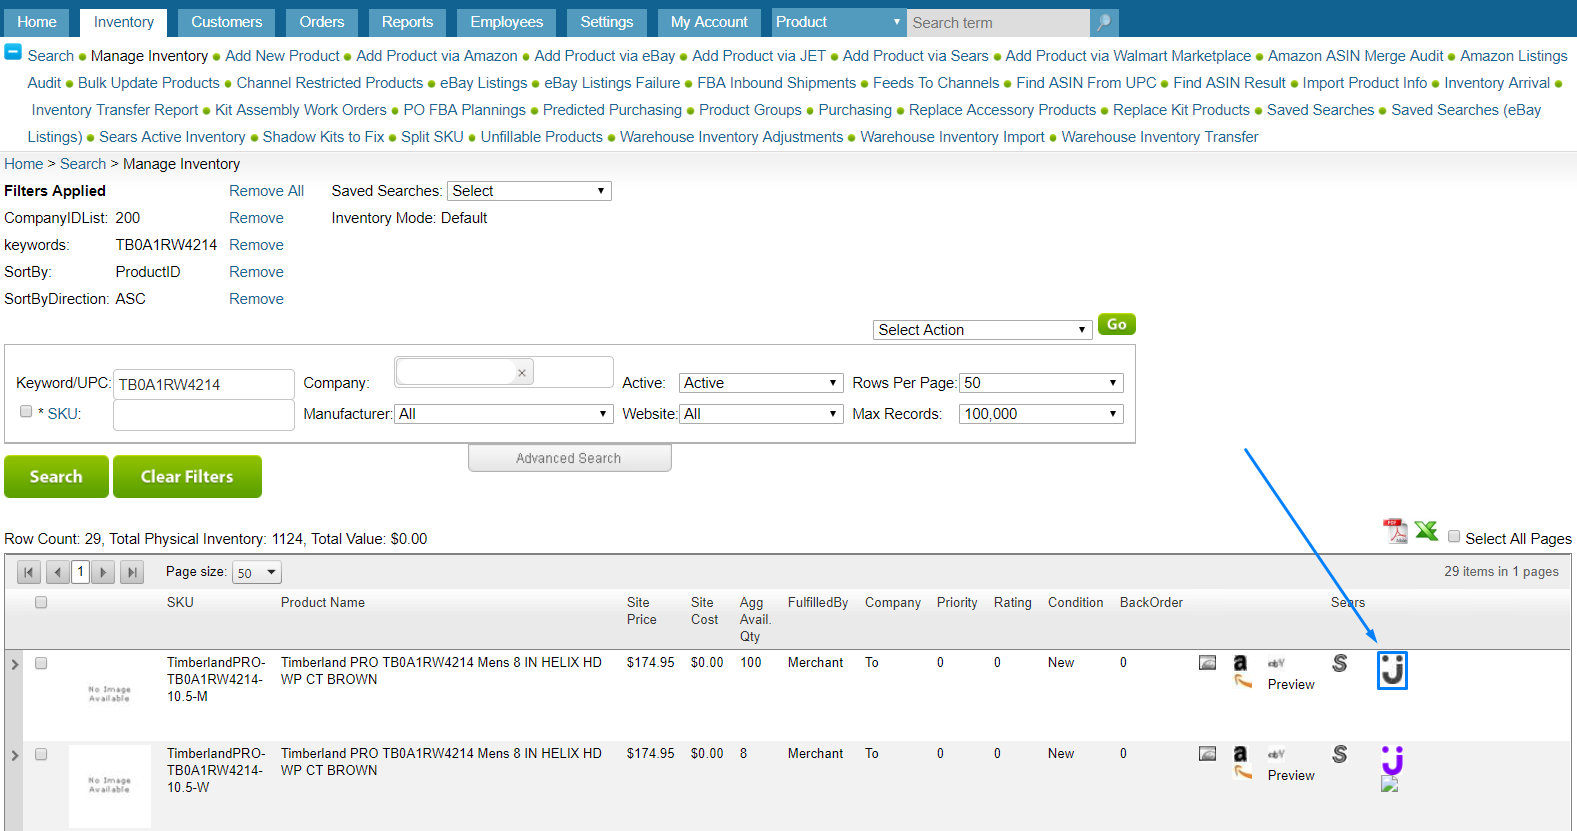
First of all, we will search the items on SellerCloud Inventory page those we want to sell on Jet.
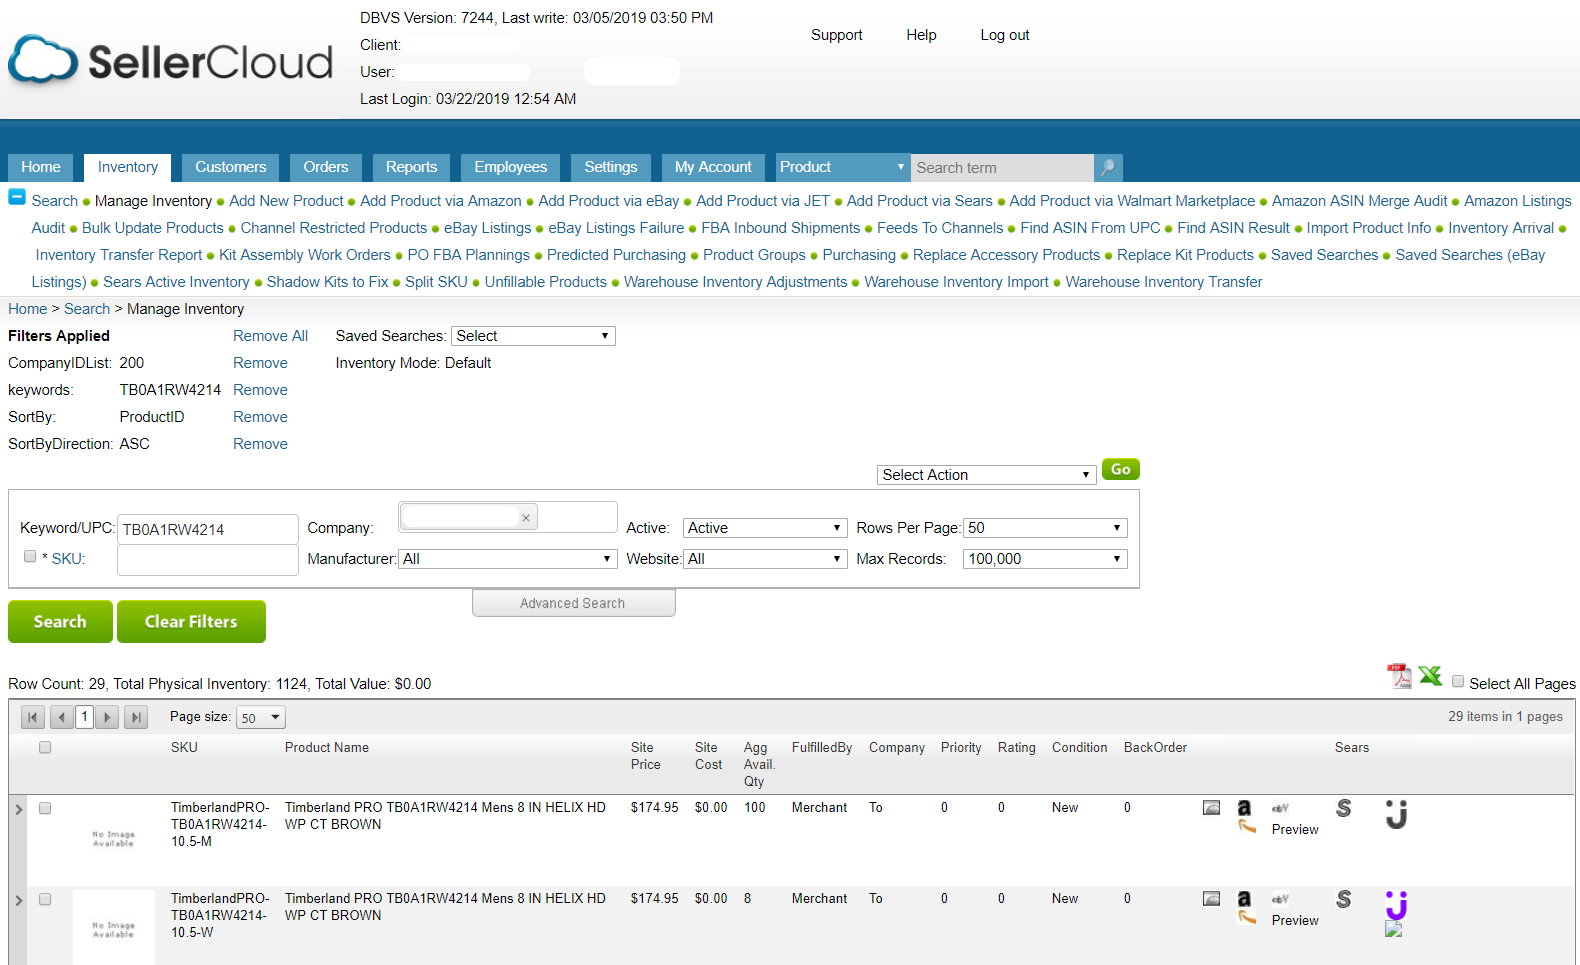
Then we will click on the Jet sign on the right side to go to Jet properties page.
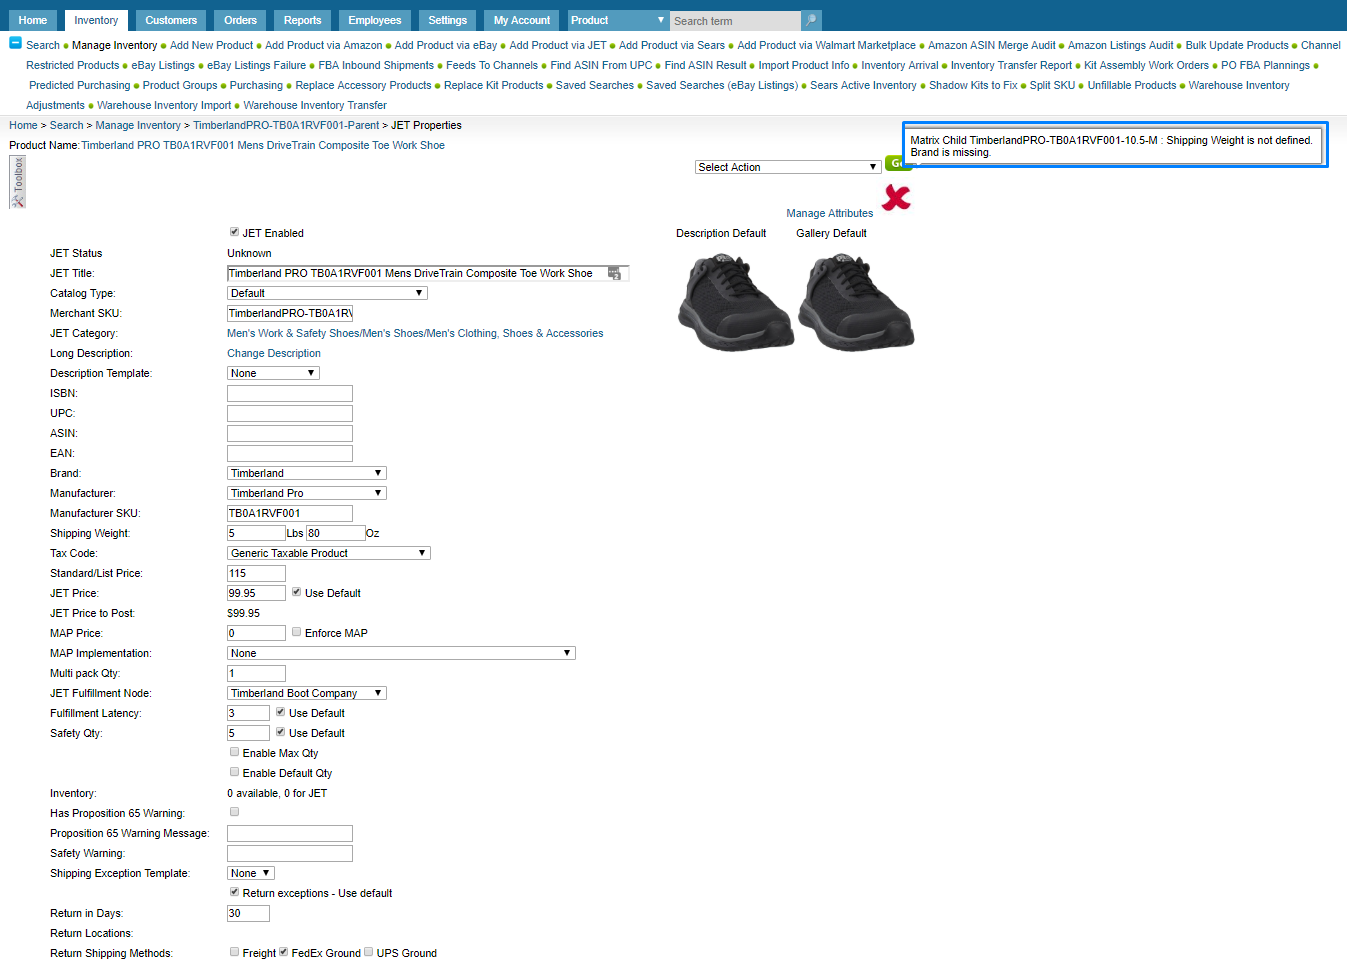
On the Jet Properties page we will see the required field those we have to populate to list items on Jet. Some fields must be filled to make them ready for Jet. We have to enable the item on Jet, we also need to provide Title, Merchant SKU, Jet Category, Long Description, UPC, Brand, Manufacturer, Manufacturer SKU, Shipping Weight, Standard/List Price, Jet Price, Jet Fulfillment Node, Inventory.
Note: JETMerchantSKU does not allow any special character, only valid chareacters here are
abcdefghijklmnopqrstuvwxyzABCDEFGHIJKLMNOPQRSTUVWXYZ1234567890-_

We can hover over the red cross mark on the right upper corner to reveal the missing information for Jet.

After populating every field when we will click on save, we will notice the red cross mark has changed to the green check mark and showing the item is ready for Jet.

We need to make every child items ready in this way for listing a variation item. It becomes quite difficult when the variation item has a lot of child items or if we want to list many different items at a time. For this reason, we are seeing now how we can easily list items on Jet in bulk through SellerCloud.
Making items ready in Bulk using Excel or CSV Feed file Template
We can prepare a feed in excel or CSV with all required information like ProductID, JETCategoryID, JETMerchantSKU, JETTitle, JETEnabled, JETPrice, JETPriceUseDefault, ManufacturerName, ManufacturerSKU, LongDescription, PackageWeightLbs, PackageWeightOz, UPC, BrandName, JETEnableCustomAttributes.

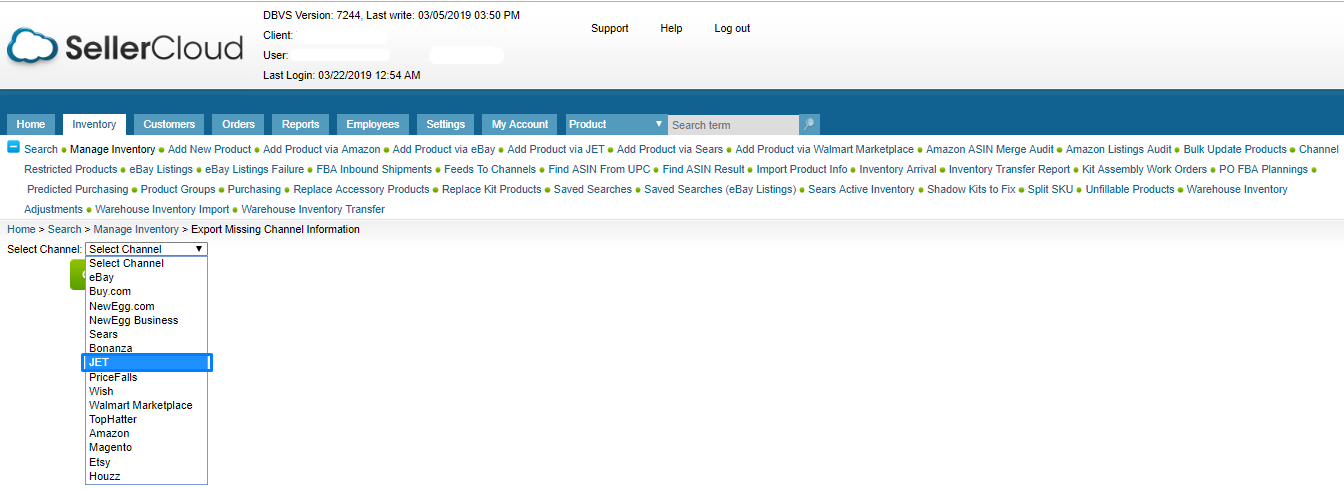
We can also export the missing information from SellerCloud. We have to go to Inventory Page and search those items we want to list on Jet. Selecting the items we have to select Export Channel Missing Information from the dropdown and we will click on Go.

At this time we will click on JET from the drop-down menu and then we will click on continue.

The missing information has been exported. Here we are seeing, some items are not JETEnabled, some do not have ManufacturerName, some require LongDescription, some Shipping Weight and BrandName.

We will upload the items filling the missing fields.

We will go to the Inventory Page and will click on Bulk Update Products.
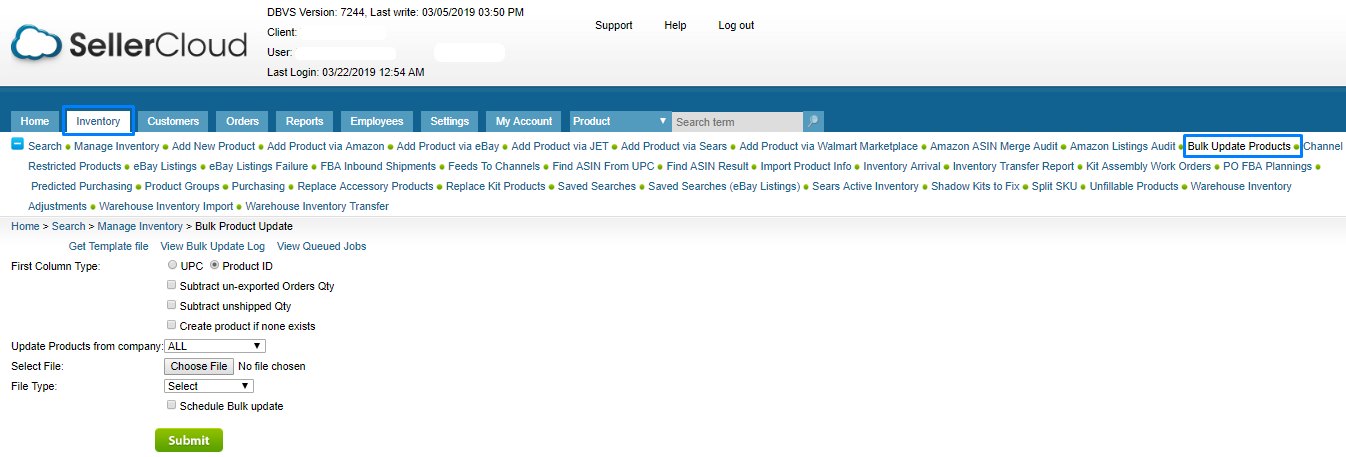
We will check Create product if none exists, select our company name from the drop-down menu, choose file and also select the File Type. We will submit our feed to SellerCloud.

Again we will search the items on SellerCloud inventory page. We will notice the color of the ready items has been changed to purple color those were dark before.

We will go to the Jet Properties Page of the parent item and find that the item is ready for Jet.

If any of the child items were not ready, we could notice the notification here.
We will click on the Manage Attributes.

We will select the Attributes from the drop-down menu and save the attributes.

After giving all the attribute we need to Save those.

Now we will go to JET Properties page, we will select Post On Jet from the dropdown menu and click on Go. Now our item will Post to Jet.
Note: Jet take some time to approve the listing. So we need to wait for Jet Approval.
Another Note: If the listing is already is Jet catalog with Same UPC then Jet will merge the Listing with existing listing and If the listing is not in Jet Catalog then Jet take more time to approve the listing. Cause Jet take the Content very seriously and they analyses the content before publishing a new listing on their portal.
So far, we have discussed the process of uploading a Variation item to Jet from Sellercloud. But If anyone wants to list simple item on Jet, he or she can easily do it following the same procedure. It is much easier than a variation listing. The only difference is we have to define all the attribute in the Attribute section. No need to work on Matrix Item.

Hopefully, this article will help everyone who wants to list item on Jet using Sellercloud Interface. If still anyone faces any issue with uploading feel free to contact with us. If needed then we will write another article based on Simple Listing Procedure.