How to Create Listing or Add product in Sears using Sellercloud – Sears
Listing Overview
Listing items in multiple marketplaces create the opportunity to gain more sales, more customer and finally more revenue. In this article, we will discuss how to post items in “Sears” as it is one of the largest retailer marketplaces in the world. But here we will show the process of listing a simple item from Sellercloud, Anyone can list items directly from Sears backend, but who are using Sellercloud as their inventory or listing management software, sometimes it becomes difficult to list items, especially to those who are new in Sellercloud.
Prerequisite: Before posting an item to sears we need to make sure every item are ready to list on Sears, If any of the items are not ready to list on Sears, Sellercloud system will show error During uploading. Af first, we are going to explain how to make an item ready for Sears via Sellercloud as well as we will discuss, how we can know which items are ready or not to post on Sears.
Enable / Make Ready items for Sears
When we will use SellerCloud for uploading item on Sears, first we need to store information in SellerCloud as well as need to make ready of every item individually with all the required information of Sears marketplace. Let’s see how we can make them ready.
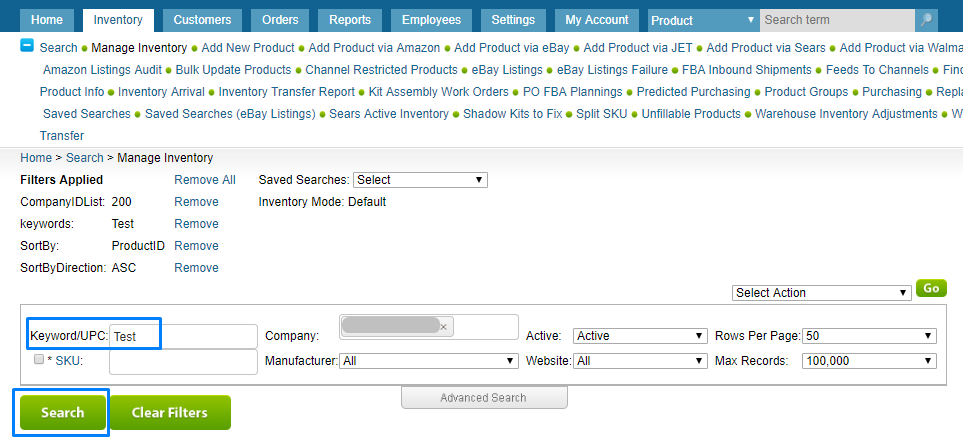
1st Step: First of all, we need to find the item on SellerCloud. So let’s go to Sellercloud and search the item from the Manage Inventory Page.
Then in the keyword or /UPC section, we need to put SKU or UPC to find our product, that we are going to list on Sears.
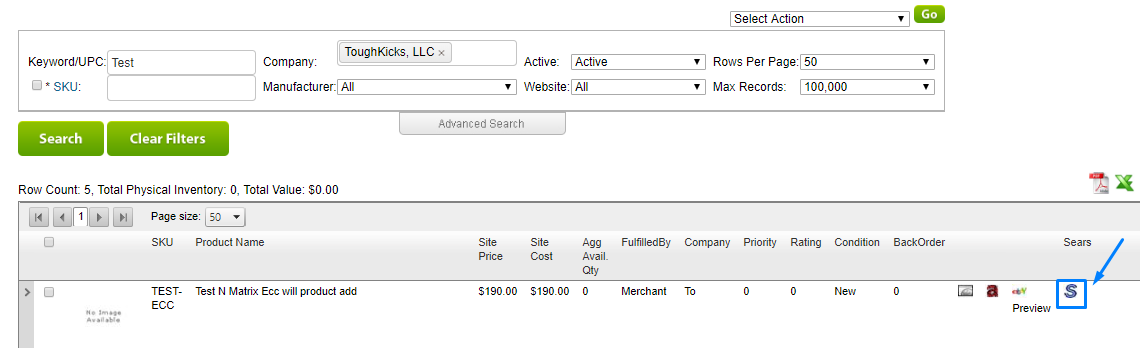
Then, We need to click on S sign to go to Sears Properties page.
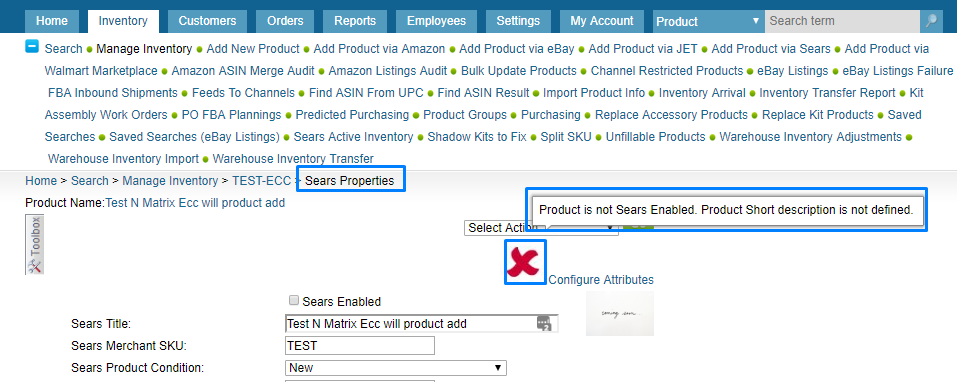
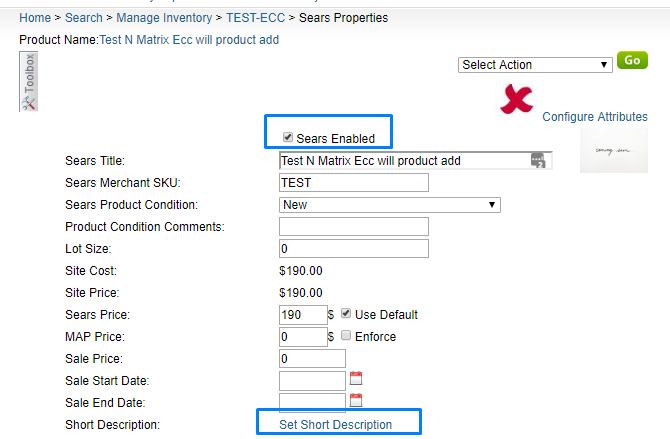
On Sears Properties page we need to populate the required fields for the item. Here you will notice a red cross mark on the upper right corner. If you hover over there, a notification will be appeared mentioning the required things like Enabling Sears, Category, Short description and Manufacturer’s SKU.
Now check the Sears Enabled box and click on Set Short Description.
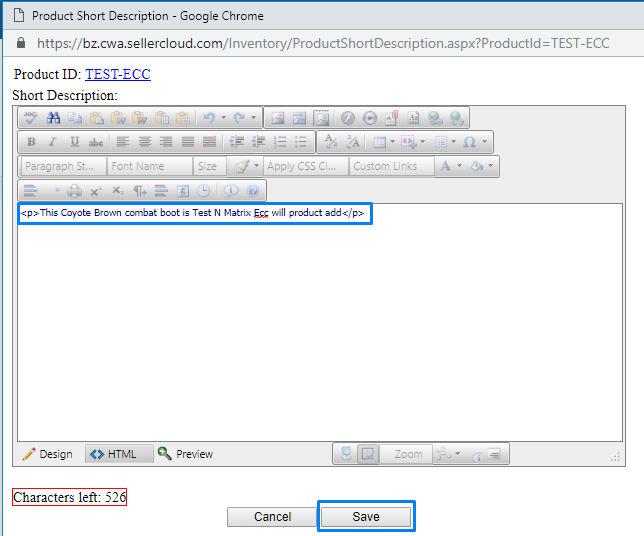
After that A pop-up window will appear, consequently, you will require to write the short description there and You have to click on the Save button.
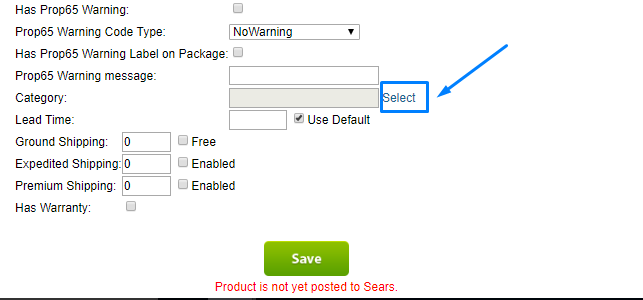
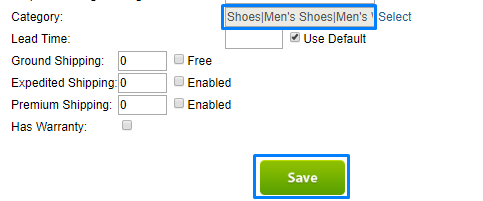
After that, you need to click on ‘select’ button to select the category.
Again a pop-up window will appear, From there, you need to select the category and click on the Done button.
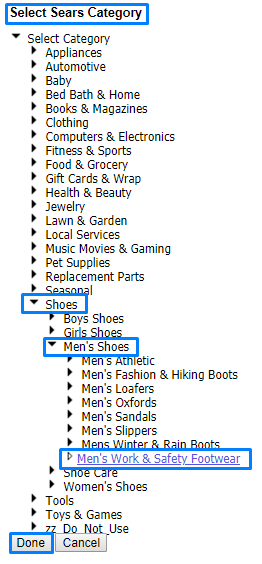
Now we will find that Sears category has been selected. Then we need to click on the Save button.
If everything is ok then you will find a green check mark on the upper right corner. If you hover on the mark, you will notice the sign that ‘product is ready for Sears.com’.
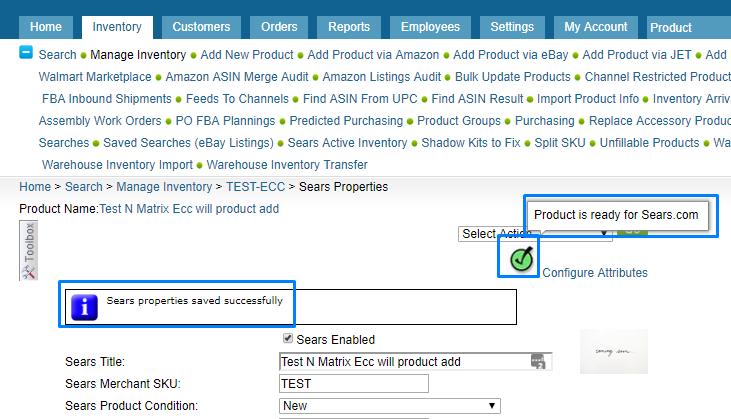
If still any information missing there, you will be noticed the red cross mark instead of green. If you scroll there, a notification will appear mentioning the remaining required things.
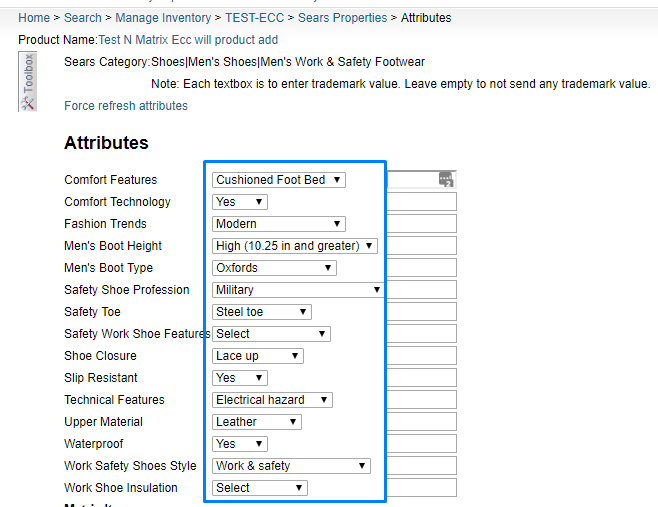
2nd Step: After making the item ready for Sears, you need to configure the attributes. For this, you are required to click on configure attributes and selection attributes from there.
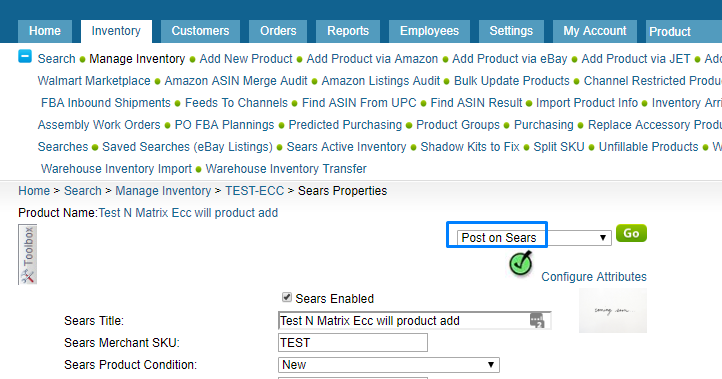
After selecting Post on Sears on the Action Menu and click on Go.
Today we have shown the process of posting Simple item in Sears using Sellercloud, in our next article we will show how to list variation item on Sears from Sellercloud. So keep reading our Blog. Still, if you have any hesitancy or any question that you want to clear yourself. You are invited to contact us. We are one of the best solution providers for the seller who has the account on Amazon, Sears, eBay, Walmart, Rakuten, and Overstock. Contact us and get the best solution which you can expect from a solution provider.