Listing items in the right category is crucial for your items’ search result position. This also affects your sales. When your items are in the wrong category you need to update the category of your listed item as soon as possible. If you have a large number of products/inventory in your StoreAutomator account, then updating them one by one is a tedious task and takes a huge time. It could be a major issue for you. But don’t worry, using Store Automator, you can resolve it in a matter of minutes. StoreAutomator is a multichannel program that can assist you in properly running your eCommerce store. From a single platform, you can manage your inventory, orders, shipping, and listings across many channels. In this article, We’ll show you how to update your listed item’s category in bulk using StoreAutomator in this documentation.
Update Items Category in Bulk Via StoreAutomator
You can easily edit local categories on your desired marketplace with a bulk file via Store Automator. This will definitely minimize your workload and save you valuable time also.
Let’s dive into the process and follow the below steps one by one to update listed items in bulk on sales channels via storeautomatror.
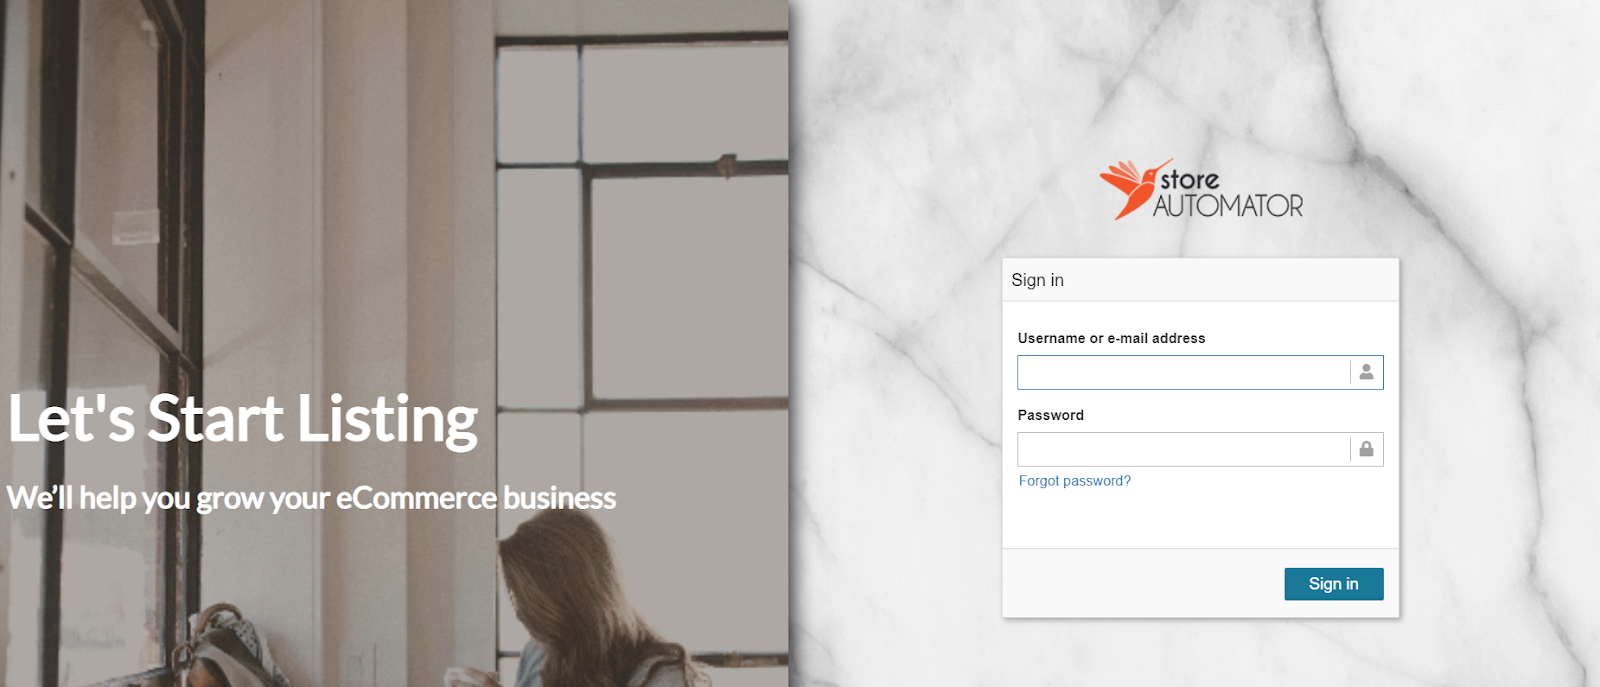
Step 1: First, log in to your StoreAutomator Account.
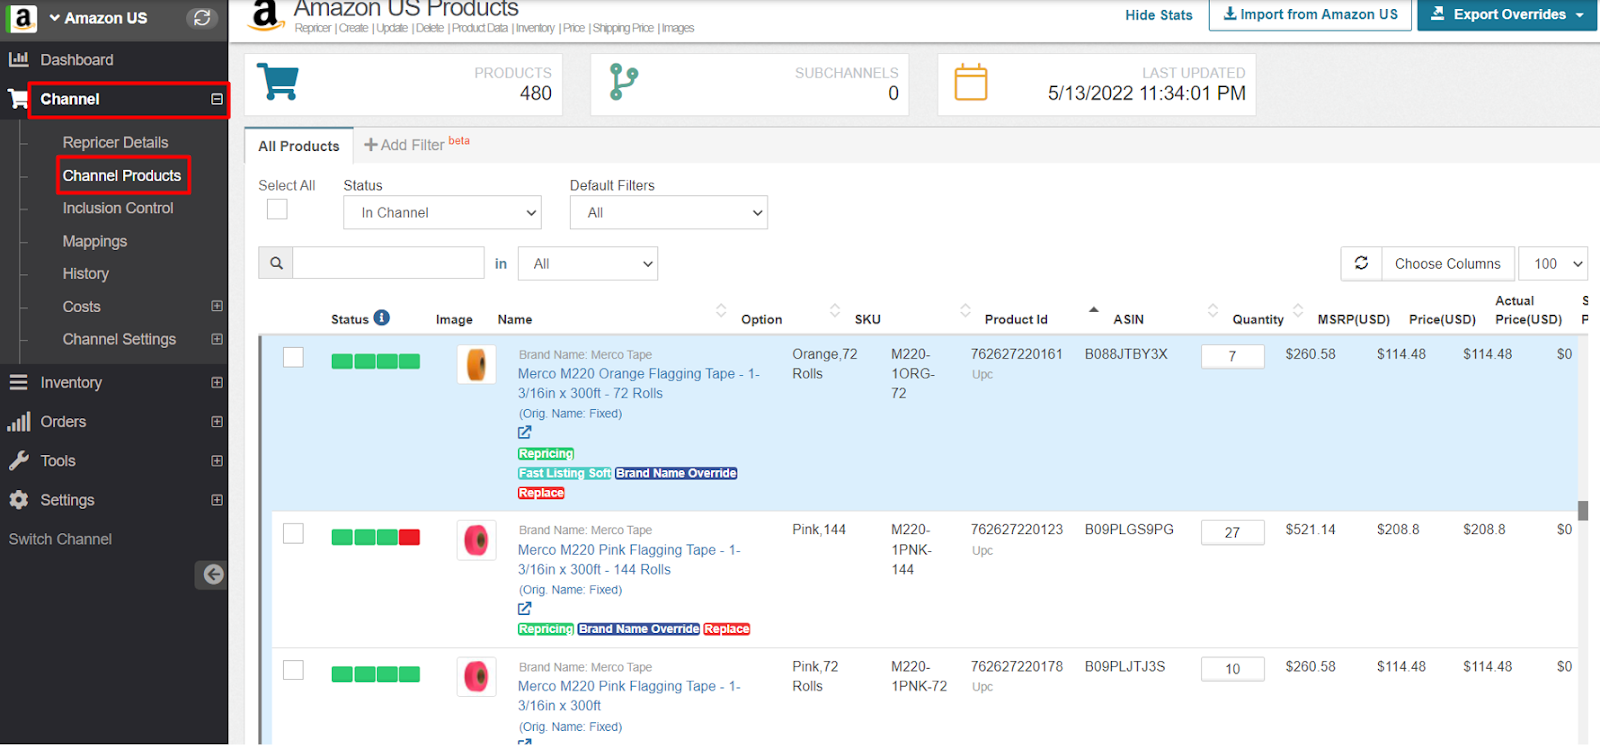
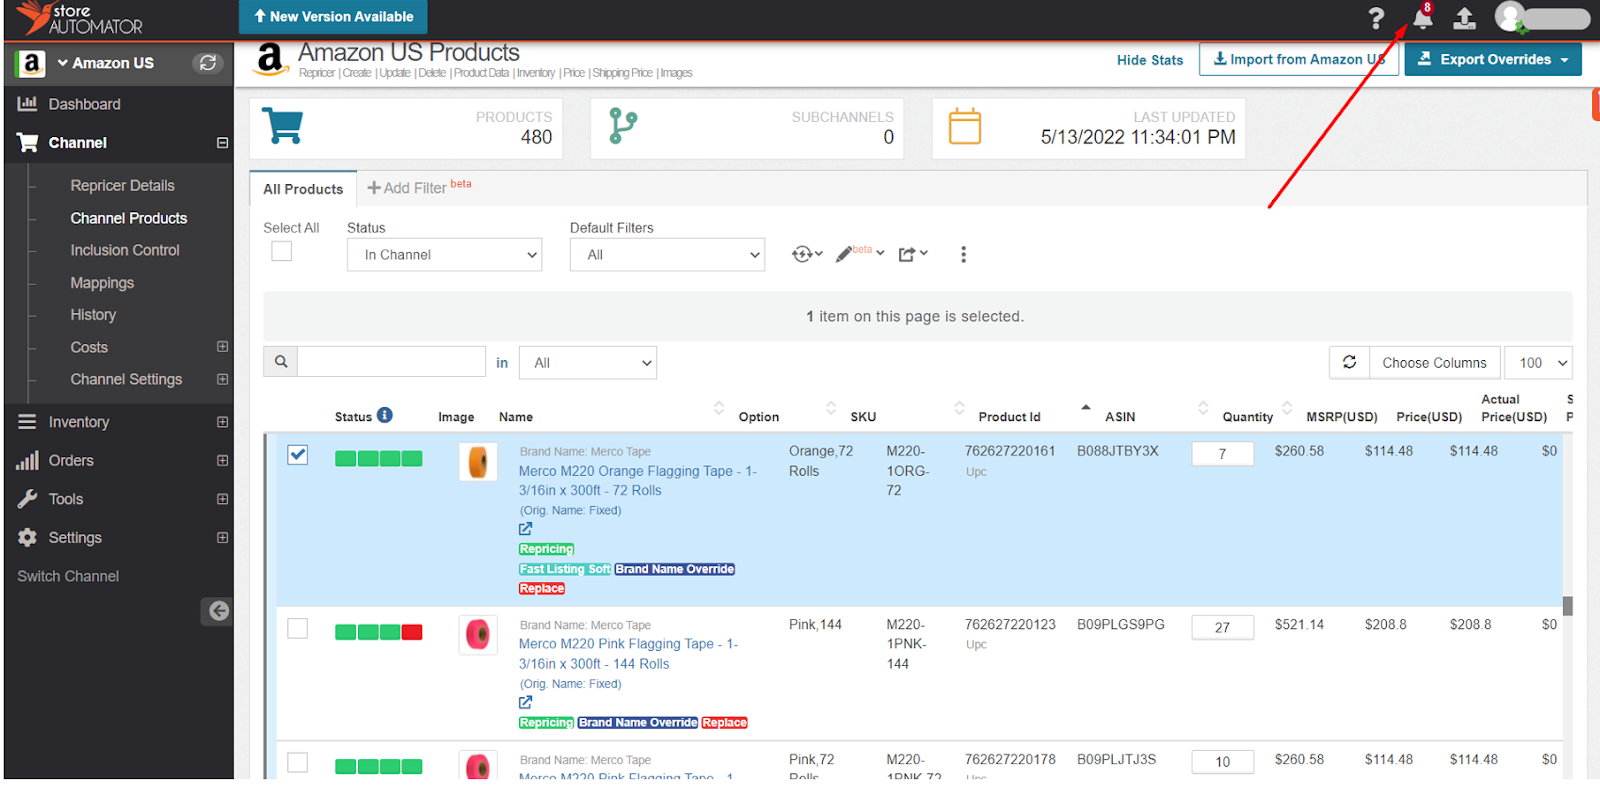
Step 2: Go to the Channel Products from Channel which is located left middle of the screen.
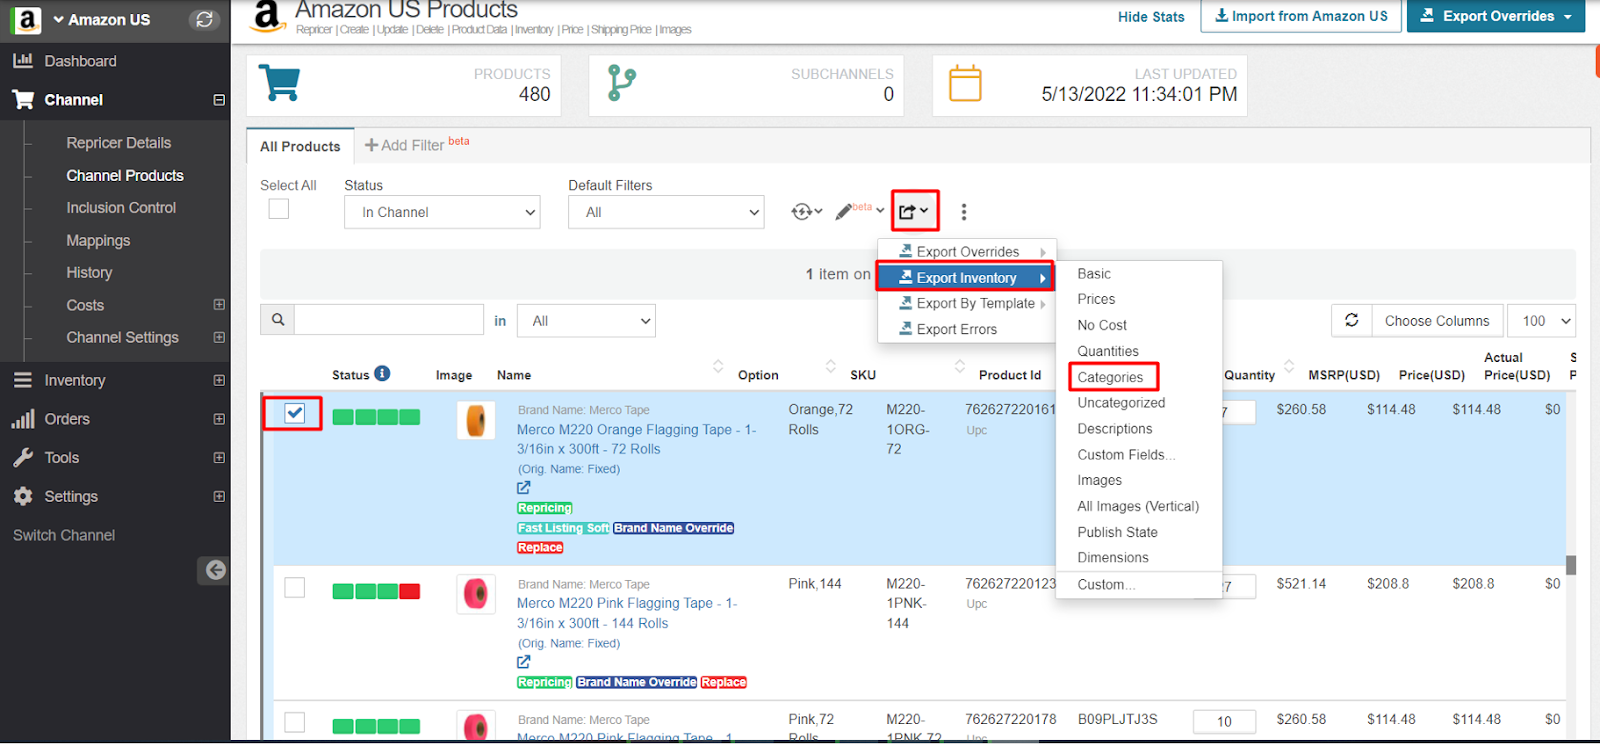
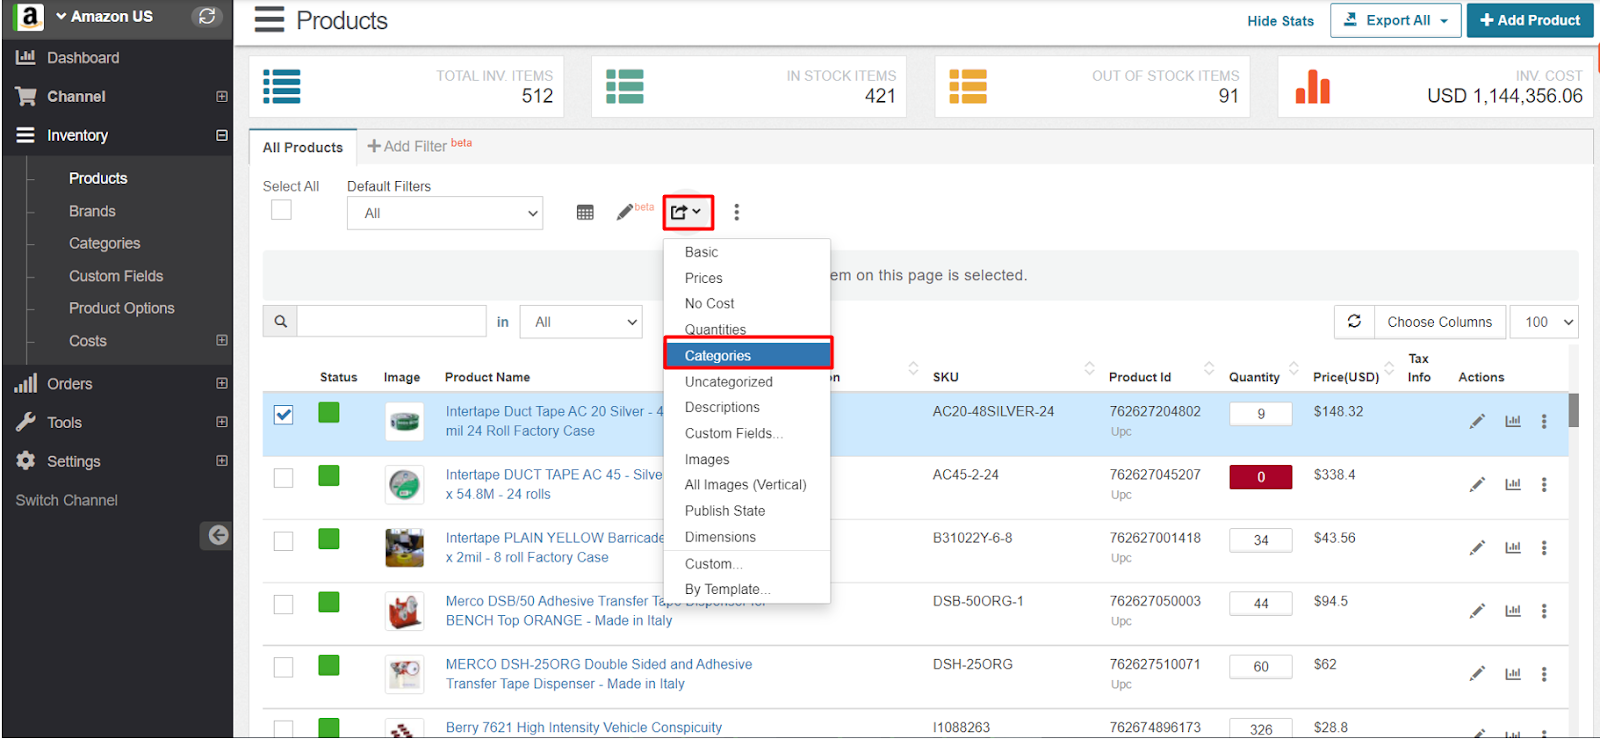
Step 3: Here, select the products and go to Export, then Export Inventory, then Categories, as you are on a channel level.
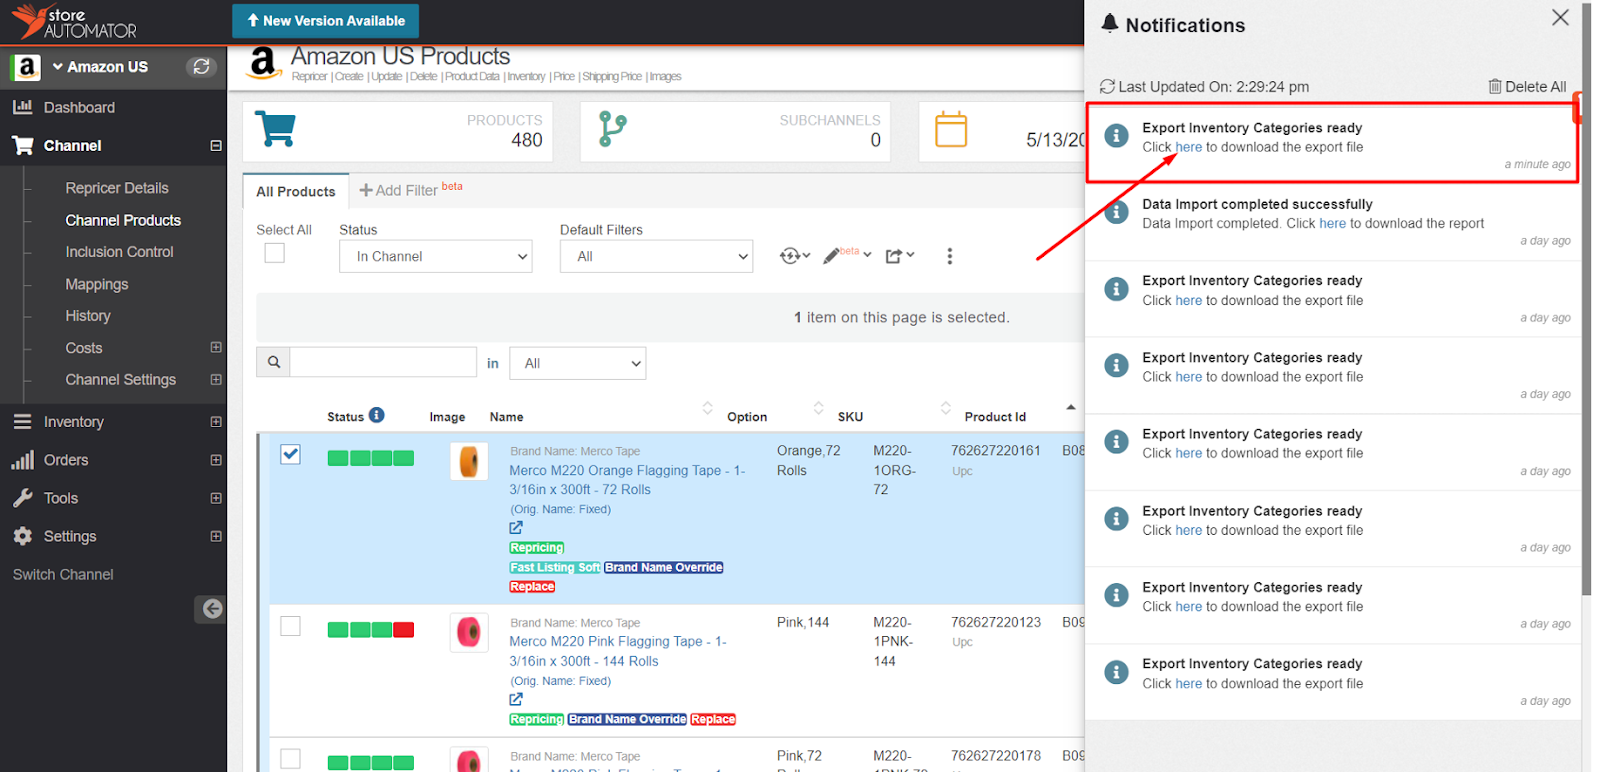
Step 4: Now click on the Notifications bar.
Download the file from the “Notifications”
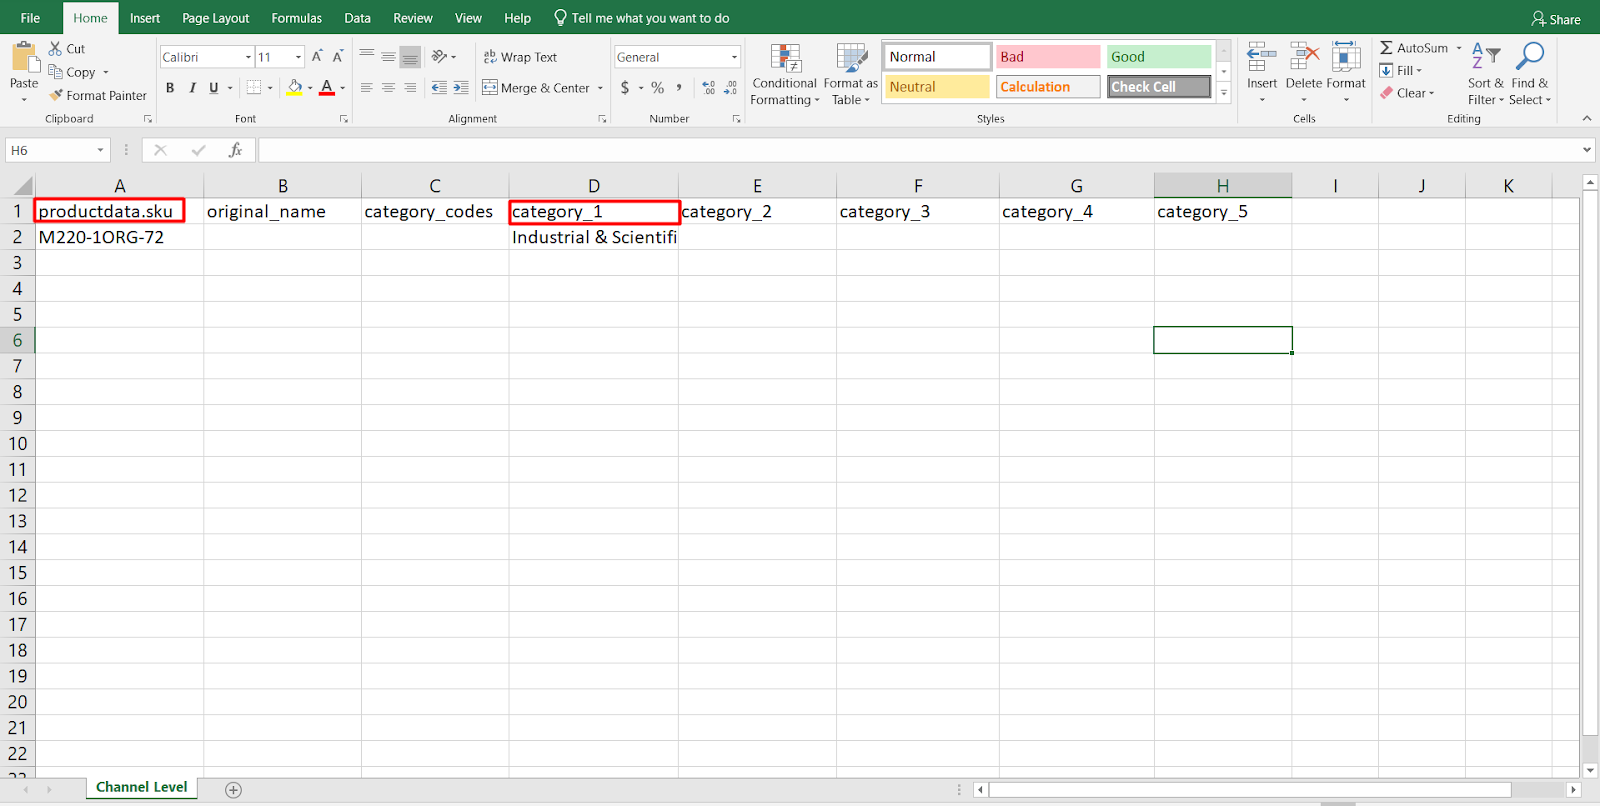
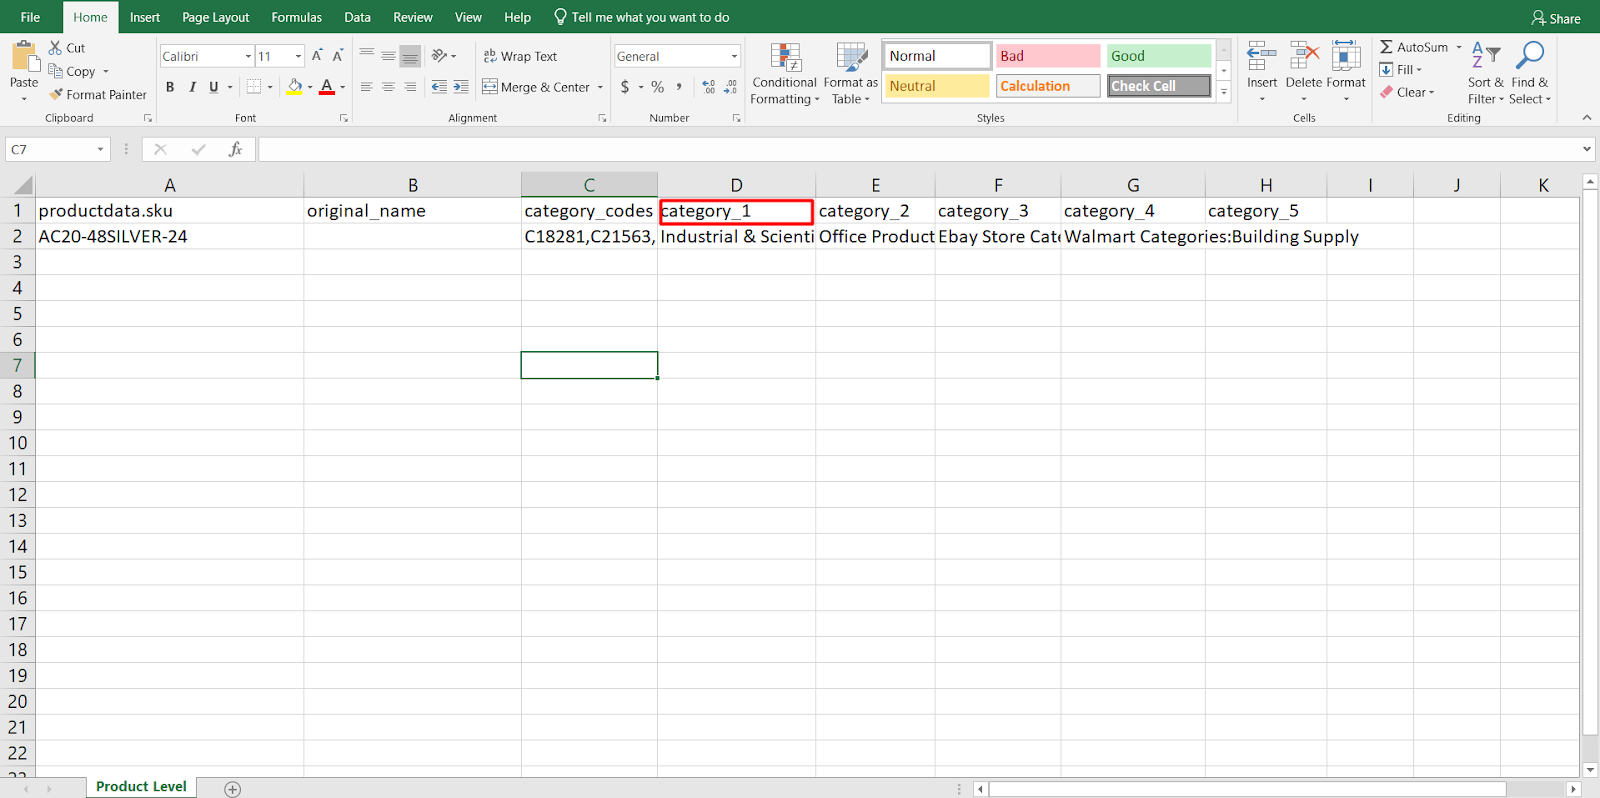
Step 5: You can delete pre-populated fields original_name and category_codes columns on editing or deleting a category process before uploading the file.
The main category for the products will be the value under the “category_1” column.
If you are working on parent products, you can only download the parent’s category because variations get their category as inherited from the parent.
Step 6: When we edit our categories, go to the Products from Inventory.
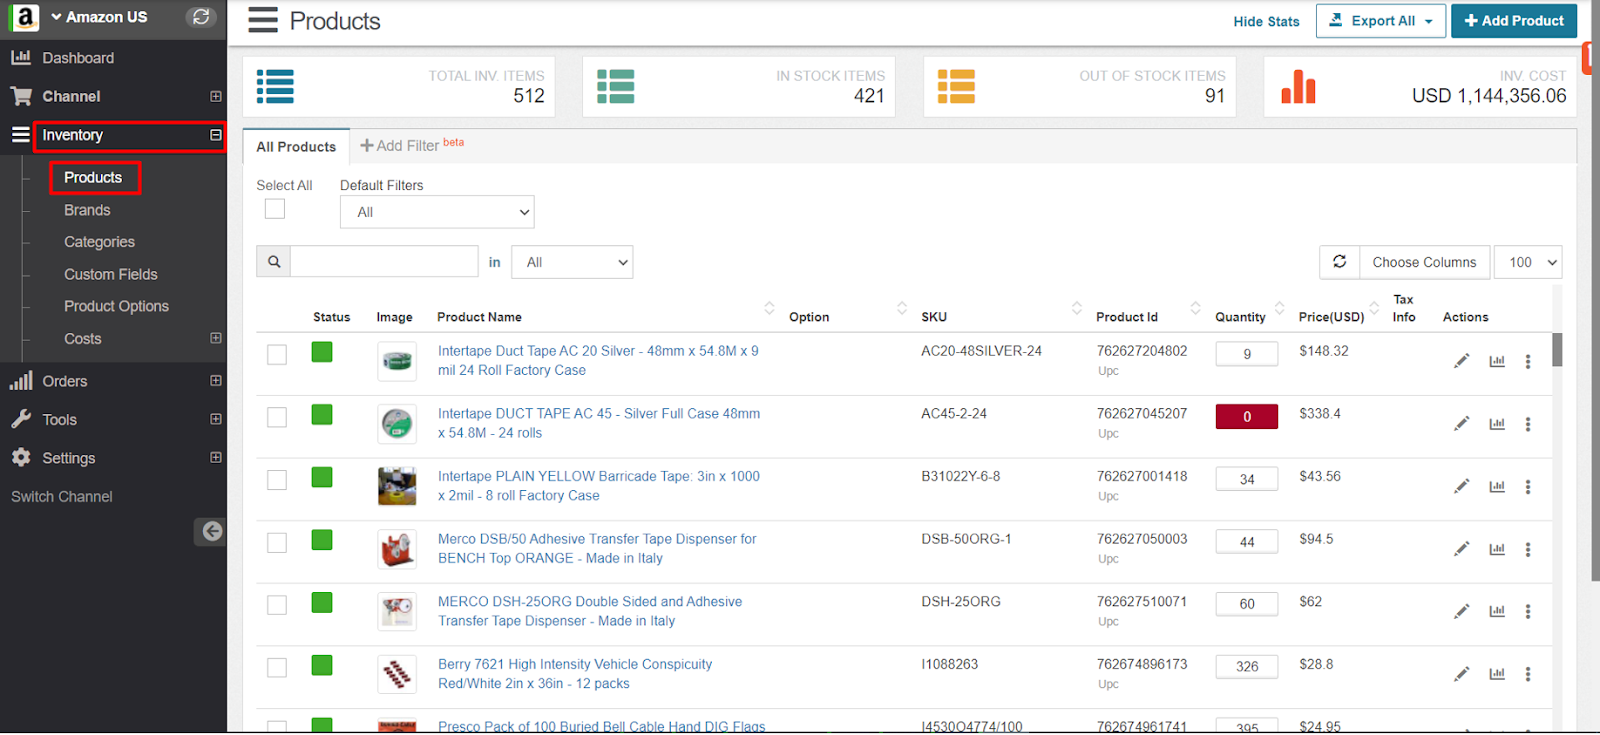
Step 7: Then click on Export dropdown, and select Categories.
Step 8: Now click on the Notifications bar.
Download the file from the “Notifications”
Step 9: Specify the new main category under the “category_1” column.
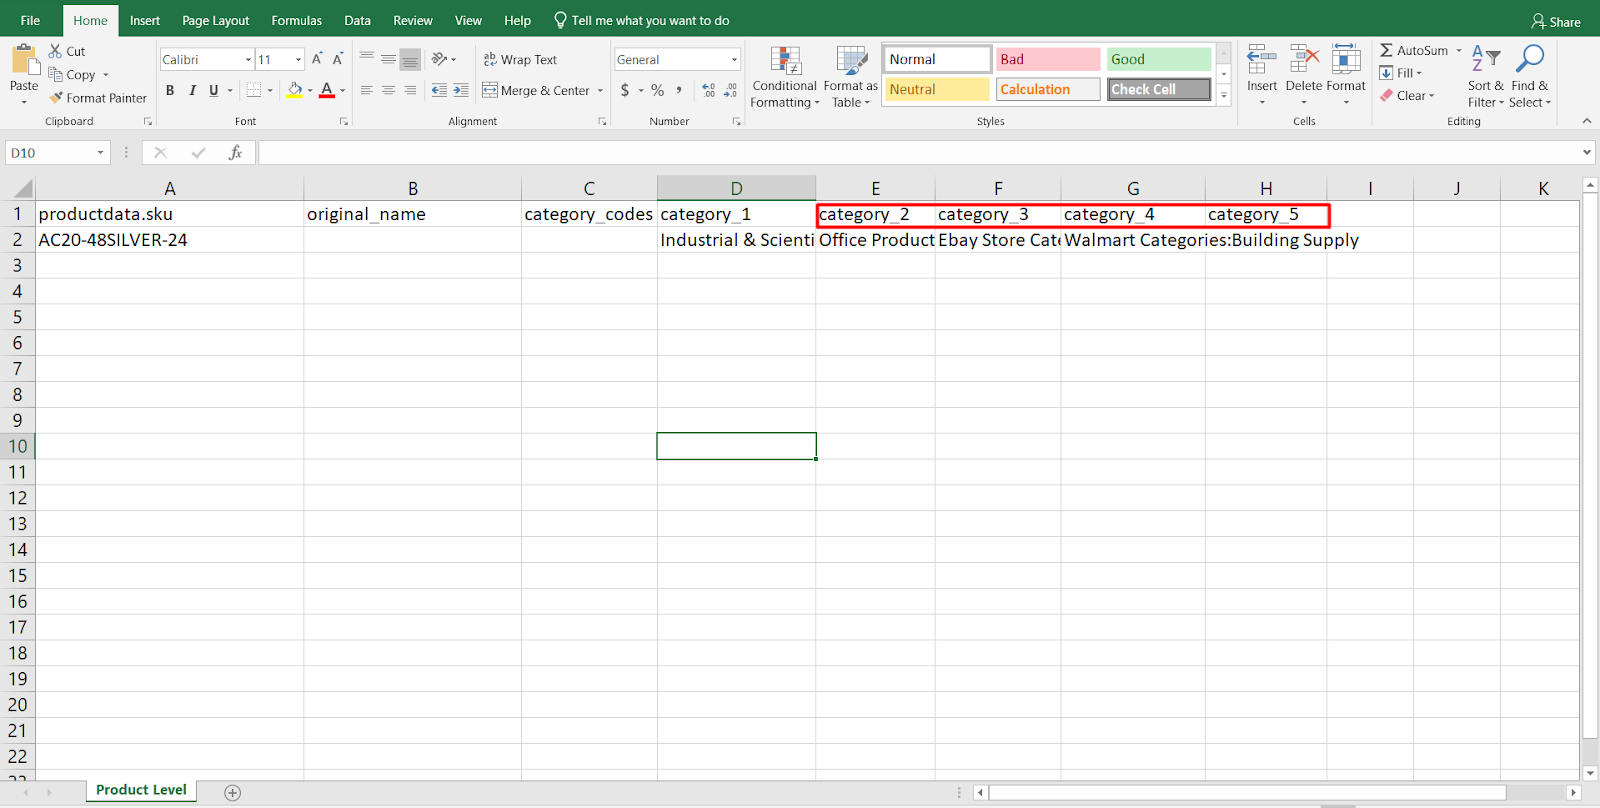
If you want to add more categories, start with “category_2” column and go on up to “category_5”.
If you want to make leaf categories under the “category_1”, use this arrow “>” sign to assign leaf categories. (Test Category>Test Category 2>Test Category 3).
Step 10: When your configurations are done, you can upload the file. To upload the file you have to click on Tools first. Then click on the Import dropdown and then go to From File.
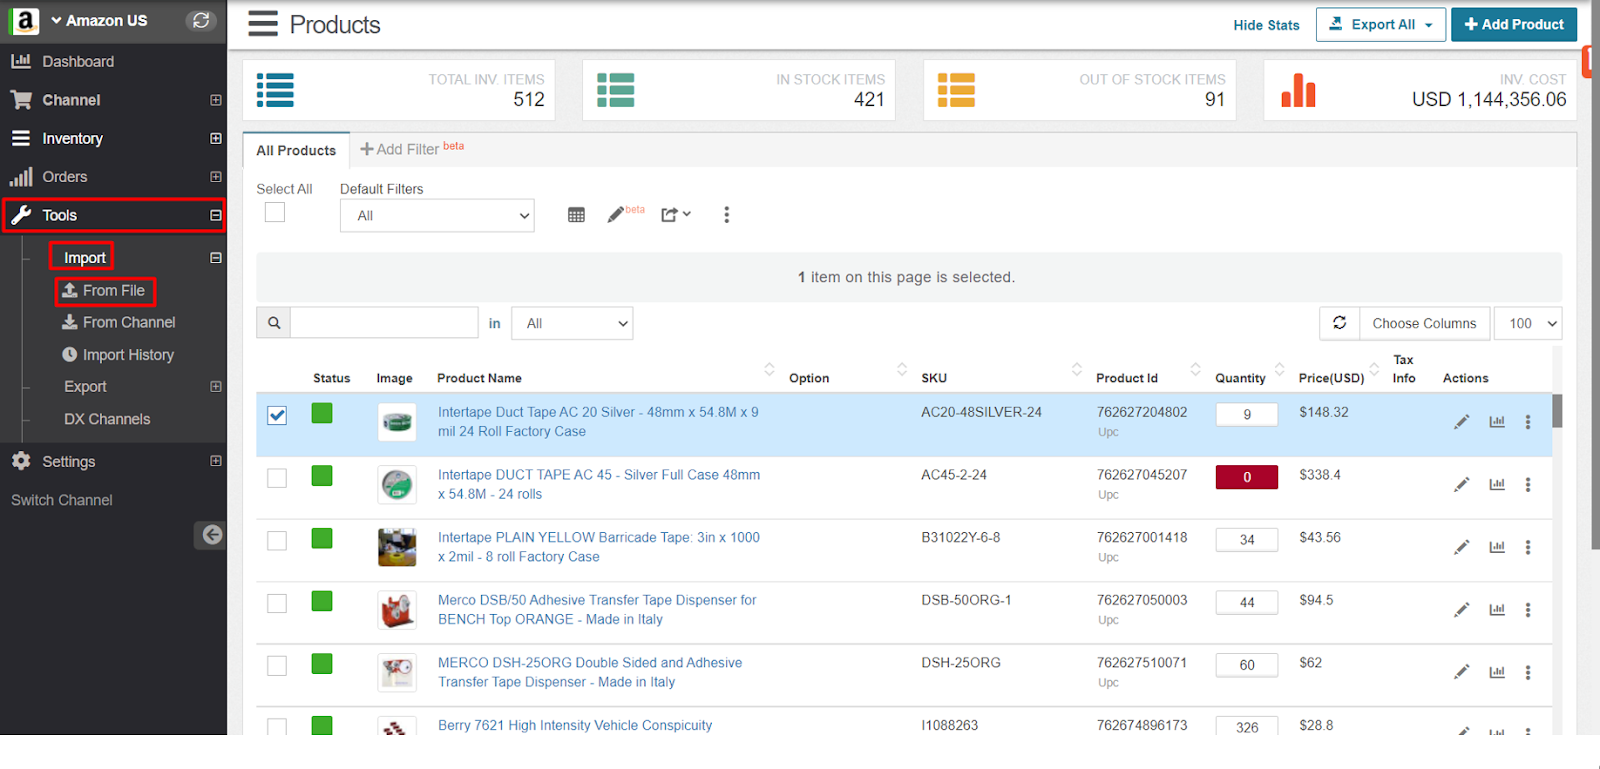
Whenever you clicked From File, this page will appear and from here you can upload your file.

To conclude, that’s all about updating items categories in bulk on sales channels via StoreAutomator. Hope this article will help you to update categories on Store Automator. If you find this helpful please share this article. Please drop your valuable thoughts or anything you want to say in the comment section below. We are always happy to share.