
WooCommerce is a customizable, open-source eCommerce platform built on WordPress. It’s an eCommerce plugin for WordPress. It makes creating and managing online stores simple, with reasonable levels of flexibility and several vital features such as inventory and tax management, secure payments, and shipping integration. WooCommerce allows you to sell any product online to both local and international markets. Before you start selling, you must list your items on Woocommerce. In this article, we will show you how to list items on this famous platform.
Before going into the main discussion, we should have some basic idea of WooCommerce.
The Benefits of WooCommerce
- Easy to Setup and Install
- Data Control
- Feature-packed Shopping Cart
- Complete Control of Products
- Easy Shipping
- Easier Tax Management
- Keeping You Informed
List Your Products on WooCommerce
There are two ways you can list your products on WooCommerce. One is manual listing and the other one is bulk upload. In this article, we are going to discuss manual listing.
Adding a Product
Prior to adding your first item, we should get to know how item categories, tags, and attributes work.
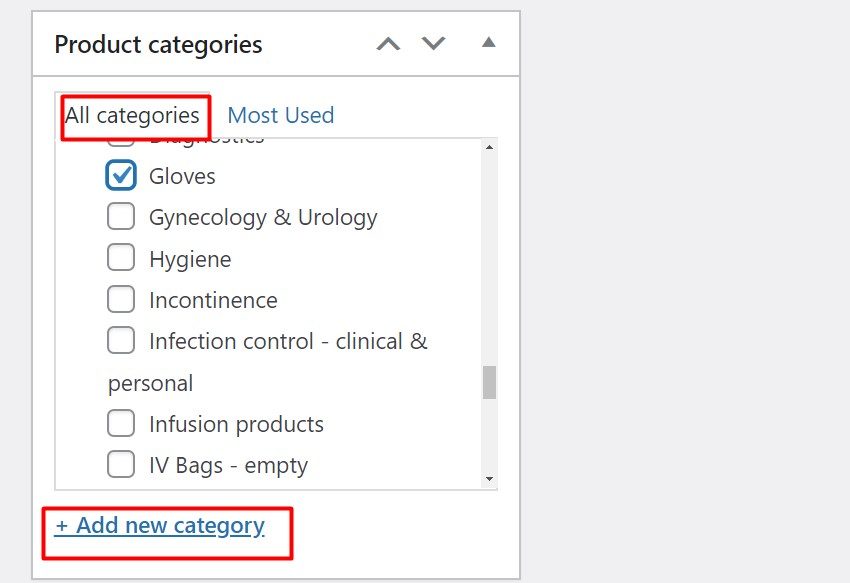
Product Categories
Product categories are the primary way to group products with similar features. You can also add subcategories if desired. For example, if you sell clothing, you might have “t-shirts”, “hoodies” and “pants” as categories.
Attributes
These can be added per product, or you can set up global attributes for the entire store to use (e.g., in layered navigation).
Product Types
With attributes and categories set up and stock management configured, we can begin adding products. When adding a product, the first thing to decide is what type of product it is.
- Simple – Covers the vast majority of any products you may sell. Simple products are shipped and have no options. For example, a book.
- Grouped – A collection of related products that can be purchased individually and only consist of simple products. For example, a set of six drinking glasses.
- Virtual – One that doesn’t require shipping. For example, a service. Enabling this disables all shipping-related fields such as shipping dimensions. A virtual product will also not trigger the shipping calculator in the cart and checkout.
- Downloadable – Activates additional fields where you can provide a downloadable file. After a successful purchase, customers are given a downloadable file as a link in the order notification email. This is suitable, for example, for a digital album, PDF magazine, or photo.
- External or Affiliate – One that you list and describe on your website but is sold elsewhere.
- Variable – A product with variations, each of which may have a different SKU, price, stock option, etc. For example, a t-shirt is available in different colours and/or sizes.
SKU
SKU, or Stock Keeping Unit number, is a unique number assigned to a product for, amongst other things, the purpose of keeping track of inventory. The SKU field can accept up to 255 characters, which can include alphanumeric values and some special characters
Adding a Simple Product
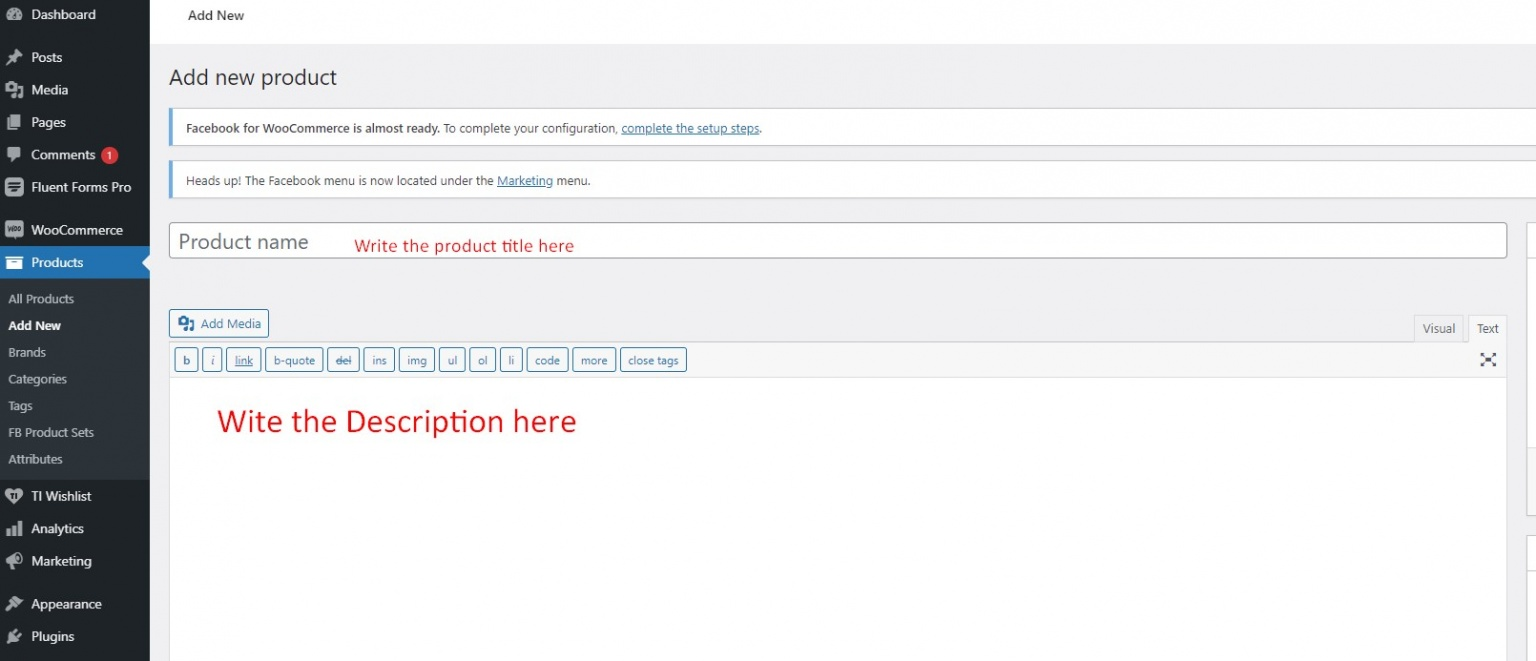
Step 1: Go to WooCommerce > Products > Add New

Step 2: Enter product Title and Description.
Step 3: Now scroll down a bit and go to Product Data section
The Product Data meta box is where the majority of important data is added for your products.
3 a. General Section
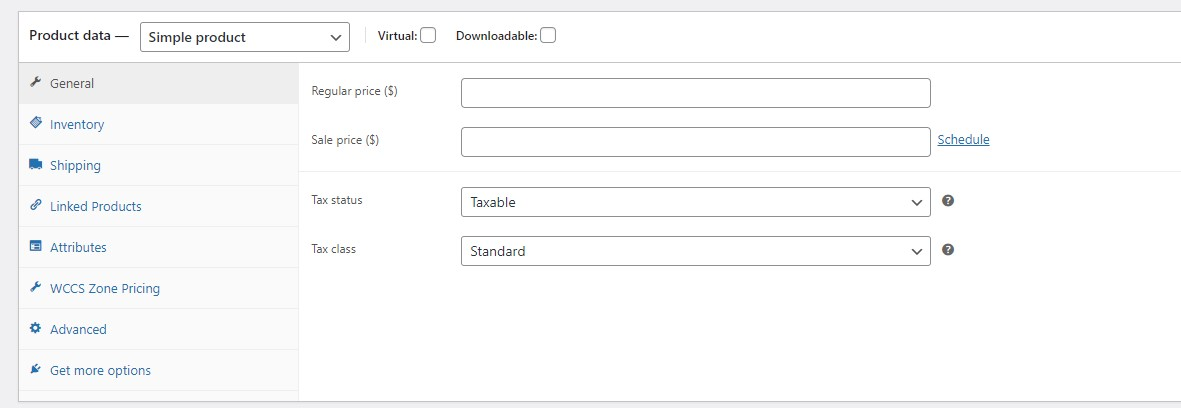
Price
- Regular Price – Item’s normal/regular price
- Sale Price – Item’s discounted price that can then be scheduled for certain date ranges. The sale expires at 11:59 pm of the specified end date
Tax
- Tax status – Taxable / Shipping only / None
- Tax class – Choose which tax class should be applied
3 b. Inventory Section
The inventory section allows you to manage stock for the product individually and define whether to allow backorders and more. It enables you to sell products and allows customers to add them to the cart to buy.
Enable Stock Management must be selected in the product inventory setting; otherwise, only the ‘Stock status’ option is visible in the Product Data Inventory box.
Options when stock management at product level is disabled. You are responsible for updating the Stock Status.
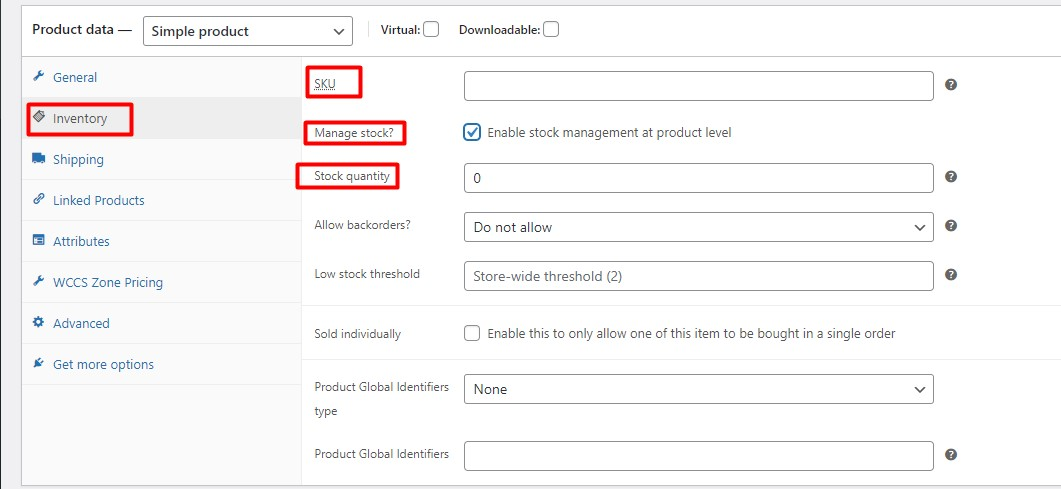
Enter the Stock Quantity, and WooCommerce auto-manages inventory and auto-updates Stock Status as Stock, Out of Stock, or On Backorder.
- Select whether to Allow Backorders.
- Low stock threshold – Enter a number upon which you are notified.
- Tick the Sold Individually box to limit the product to one per order.
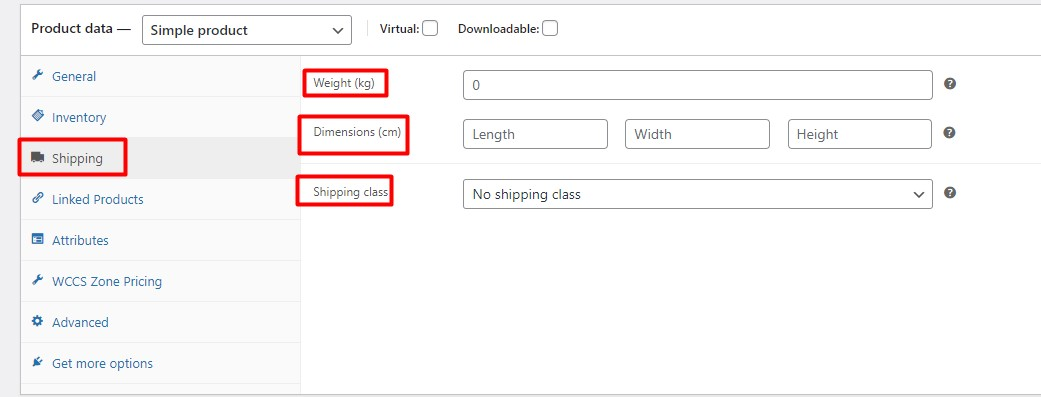
3 c. Shipping Section
- Weight – Weight of the item.
- Dimensions – Length, width, and height for the item.
- Shipping Class – Shipping classes are used by certain shipping methods to group similar products.
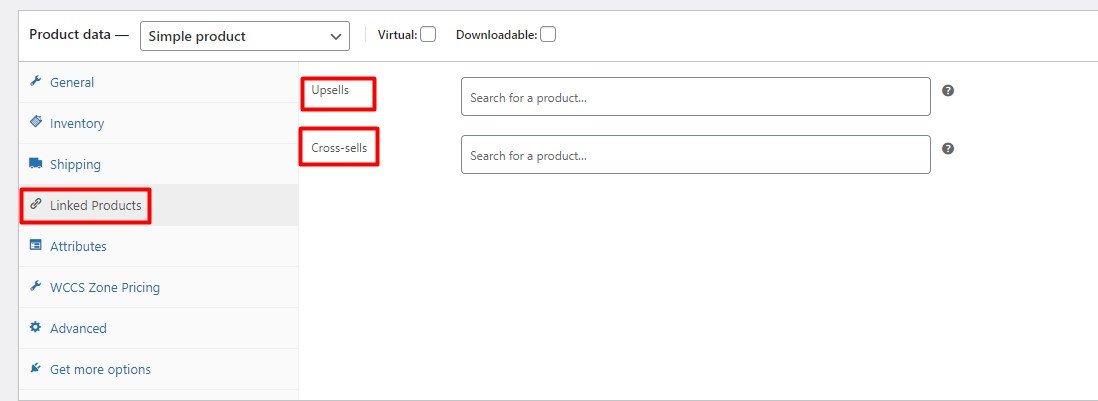
3 d. Linked Products Section
Using up-sells and cross-sells, you can cross-promote your products. They can be added by searching for a particular product and selecting the product from the dropdown list:
Step 4: Product short description
Add an excerpt. This typically appears next to product imagery on the listing page, and the long description appears in the Product Description tab.

Step 5: Taxonomies
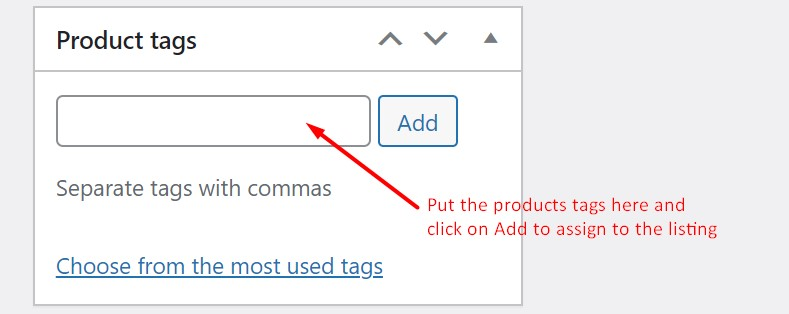
On the right-hand side of the Add New Product panel, there are product categories in which you can place your product. You can also assign product tags in the same way.
Step 6: Adding Product Images and Galleries
Adding product images and galleries are options available on the right-hand side when adding or editing a product in your store from WooCommerce.
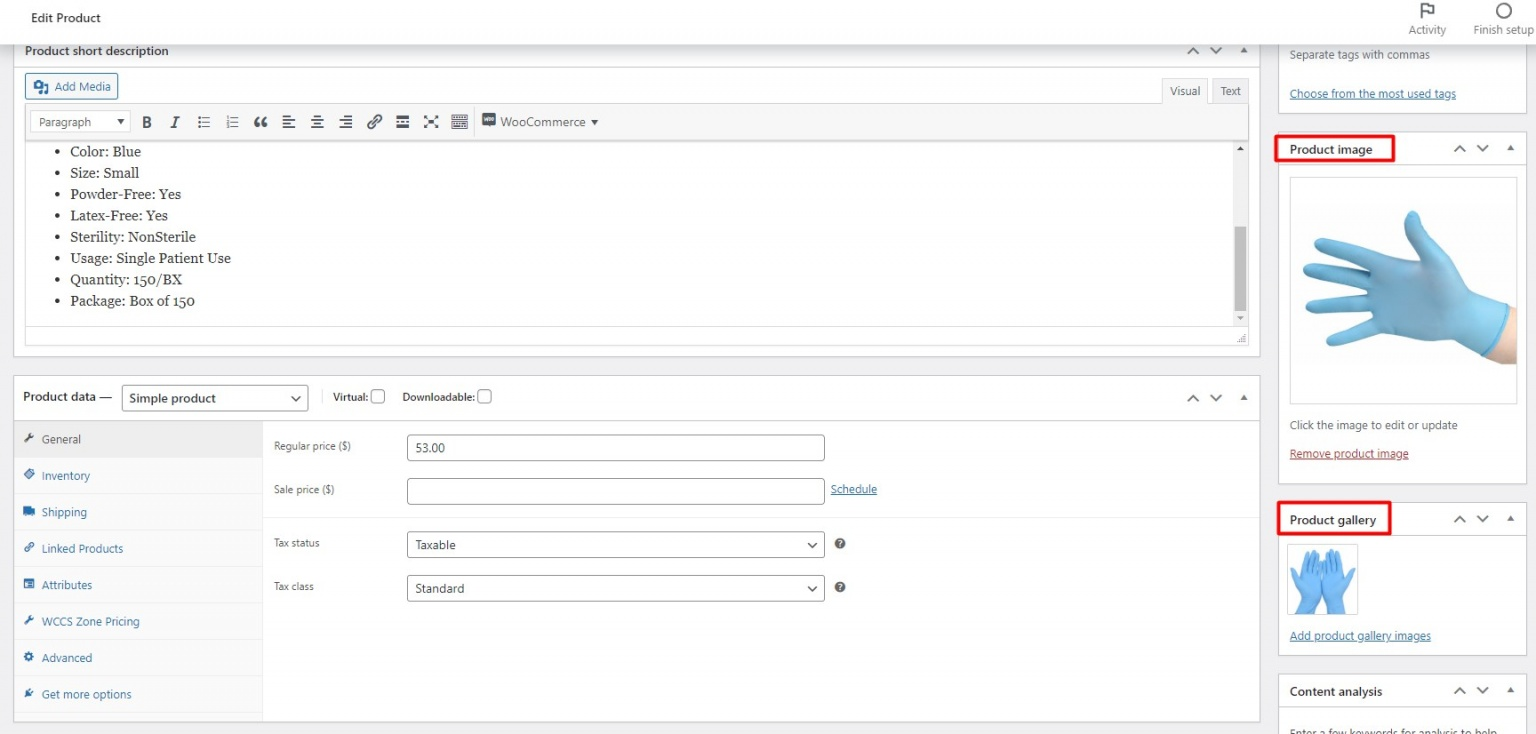
6 a. Product Image
The Product Image is the main image for your product and is reused in different sizes across your store.
Select Set Product Image.

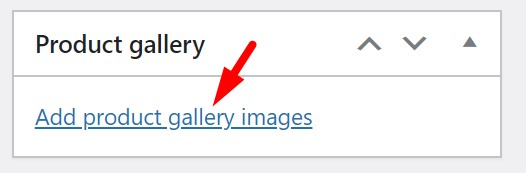
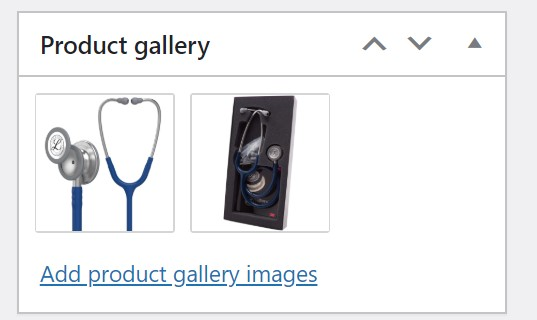
6 b. Product Gallery
Product galleries display all images attached to a product through the Product Gallery meta box.
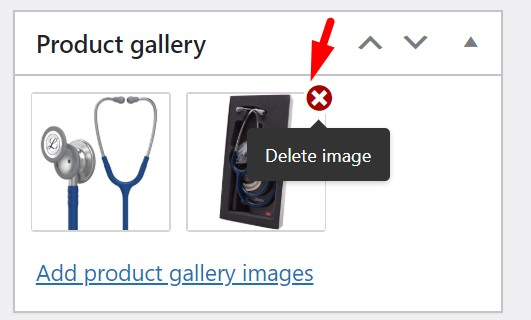
6 c. Remove images from the Product Gallery
To remove an image from the product gallery, hover over the image and click on the red “x.”
By now, you have gathered how to list a simple product on WooCommerce.
To conclude, WooCommerce is your best bet if you want to build a flexible and reliable eCommerce store. Listing through WooCommerce is a great comfort. Even if you are new to WordPress, you can easily do the listing following our steps. If you like our discussion, please comment, share, and subscribe to our blog. Also, feel free to ask If you have any queries regarding WooCommerce. We would be glad to hear from you and answer your questions.