
Hudson’s Bay is a Canadian-based eCommerce platform. Every month, almost 18.3 million customers visit this marketplace and have 5.7 million loyal customers. It offers vеndоrѕ frоm аll bасkgrоundѕ equal орроrtunіtіеѕ tо become a ѕuррlіеr. Hudson’s Bay offer products in almost all categories including pet supplies, stationery, health and wellness, sports, electronics, clothes, home decor, and many more. Like the other online marketplaces, it provides a variety of customized marketing solutions. On Hudson’s Bay, sellers can view and manage all the aspects of their seller account including product listings, orders, payments, sales, etc. Throughout this article, we will guide you on How to list products on Hudson’s Bay.
Okay, let’s walk through the process of how to list products on Hudson’s Bay.
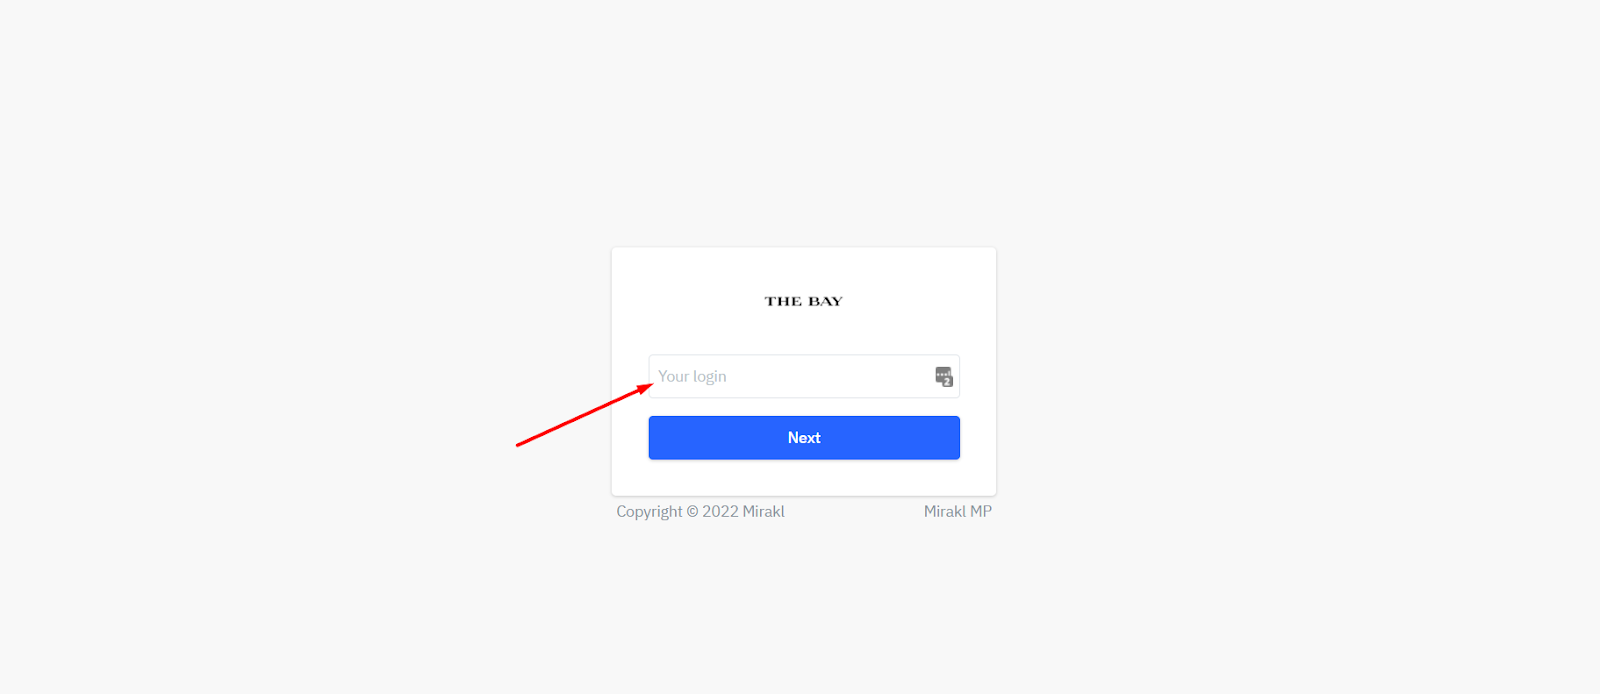
Step 1: At first log in to your Hudson’s Bay Account
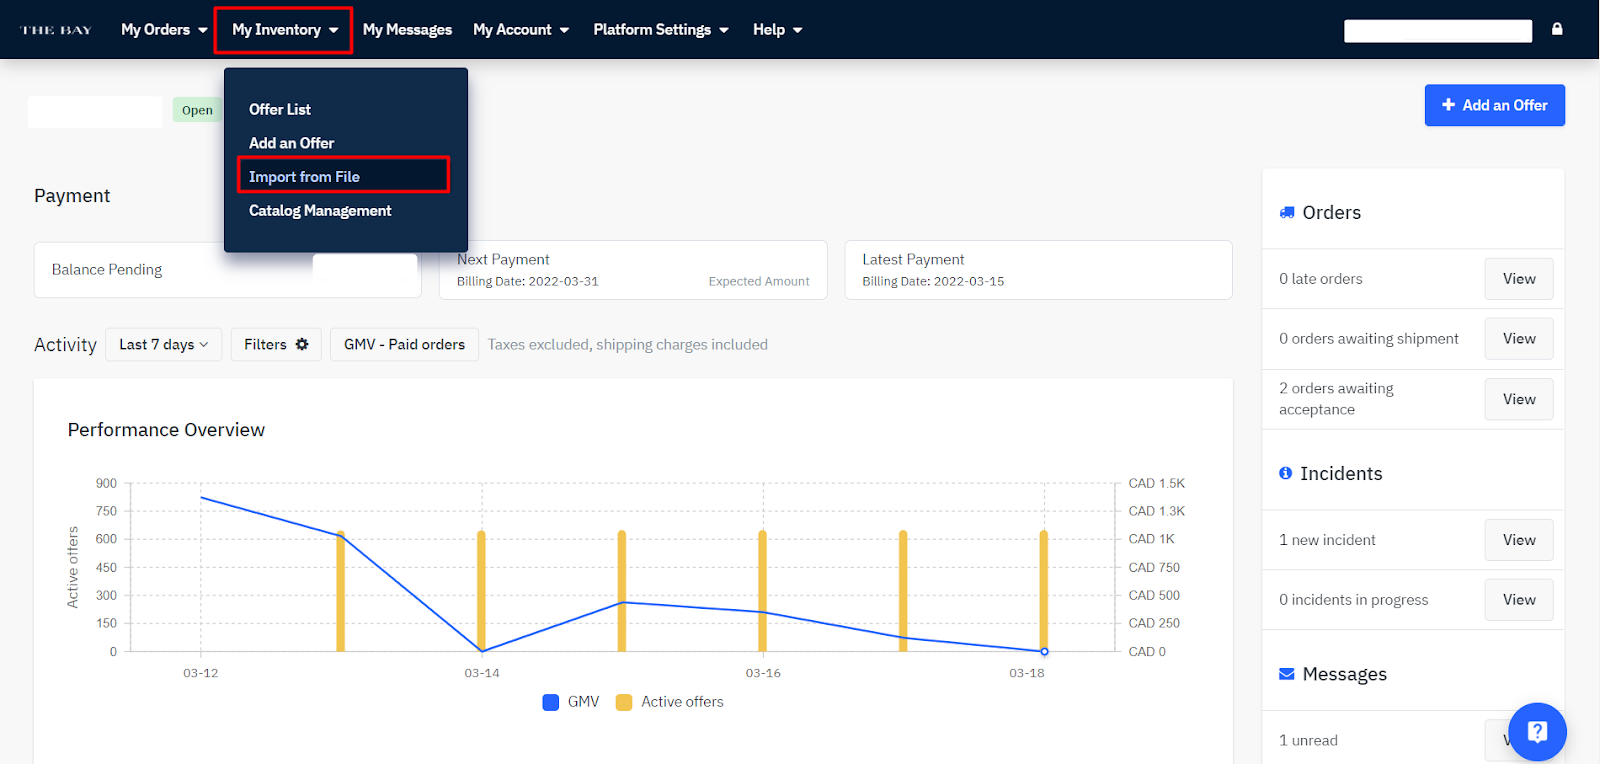
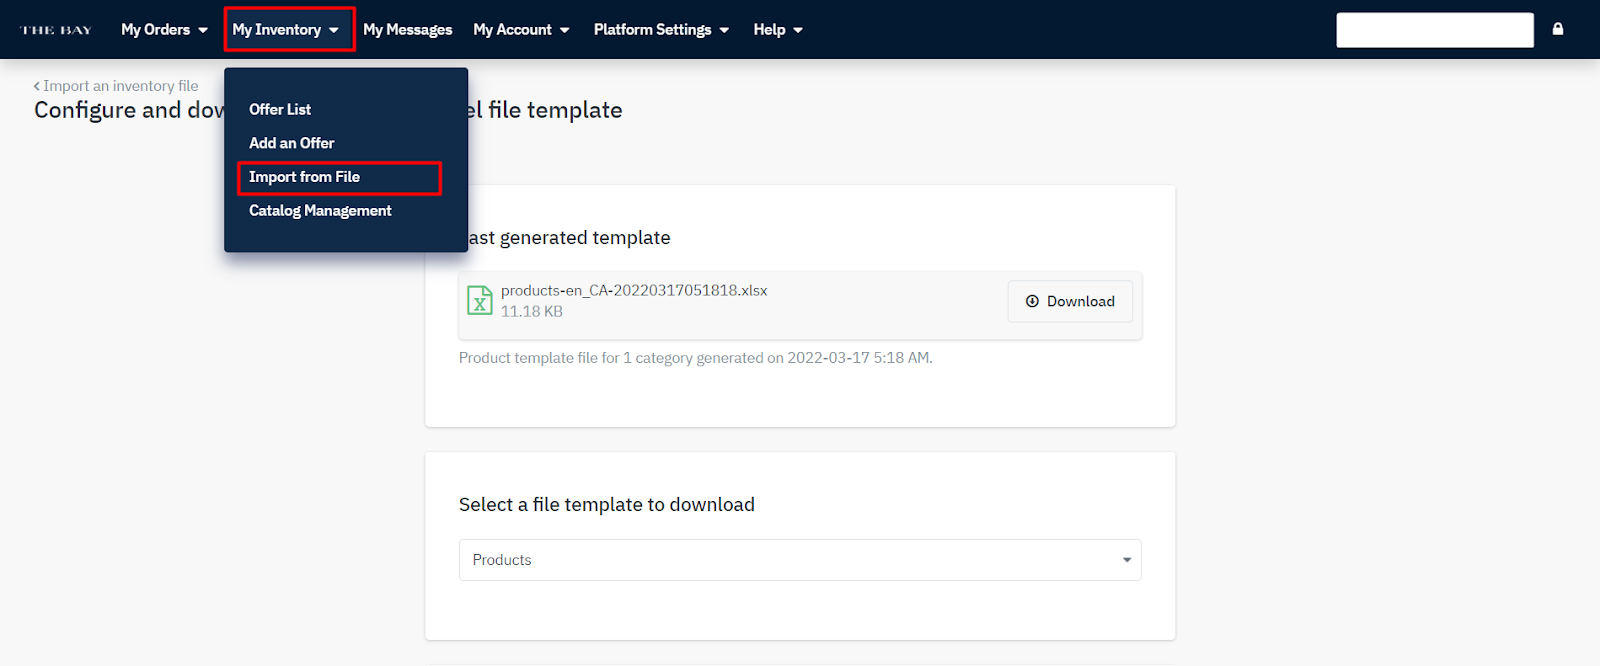
Step 2: Now hover over the My Inventory tab and click on the Import from File
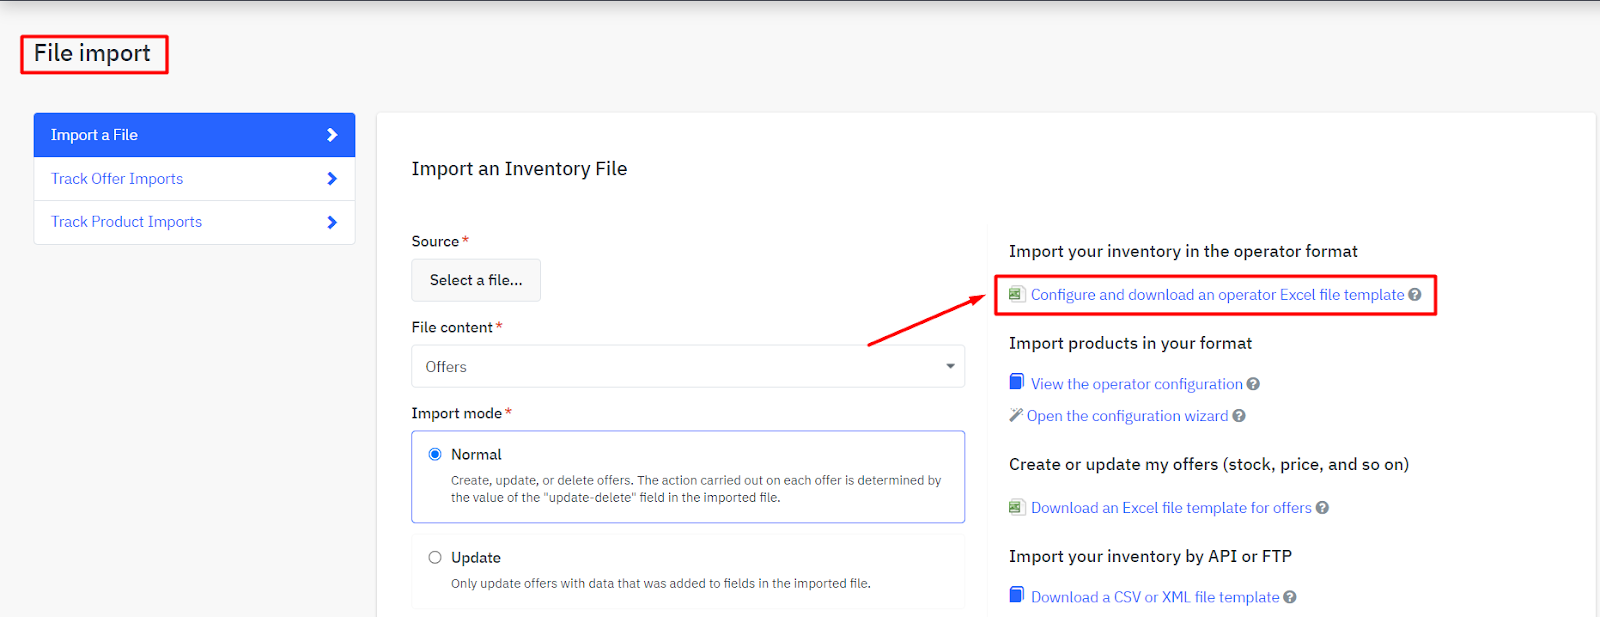
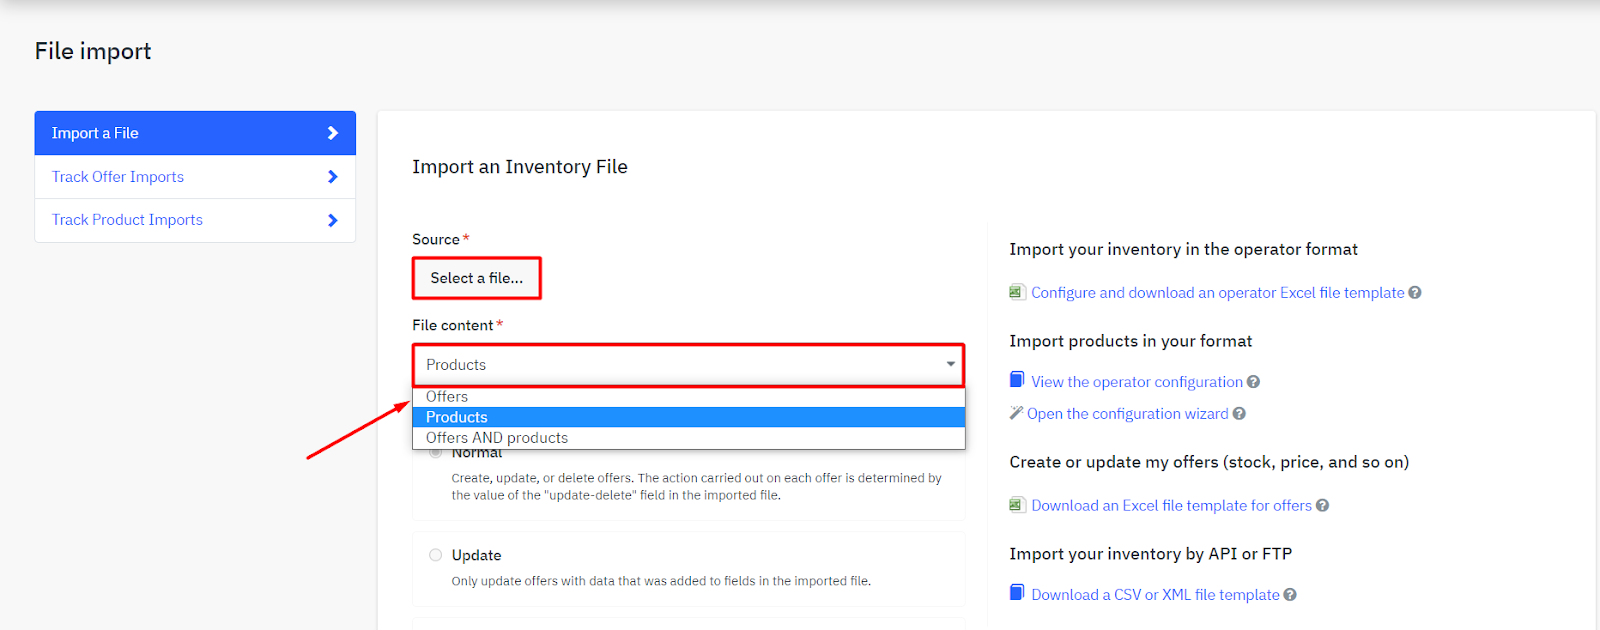
Step 3: After that, the File import page will appear. Now, go to the Configure and download an operator Excel file template and click here for the next step.
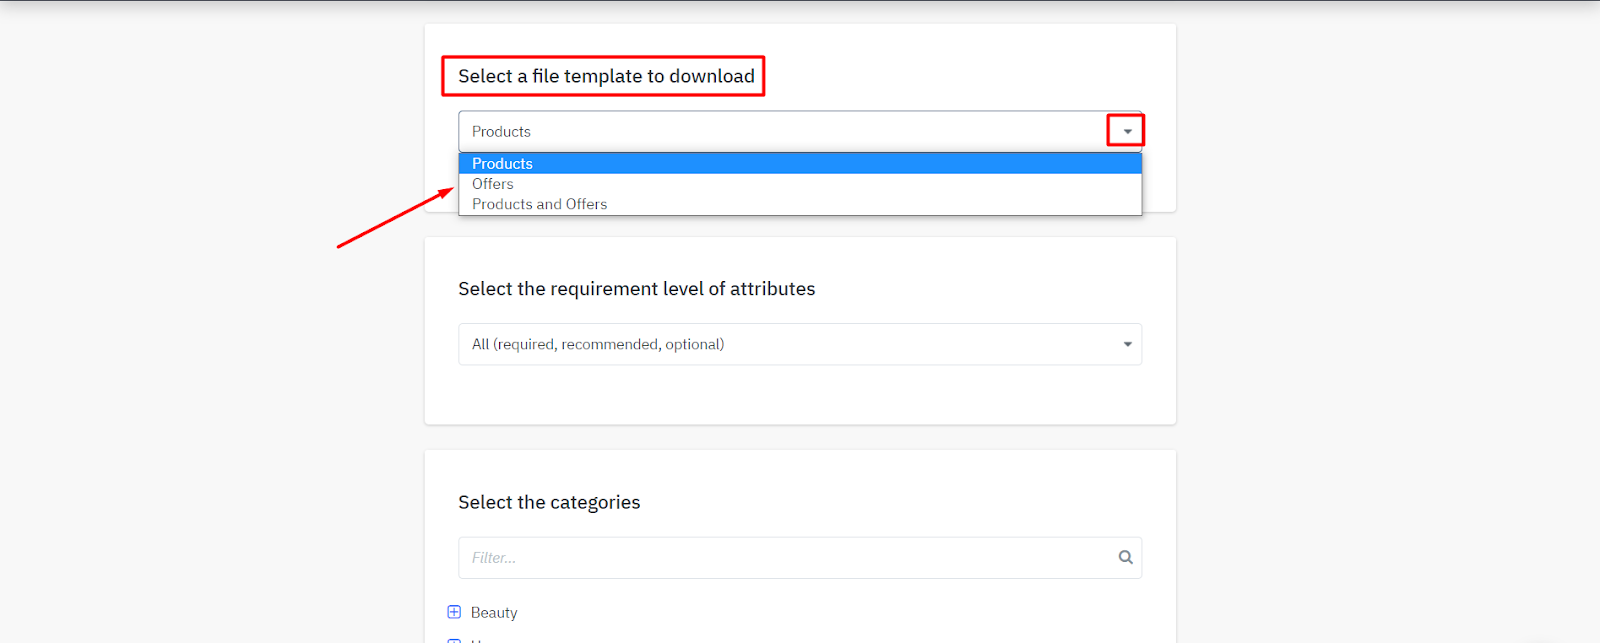
Step 4: Now, go to the select a file template to download option and click on the dropdown icon. Here you can see, three options: Products, offers, and Products and Offers.
4.1. If you want to add products only then select the Products option. Note that, if you select the products option then you need to download and upload the offers file individually.
4.2. If you want to add products and offers at once, please select the Products and Offers option from the drop-down.
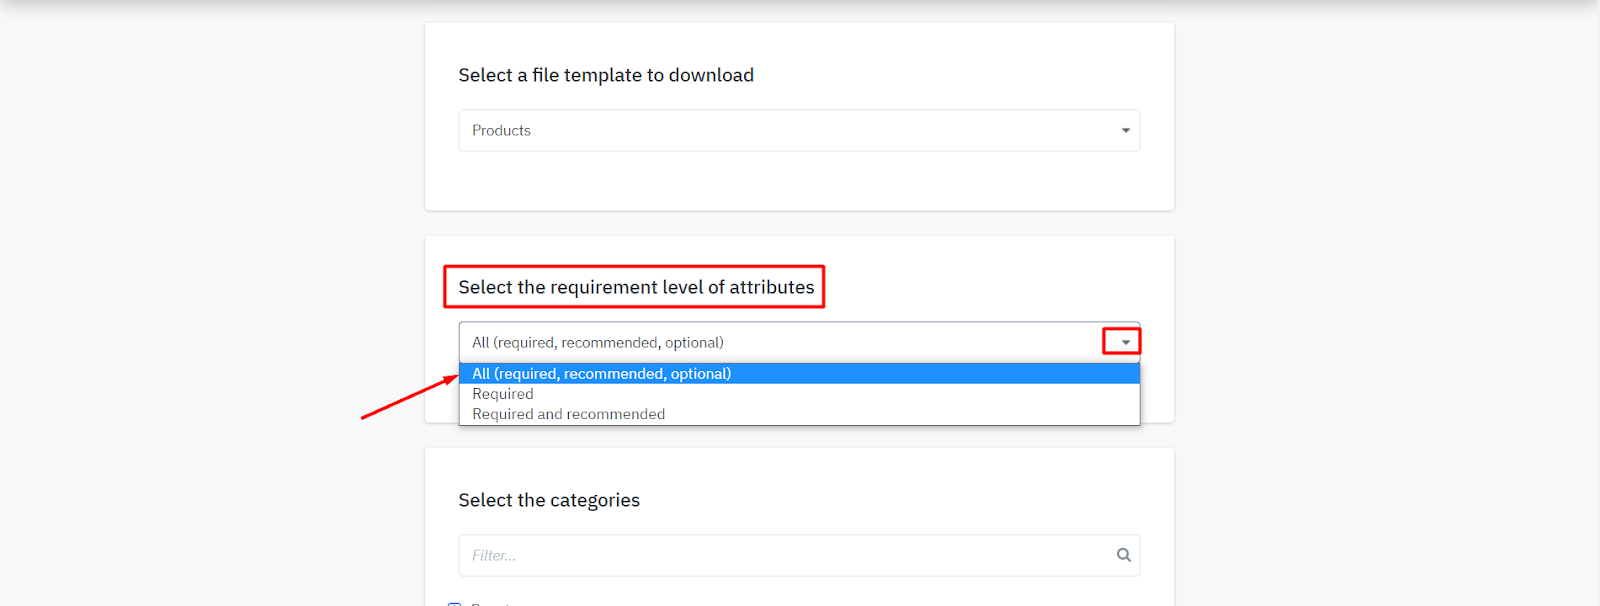
Step 5: After selecting your desired option, go to the next option Select the requirement level of attributes and select All (required, recommended, optional) from the dropdown
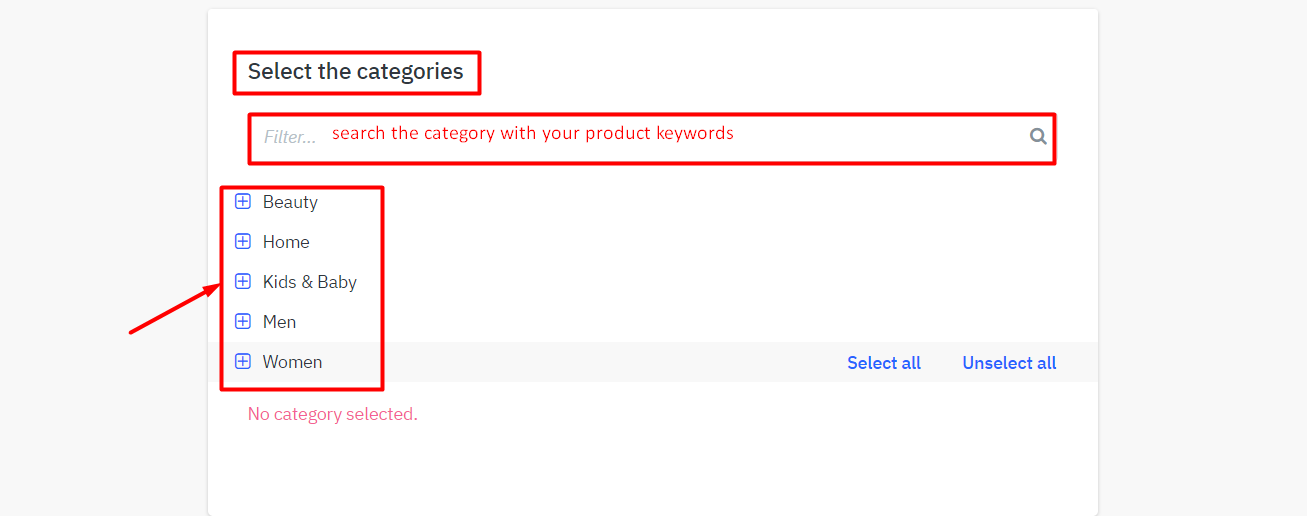
Step 6: Now, select the category according to your products from the list. You can search the category with your product keywords. You can also select one or multiple categories under one feed file.
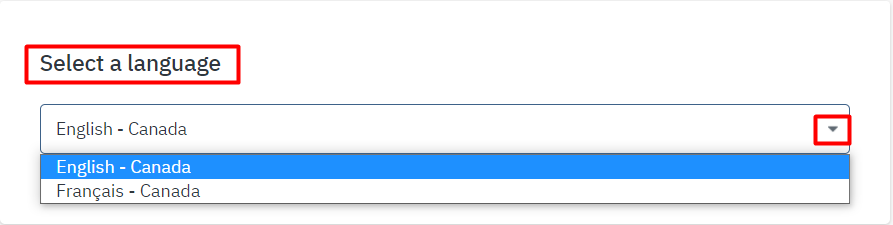
Step 7: The next section is Select a language. Please select the desired language that you want to list your products.
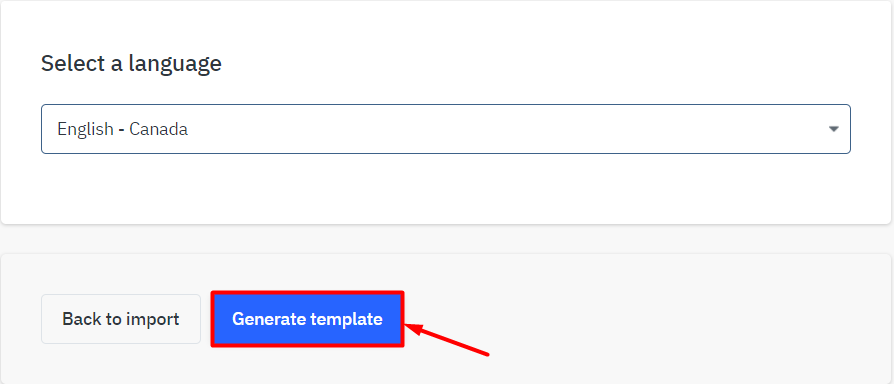
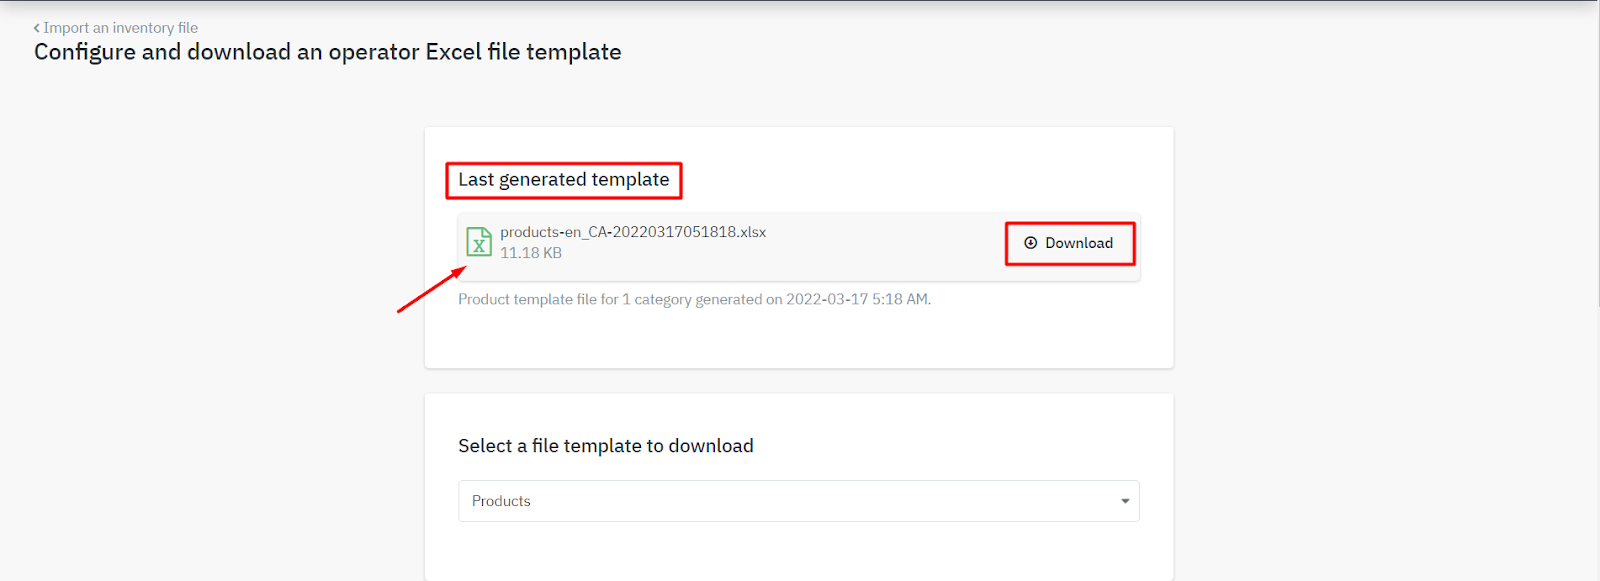
Step 8: After selecting the category, Now click on the Generate template button.
Step 9: After that, you will find the Last generated template at the top of that page. Just click on the Download button to download your last generated feed file.
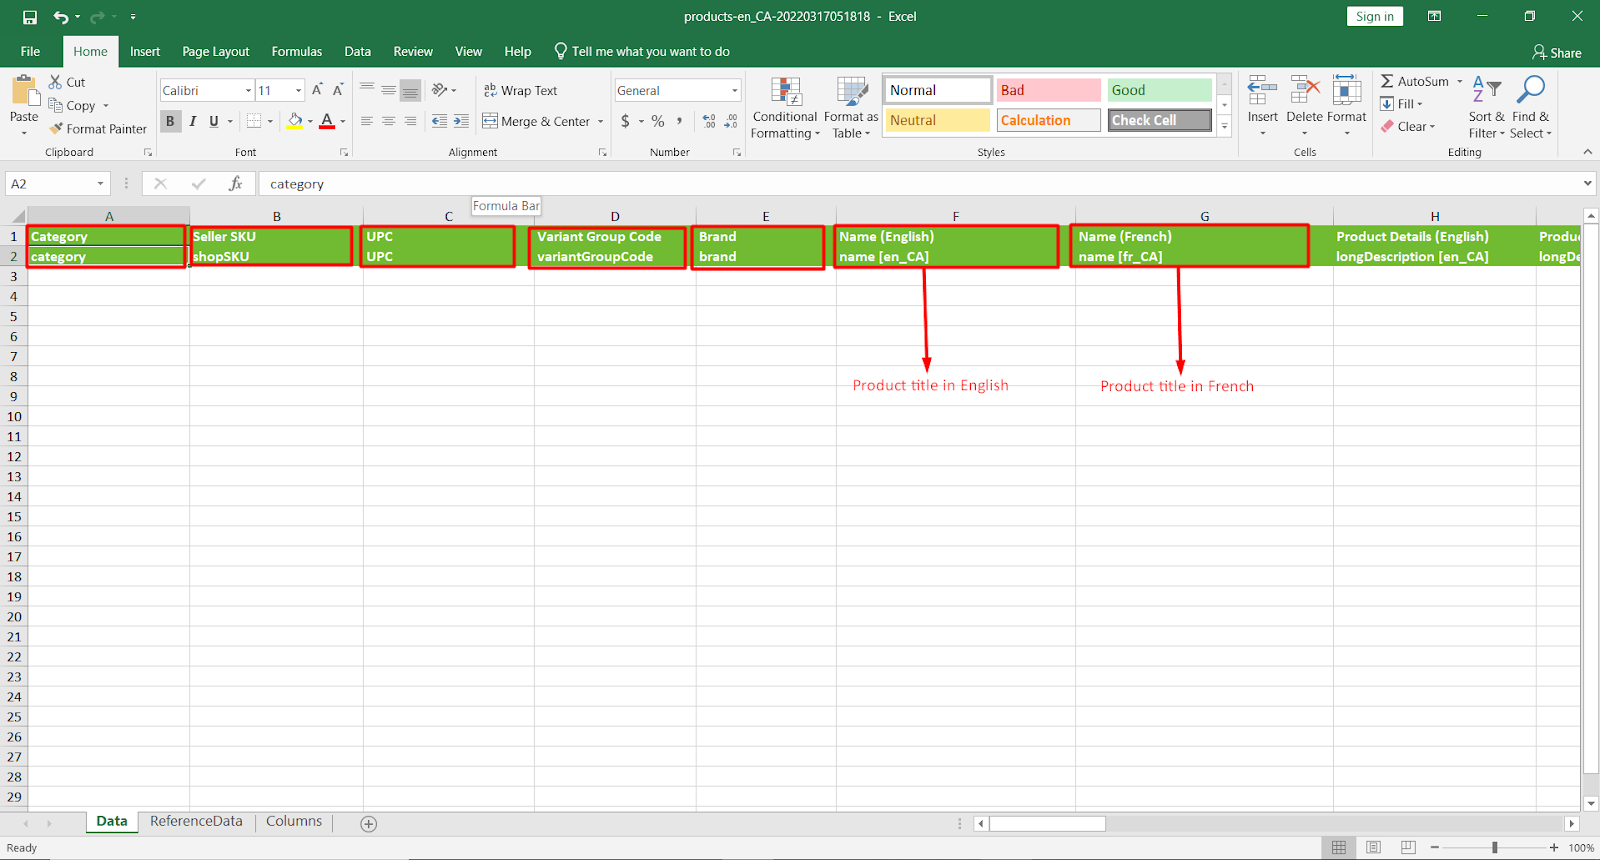
Step 10: Open your downloaded feed file and fill up all the required attributes like category, Seller SKU, UPC, Variant group code, Brand name, Product title, description, etc.
Step 11: Now go to the My Inventory tab and click on the Import from File option.
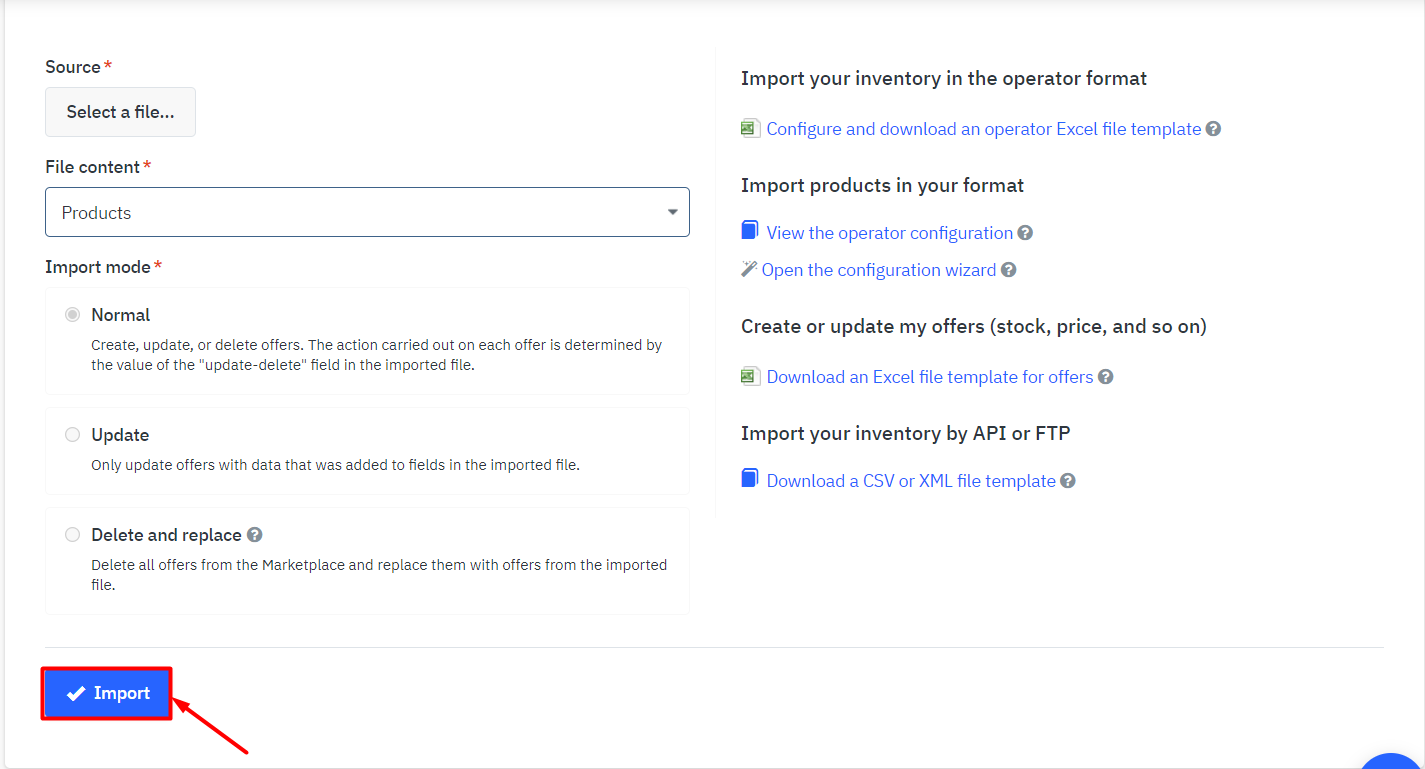
Step 12: Now upload your prepared feed file from your computer by clicking on the Select a file option. Then select the option according to your downloaded template from the File content attributes.
12.1. If you downloaded only the Products/Offers file, then select the Products/Offers option. or
12.2. If you downloaded the Products and Offers file, then select the Products and Offers
Step 13. Now, you are just one step away to complete the process. Just click on the Import button to list your products on Hudson’s Bay.
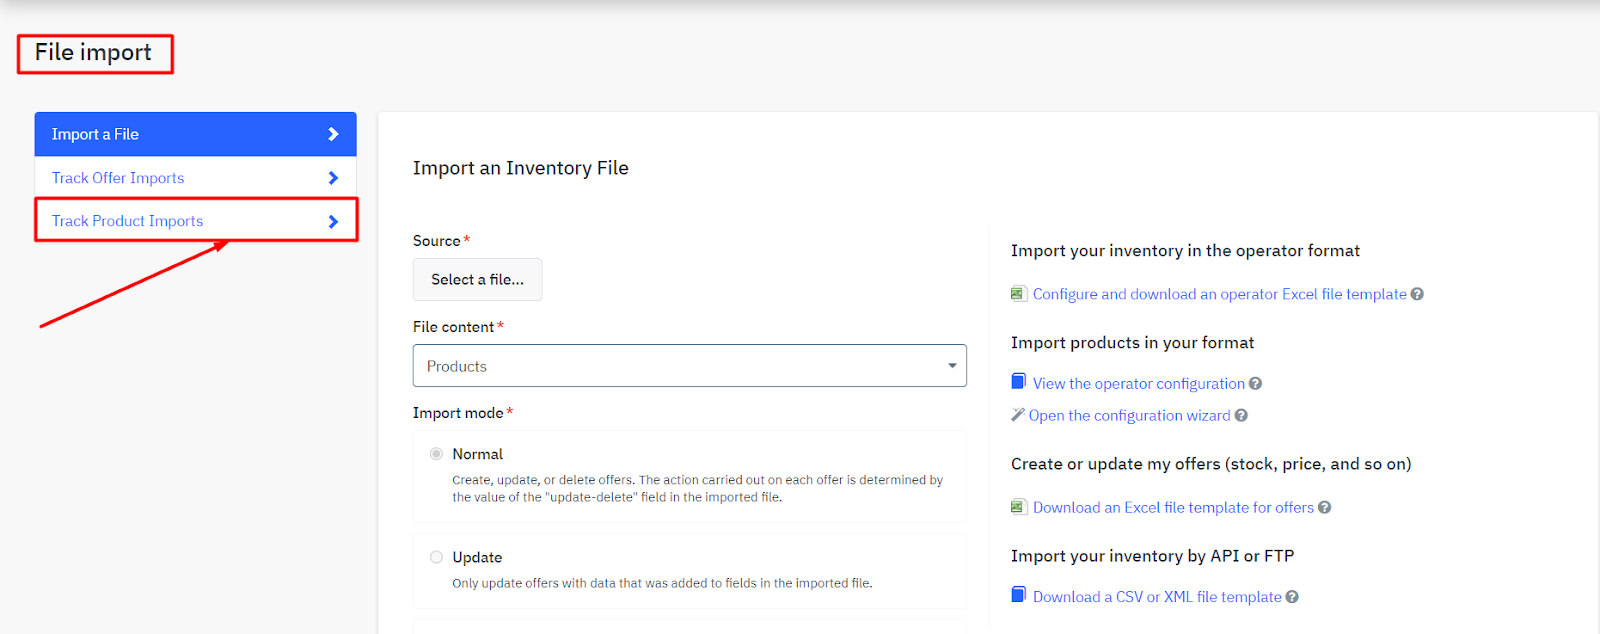
You can check the report of your uploaded bulk file by clicking Track Product Imports from the File import page.
To sum up, creating a new listing on Hudson’s Bay is sounds easy enough. Its time consuming because you need to make sure every data is in the right place. We hope that you understand the whole process clearly and are able to list your products on the Hudson’s Bay marketplace by following our given instructions. If you like our discussion, please comment, share, and subscribe to our blog. Also, do not hesitate to ask if you have any queries regarding the BestBuy marketplace. We would be glad to answer your questions.