In this article, we will show the complete process of how to upload or add shadow SKU on SellerCloud manually.

What is a Shadow Product?
A shadow product is a type of virtual product. It’s a shadow of a real product – it’s inventory count is linked to an actual inventory SKU, but it can have its own alternative product profile on SellerCloud.
How does a Shadow Product work?
For example, an SKU may have one profile while the shadow SKU will have different Product ID, description, images, and title. This is an innovative and very useful method by which to list a product in alternative venues. Like Amazon and eBay only allow a single SKU to be listed once, under one category. Also, in Shopify, you can create the same SKU but SellerCloud will sync quantity for only one SKU. By creating a shadow SKU, or multiple shadows, the product can be listed in multiple categories, we can sync quantity to all similar items.
For doing this we need to create an SKU first on SellerCloud and then we will assign the SKU under the original SKU as a shadow. That means quantity will sync from the original SKU.
Now going to discuss how we can create a shadow SKU on SellerCloud.
Create Shadow Product
Creating a shadow product manually is very easy. Follow the below steps you will find it easy.
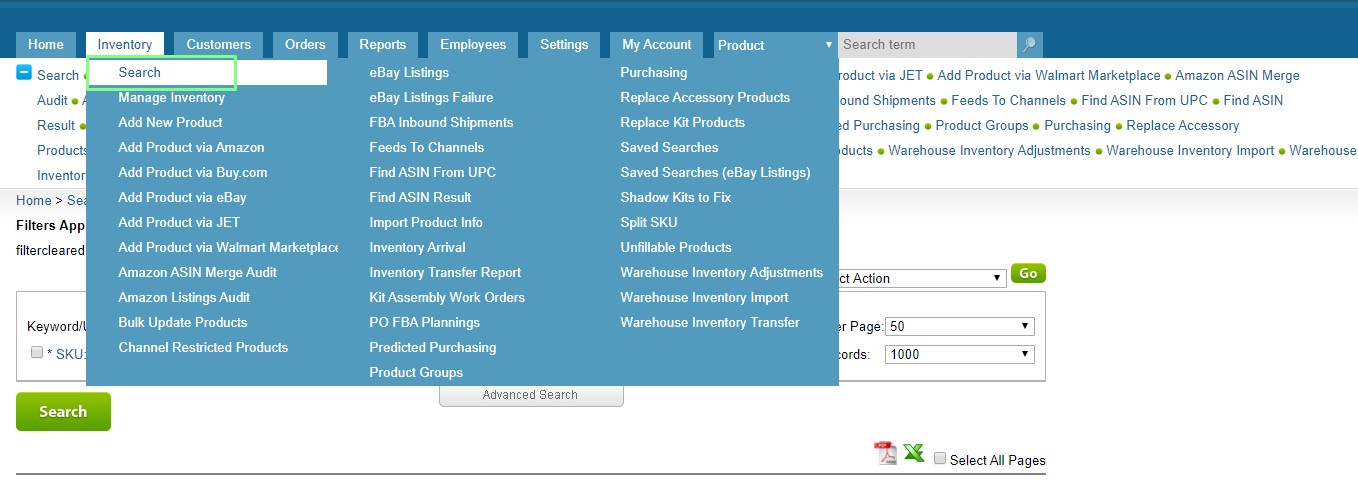
Step 1: Once logged into SellerCloud, you can see that on the top side of the screen SellerCloud features are grouped into categories that you can use. Search your original SKU, you need to choose “Search” from “Inventory”.
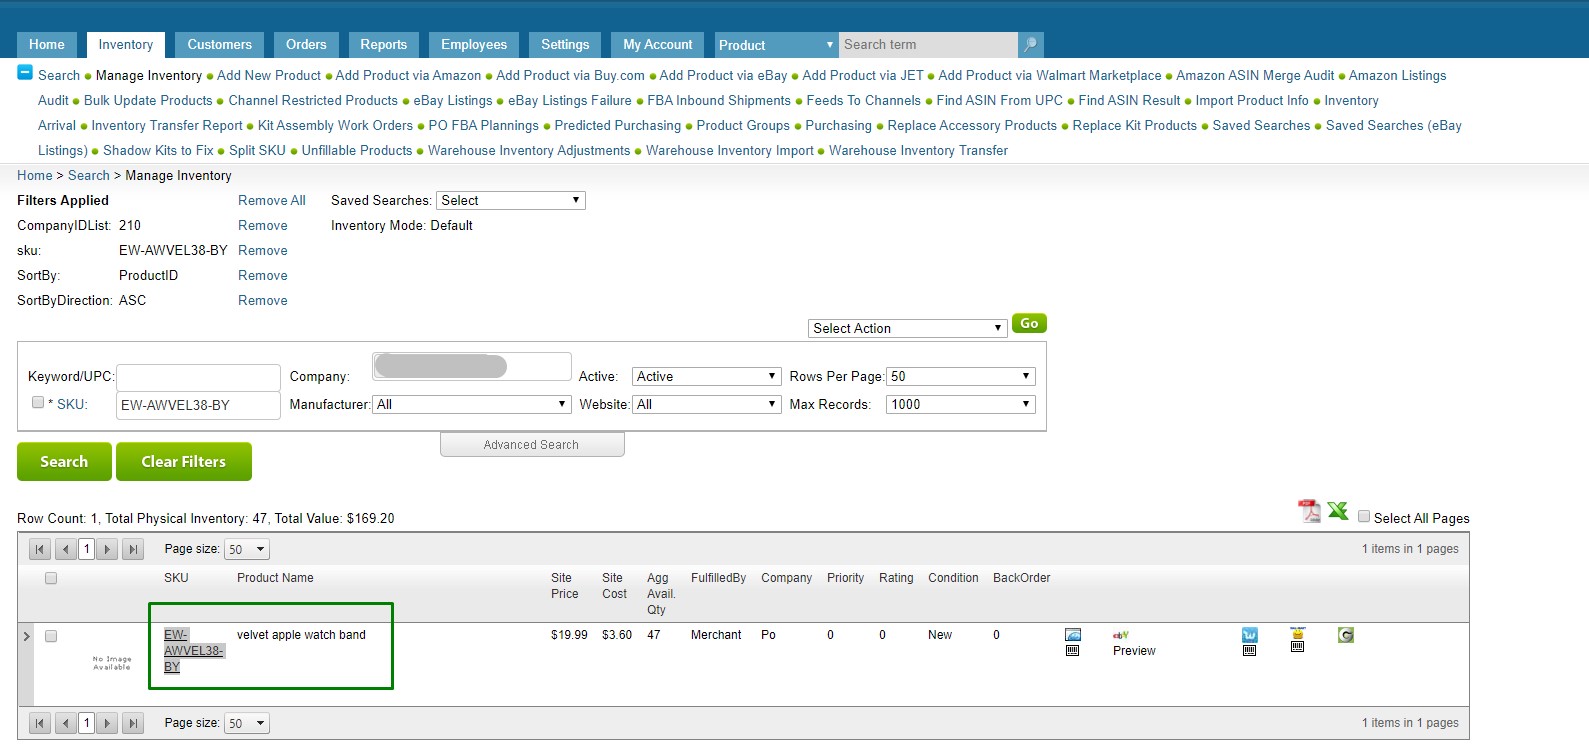
Search your parent product and click on the product to enter.
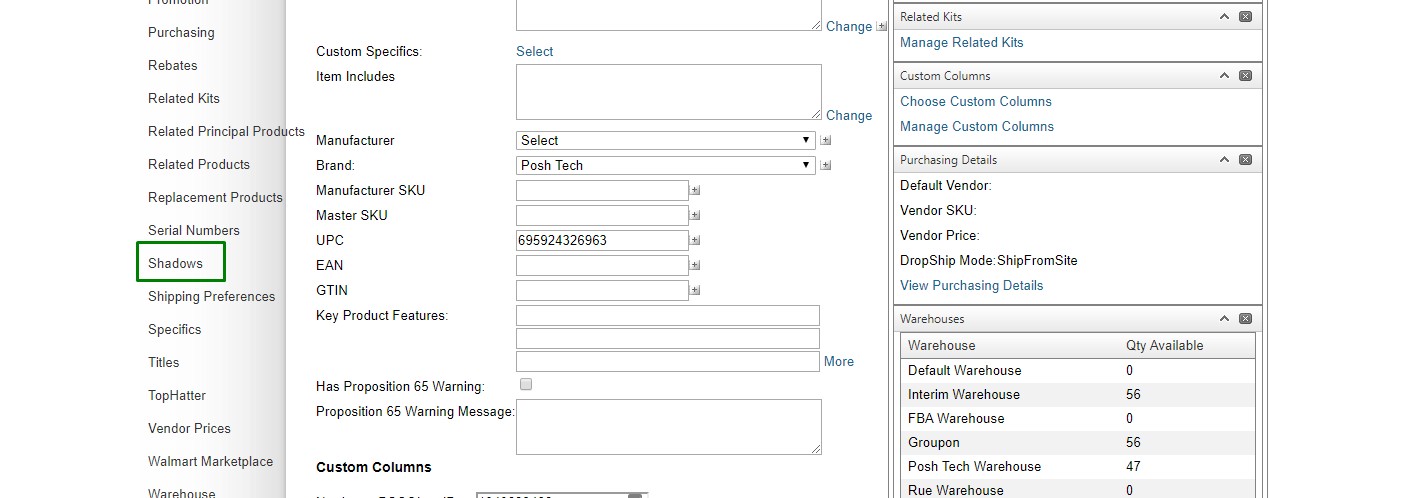
Step 2: Click on “Toolbox” and scroll down until you will find “Shadows”.

Click on Shadows.
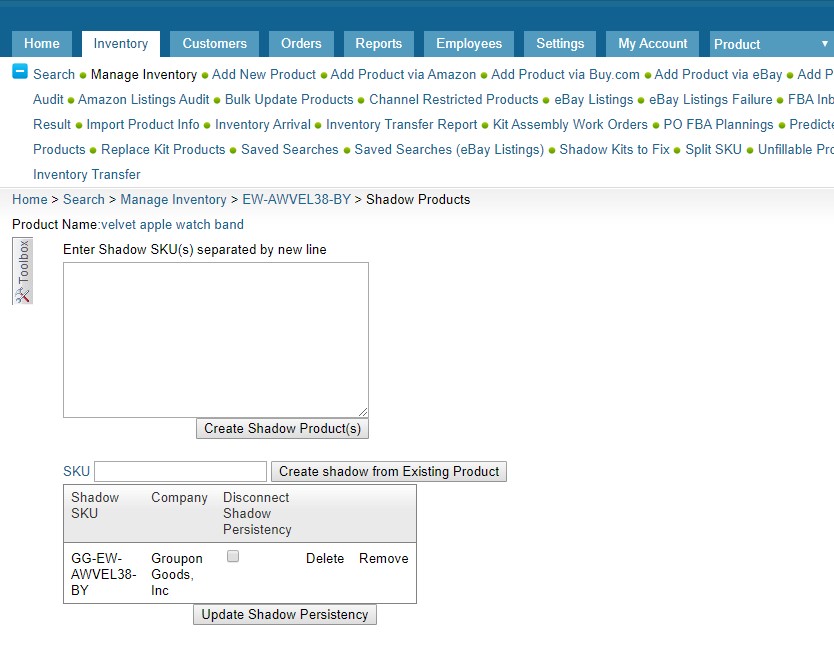
Step 3: After clicking Shadows, this will take you to the creating Shadows product page. You can create Shadow with a new SKU or if you want you can create a shadow from existing SKU.
Here you need to give your new SKU that one you want to create as a shadow and click on “Create Shadow Product”
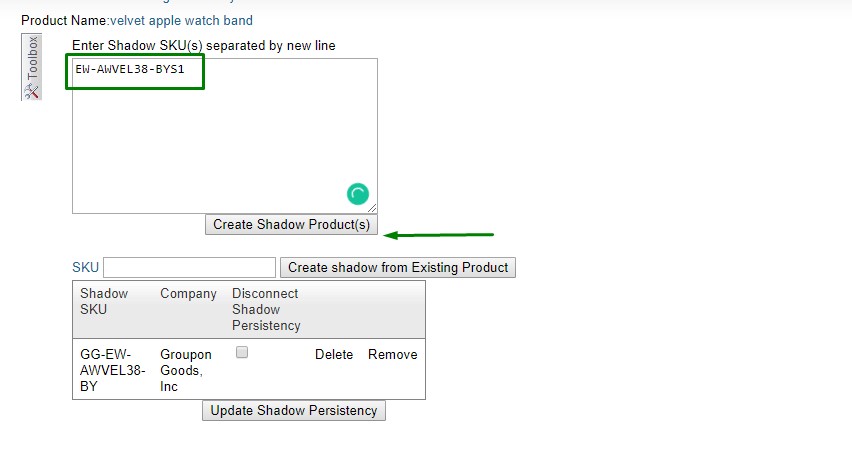
Once click on “Create Shadow Product” the product is created.

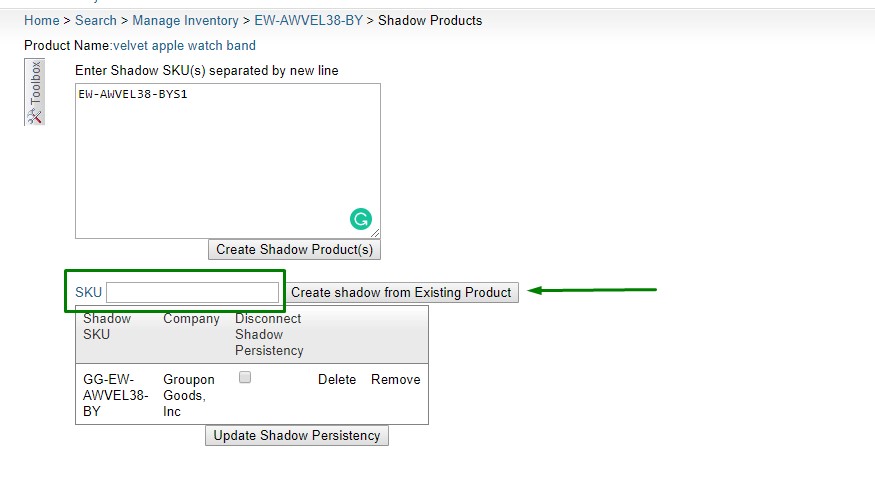
If you want you can create shadow SKU from the existing products.
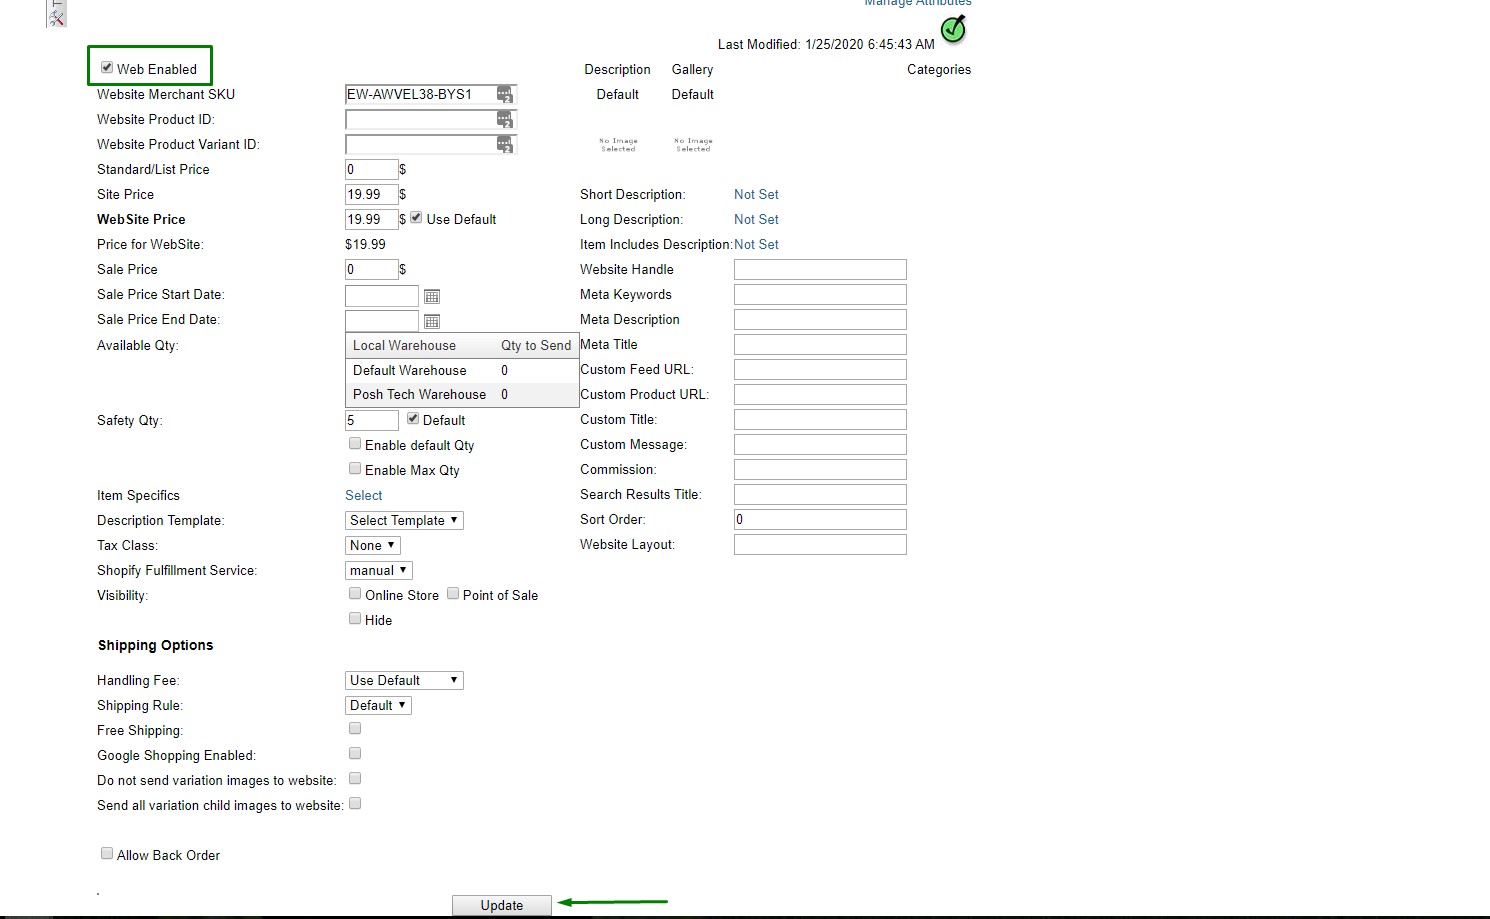
Step 4: This is the final step. Shadow product is successfully created now enable them on the marketplaces. For enabling the product search the newly created product on “Inventory” and click on the marketplace for enabling the SKU where the SKU is listed.
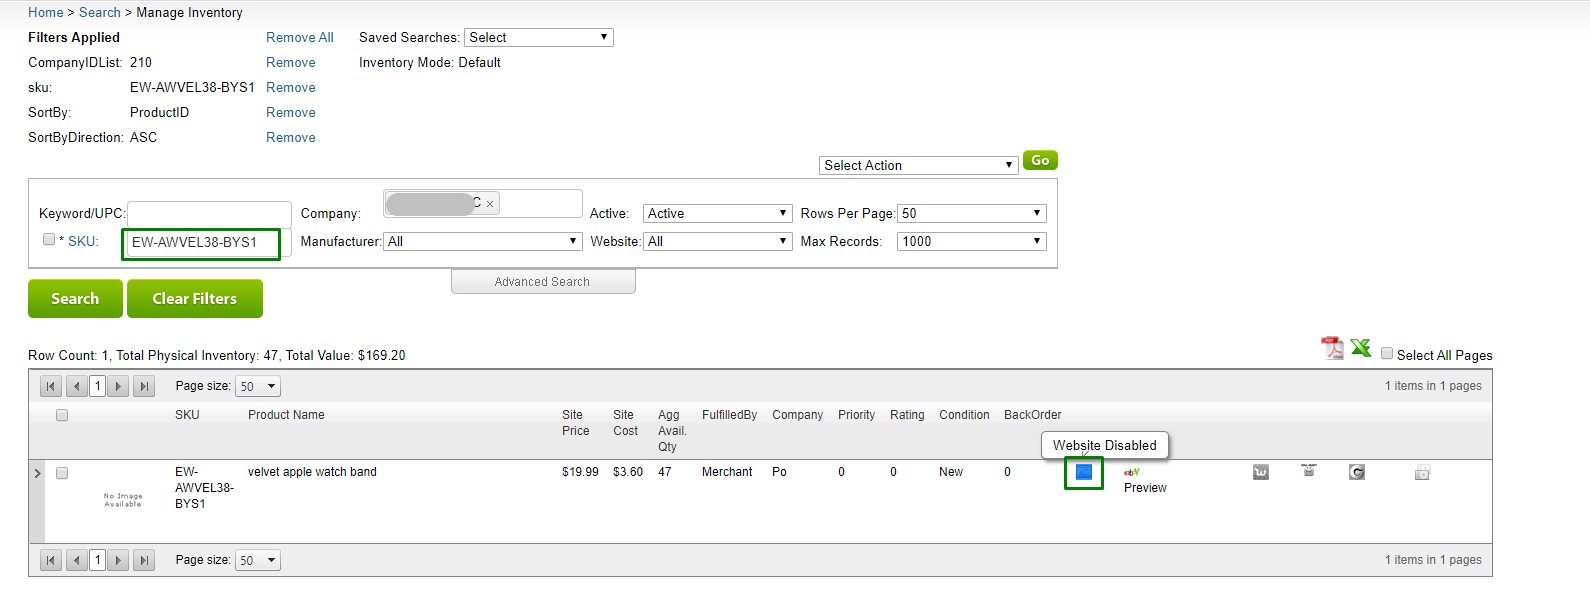
Enable the SKU by clicking Web-Enabled(If there is a different marketplace then this will show as the marketplace name) and click on Update.
Note: If you want to create one duplicate item then you need to create one shadow, if you want two duplicate items then you need to create two shadows. That means how many duplicates you want as the same number shadow you need to create and enable.
Now everything is set. By following this procedure you will be able to successfully create a shadow product on SellerCloud. We hope this article will help you to create a Shadow. If you need any further assistance, please let us know by commenting on the below section. We are always here to assist you.